
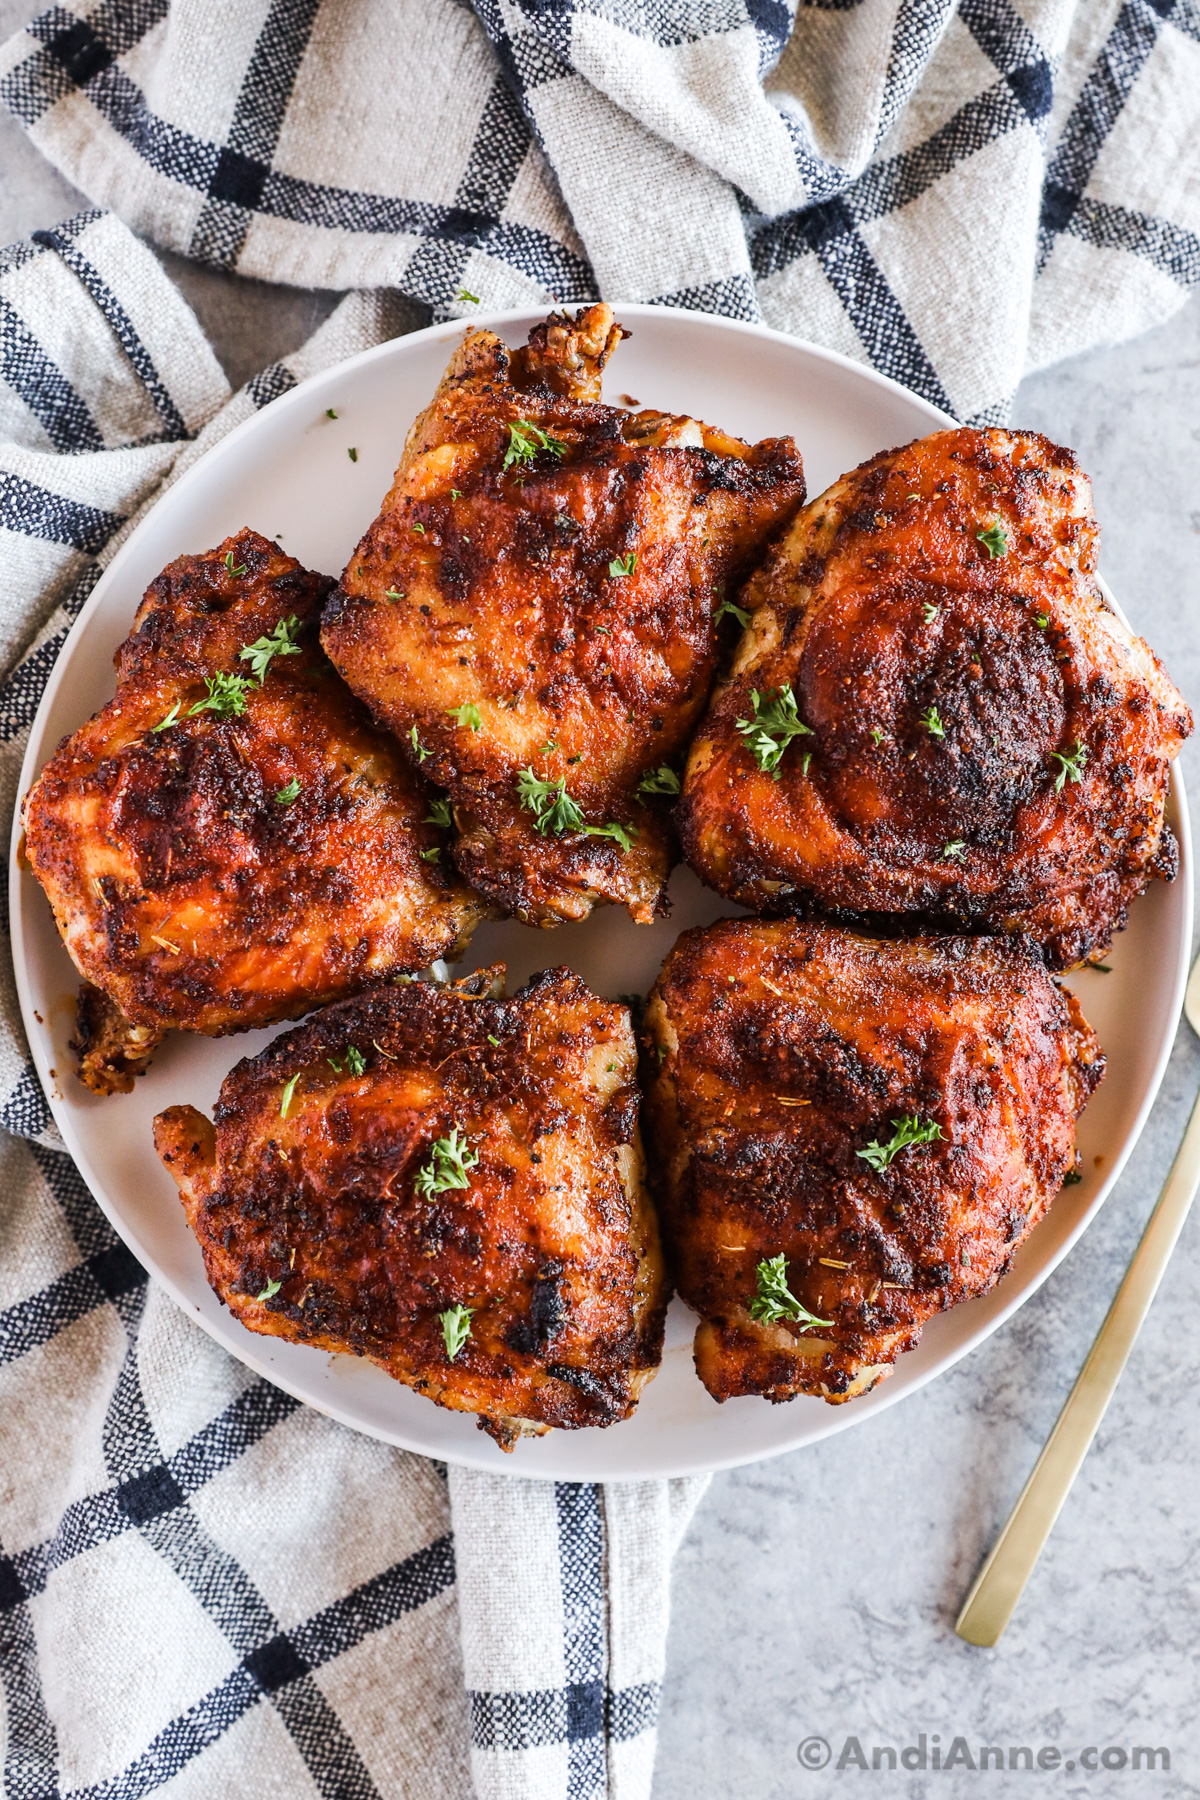
Air fryer chicken thighs are one of the easiest ways to cook chicken. They come out crispy on the outside and tender on the inside and are totally delicious.
Air Fryer Chicken Thighs
Crispy chicken thighs are so easy to make in the air fryer. Everything including prep time and cook time is all done in less than 30 minutes.
I love to buy a large pack of chicken thighs and pack them into smaller portions for the freezer. It's one of the easiest ways for me to save money at the grocery store. These thighs use a few simple spices that you probably already have in your pantry. The result is an easy dinner that can be cooked in under 30 minutes!
Recipe Ingredients
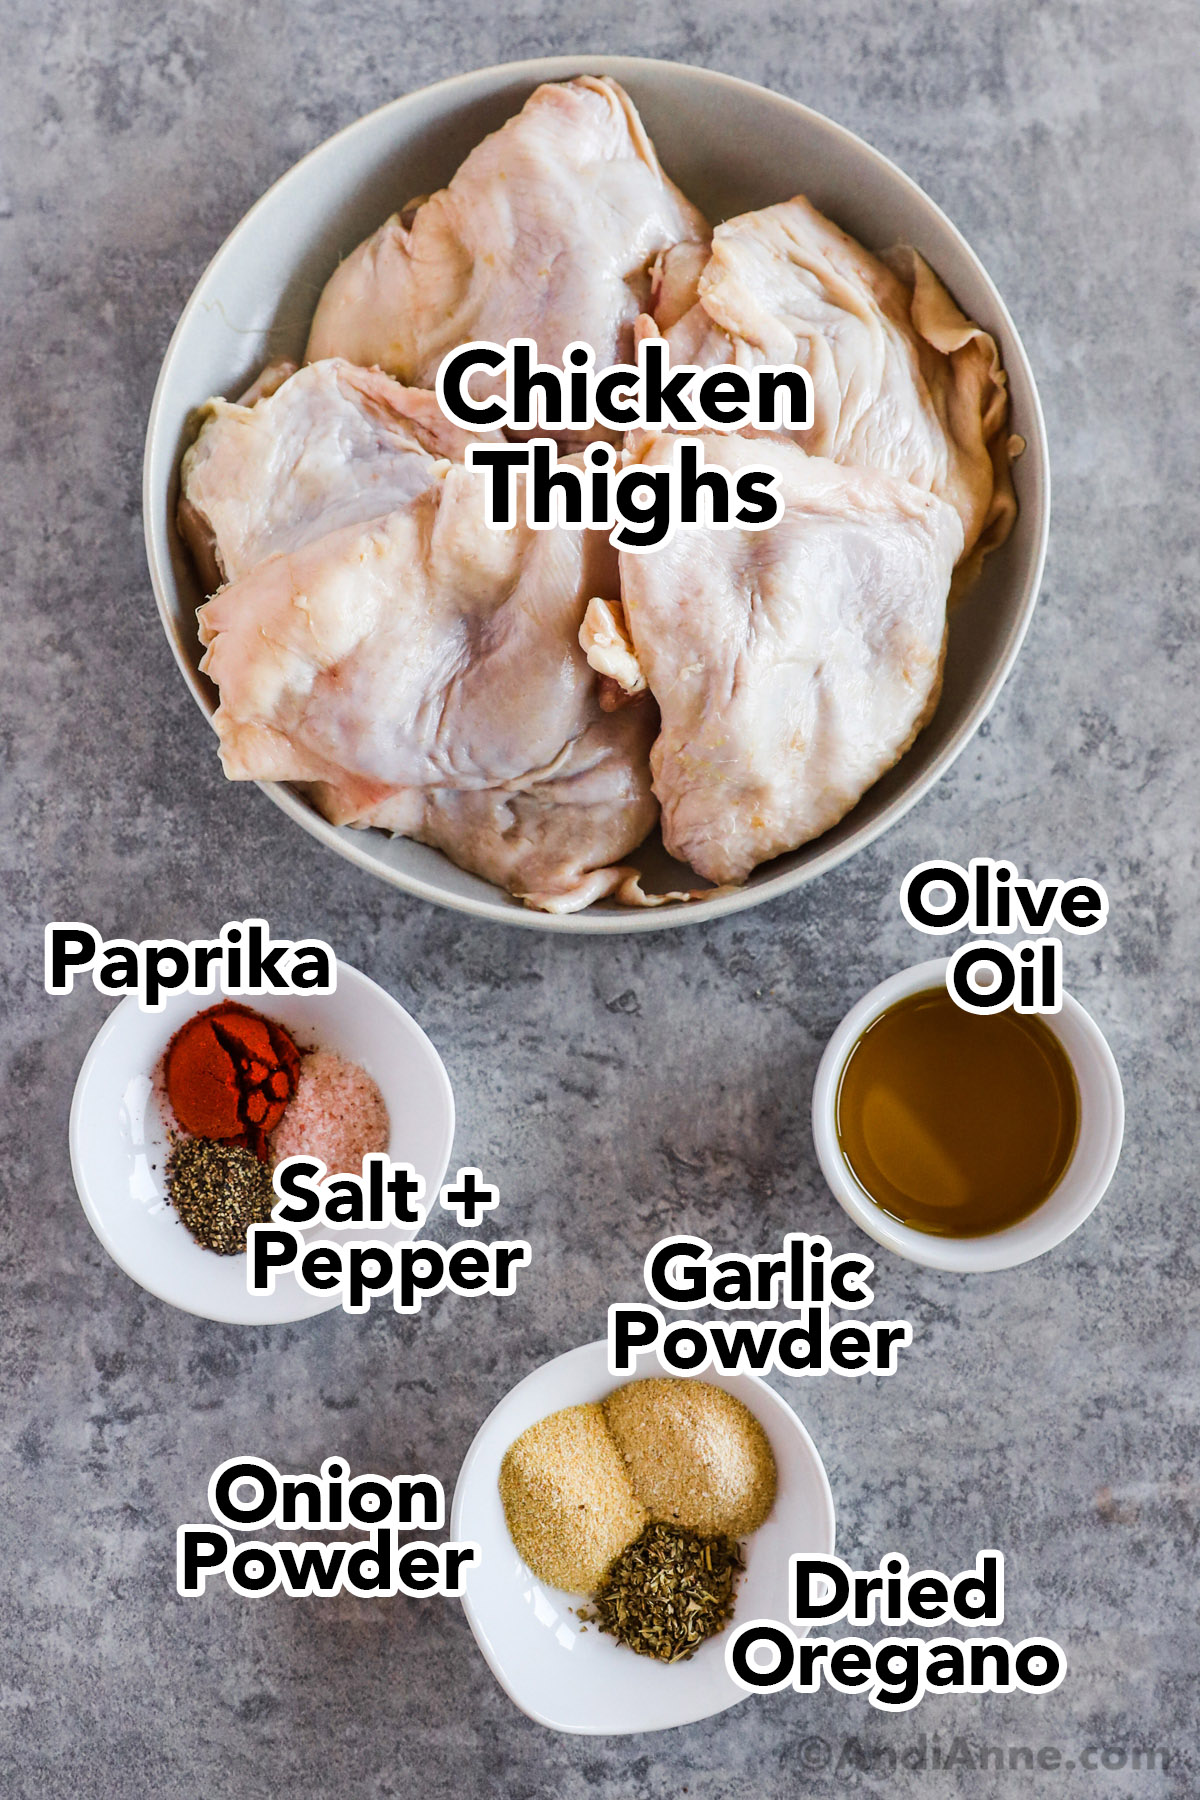
- 6 chicken thighs
- 3 Tbsp olive oil
- 1 tsp garlic powder
- 1 tsp onion powder
- 1 tsp paprika
- ½ tsp dried oregano
- ½ tsp salt - to taste
- ¼ tsp ground black pepper
How To Cook Air Fryer Chicken Thighs
Full ingredients and instructions are also in the recipe card at the bottom of this blog post.
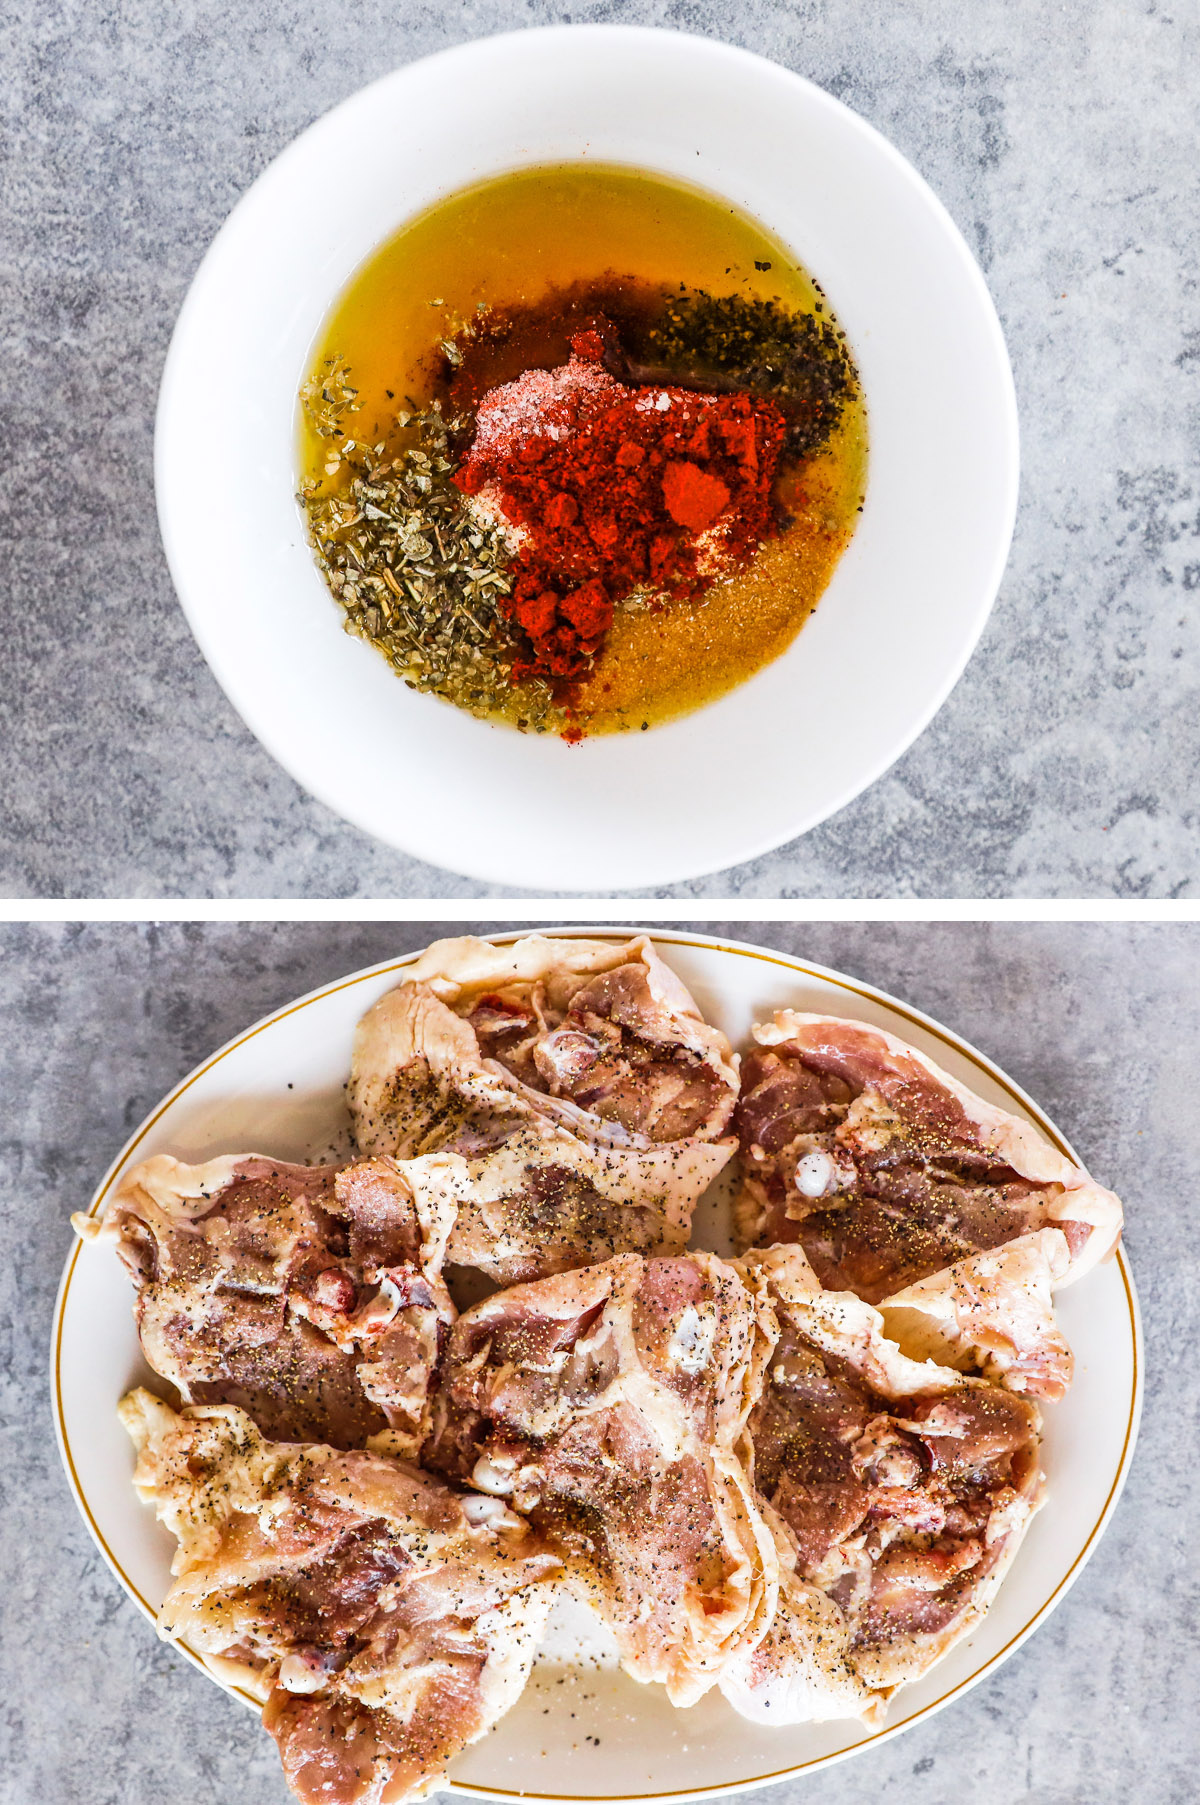
STEP 1: In a small bowl, mix together the 3 Tbsp olive oil, 1 tsp garlic powder, 1 tsp onion powder, 1 tsp paprika, ½ tsp dried oregano, ½ tsp salt, and ¼ tsp black pepper.
STEP 2: Place the chicken upside down on a large dish. Season the bottom generously with salt and pepper.
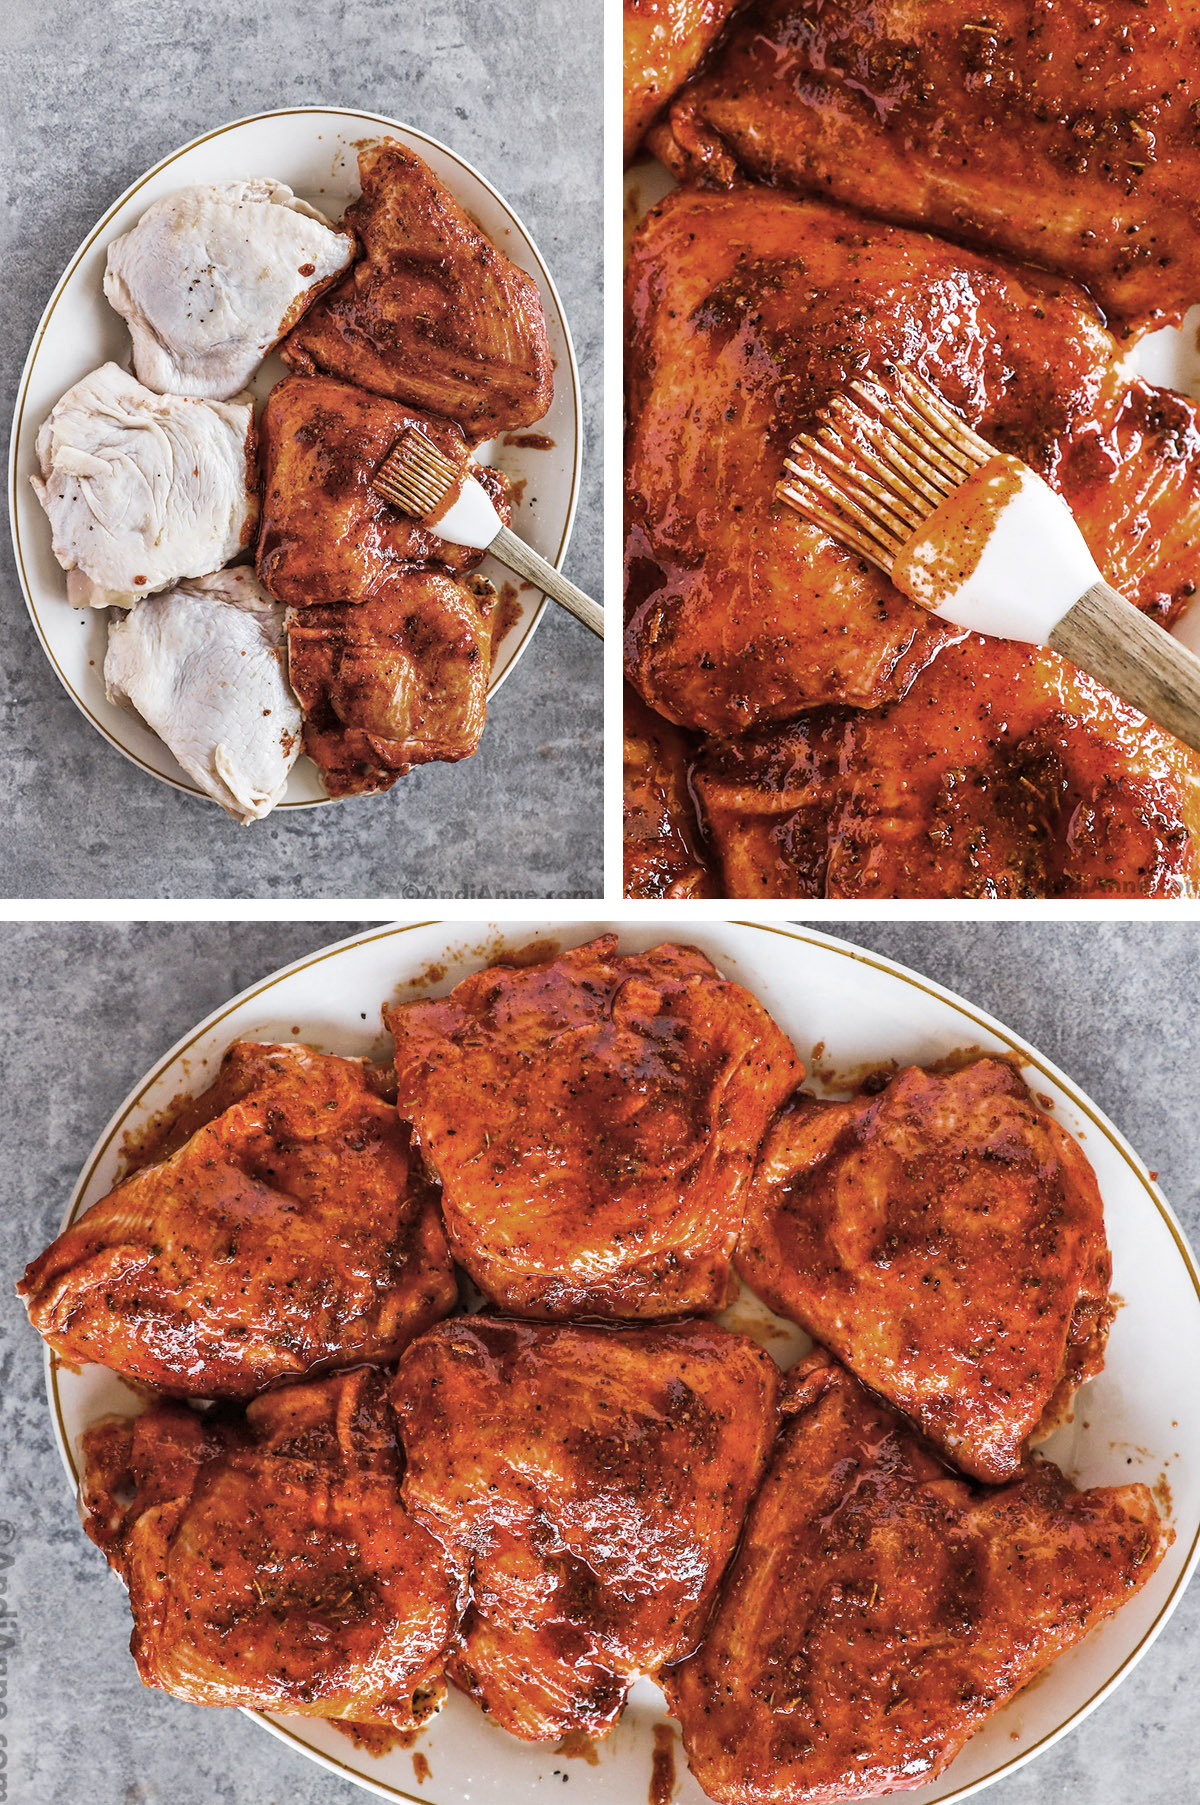
STEP 3: Now flip each chicken thigh over so that they are skin side up. Brush the seasoning mixture generously on the top of each chicken thigh.
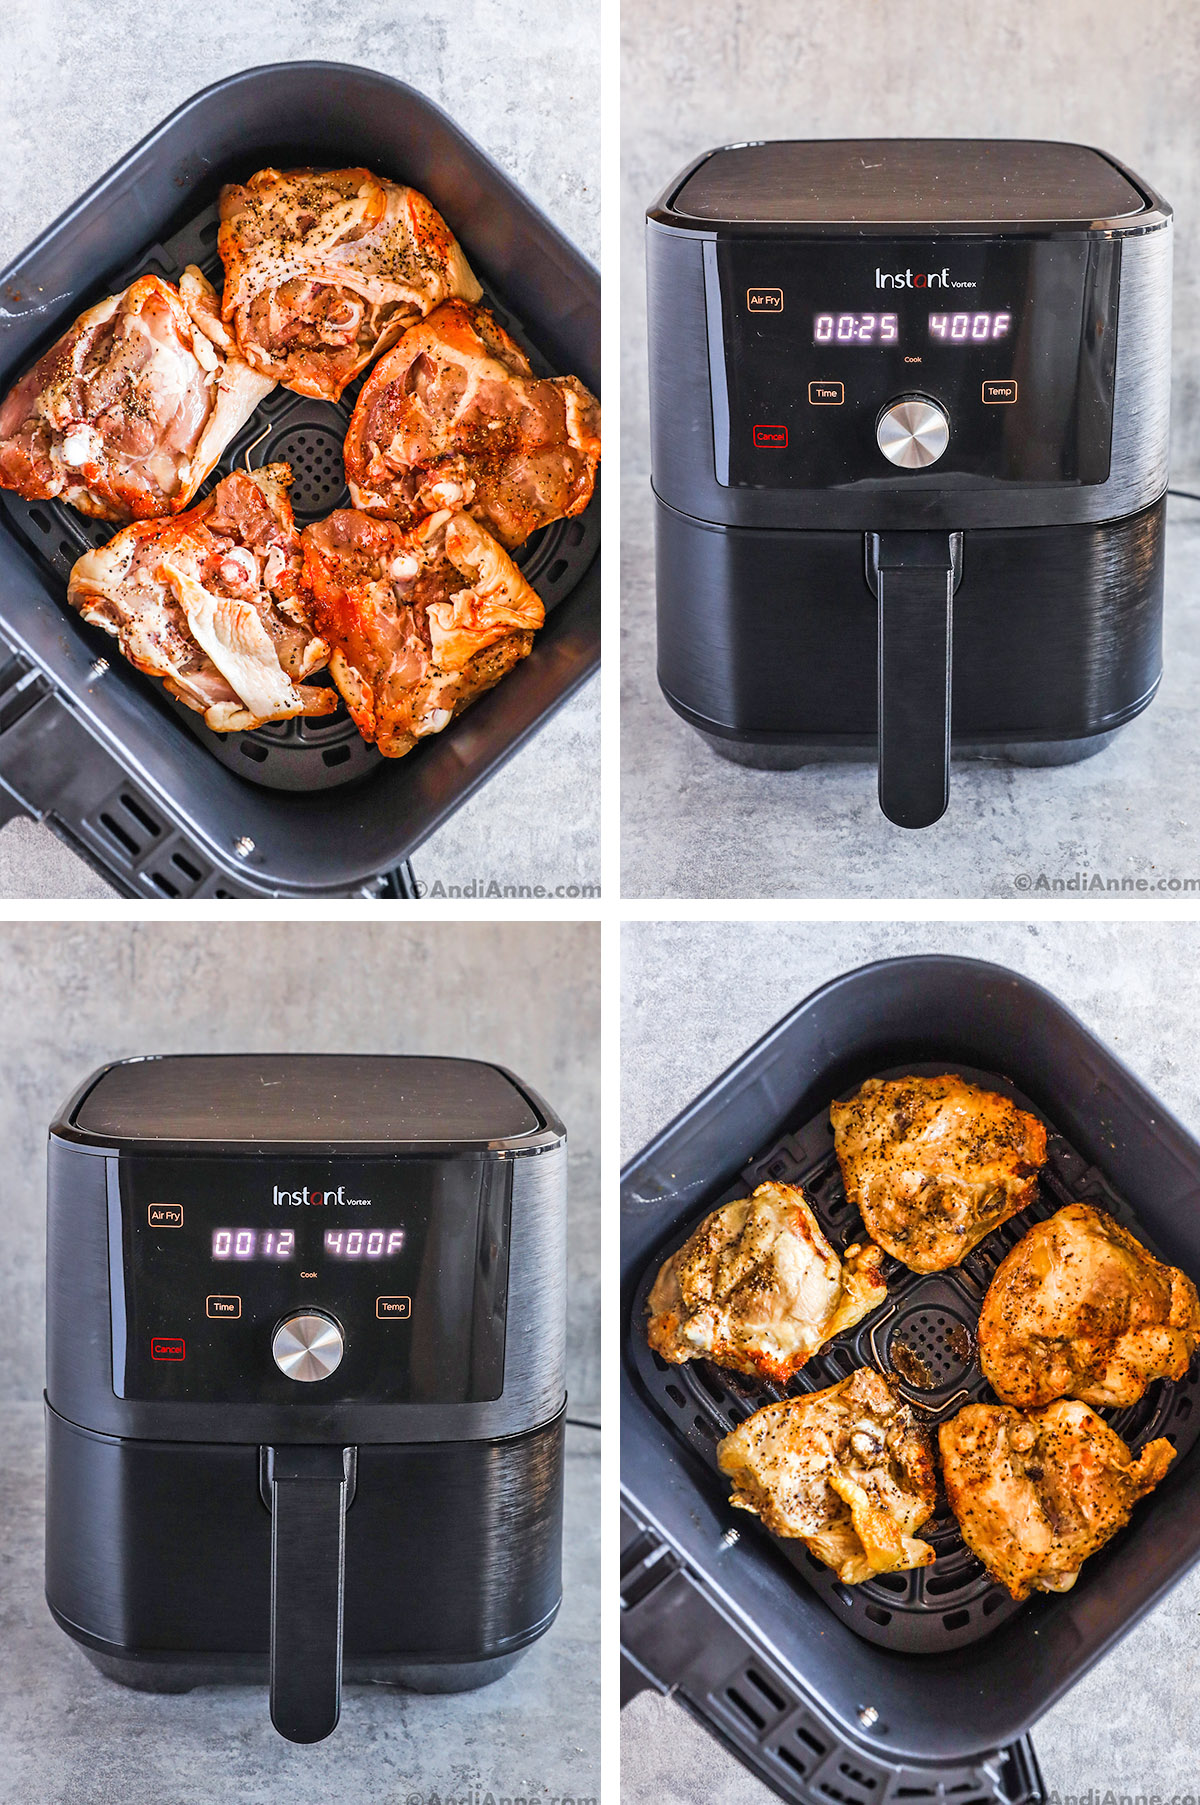
Step 4: Preheat the air fryer to 400℉ for 2 minutes.
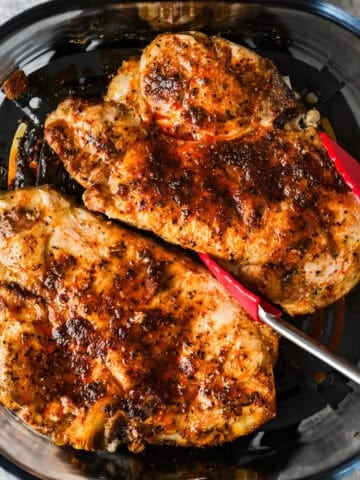
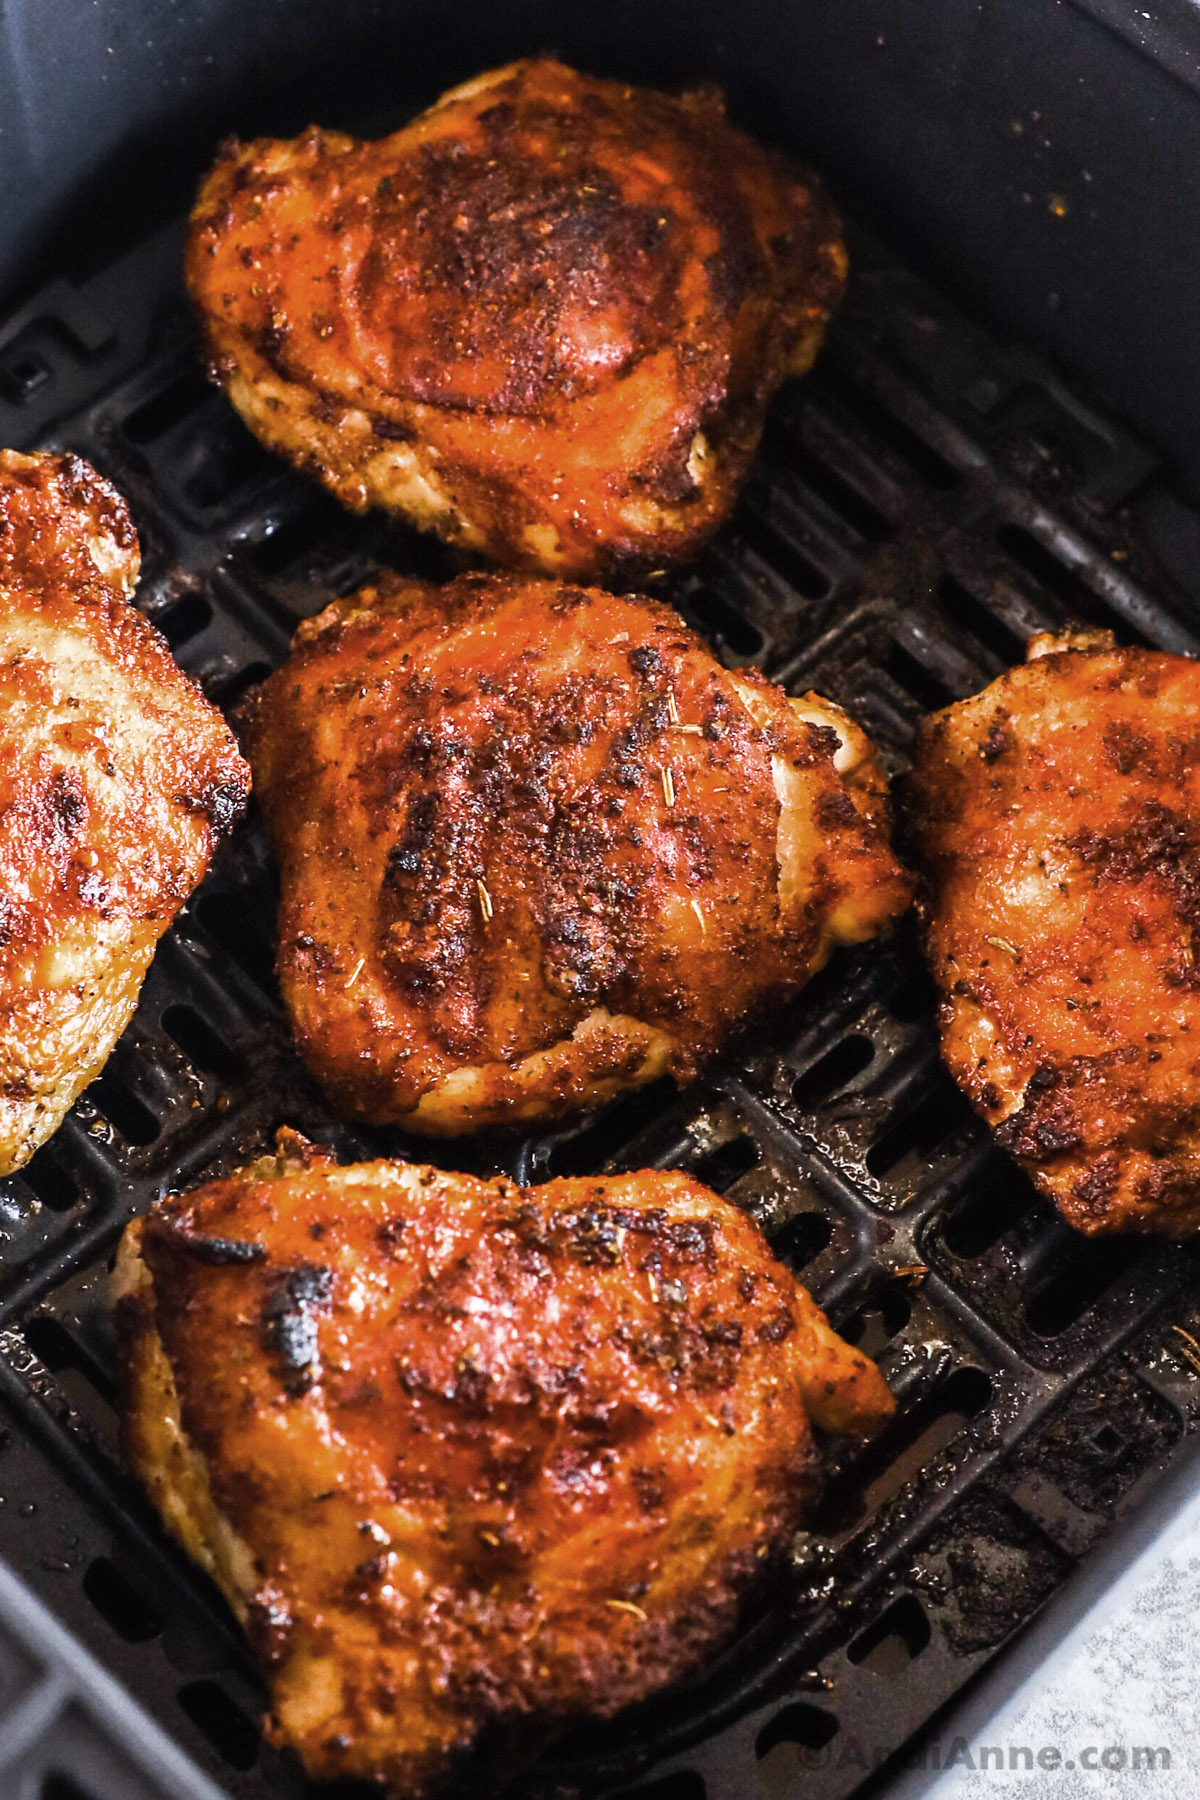
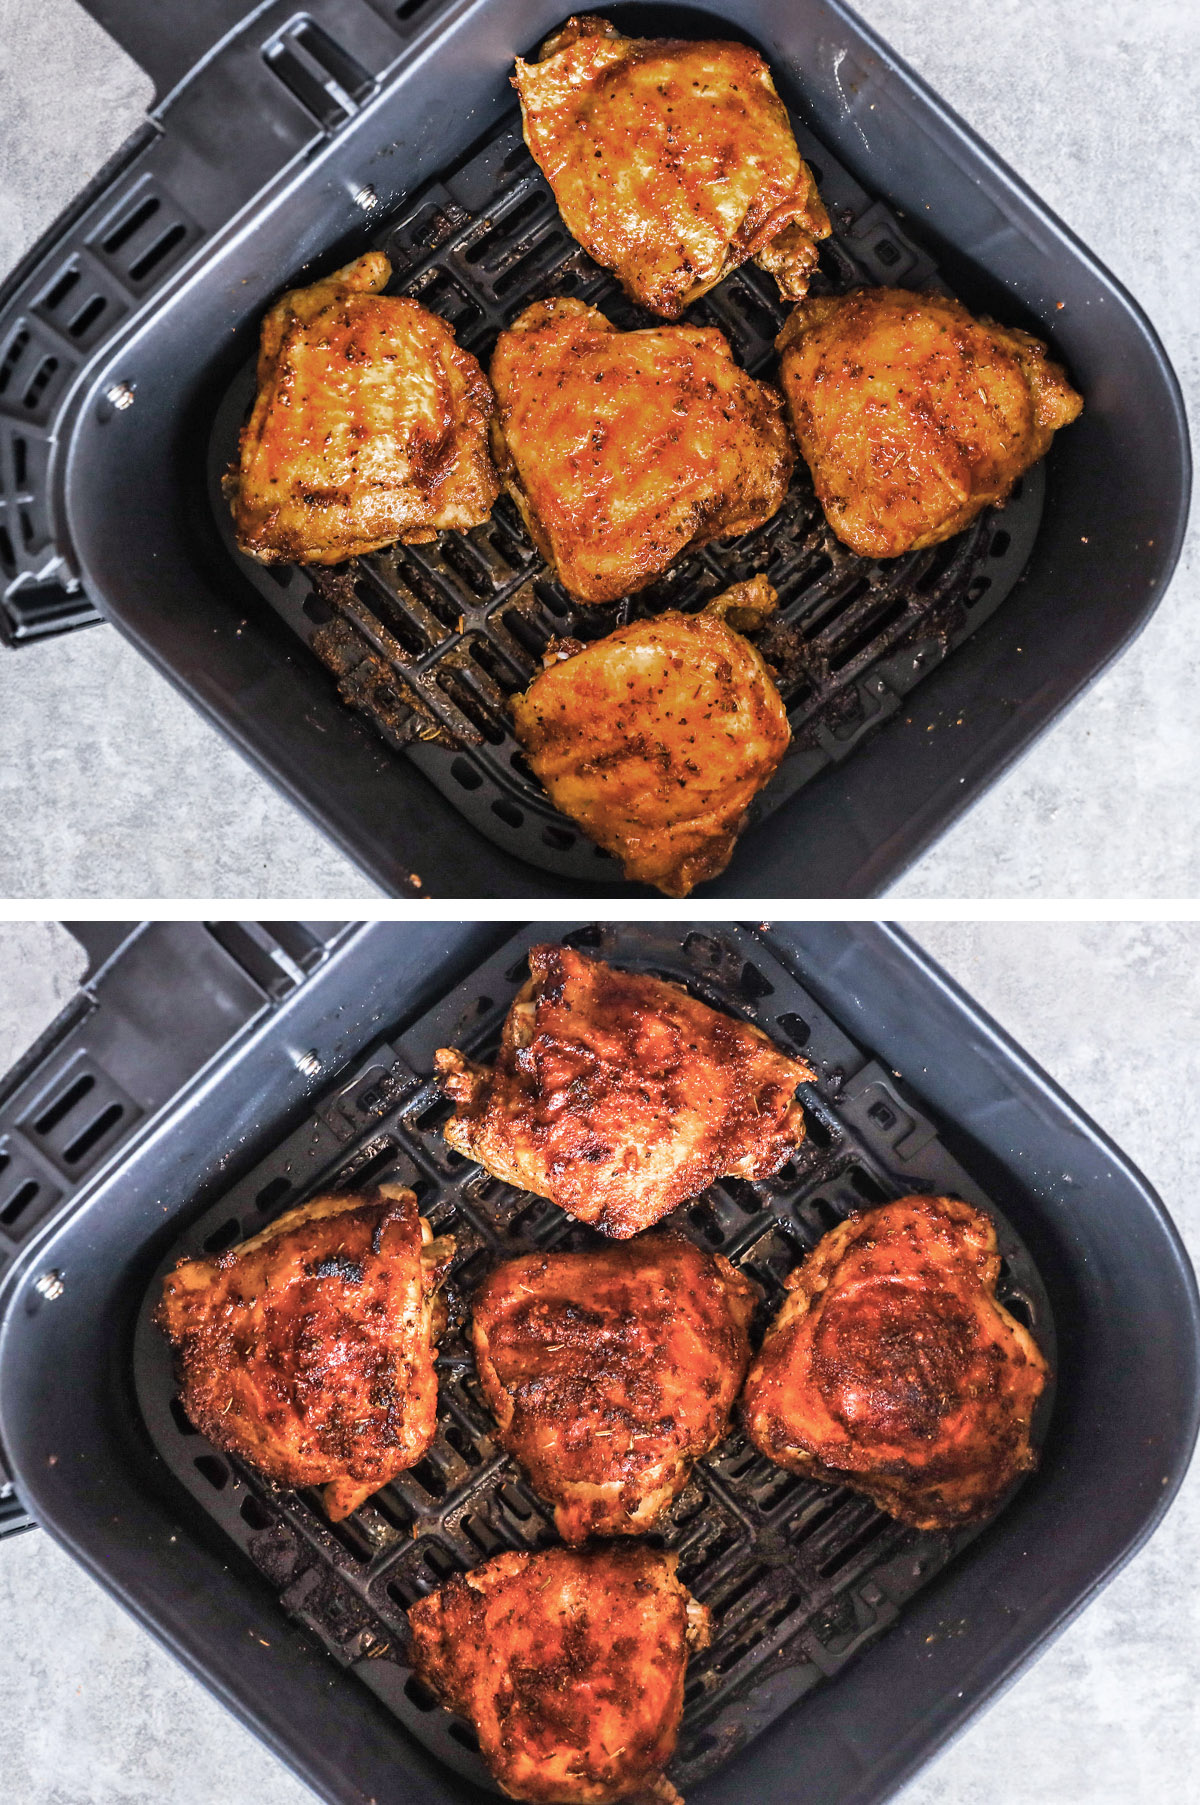
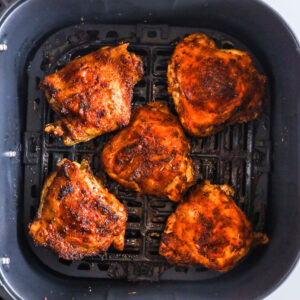
Step 5: Add the chicken thighs to the preheated air fryer skin side down in a single layer. Cook for 20-22 minutes, flipping the chicken to be skin side up halfway through. Cook until the skin is crispy and reaches an internal temperature of 165°F when poked with a meat thermometer.
Step 6: Remove chicken and let it rest for 10 minutes before serving.
Recipe Tips
- Preheat your air fryer first. This will give you the best crispy chicken thighs.
- Pat the thighs dry with a paper towel before spreading on the spice mixture. This will remove any excess moisture from the chicken and allow the sauce to stick more evenly.
- Always flip the chicken halfway through cooking to get an even crispiness. Start with the skin facing down.
- I'm using five bone-in skin on chicken thighs for this recipe. If you have a larger air fryer, you can add more or less, but make sure all chicken is in a single layer for even cooking.
- Check the chicken in the last couple of minutes to make sure they're not overcooking. Every air fryer is different so it might take a little bit of practice getting used to your temperature and how it works. I like to write my cooking times down so I know for next time.
How To Store Leftovers
- Refrigerate - Any leftover chicken thighs can be stored in the fridge. First, let them cool completely then add to an airtight container and store for up to 3-4 days.
- To Reheat - Chicken thighs can be reheated in the microwave or added back to the air fryer at 375°F and cooked for 3-6 minutes, or until warmed through. Flip the chicken halfway through reheating.
Tools For This Recipe
(Amazon affiliate links) - Check out all of my kitchen essentials here.
- Vortex Plus 6 Qt Air Fryer - This is my air fryer that I use (pictured in the photos). I love it's large basket and the automatic preheating option. I recently upgraded to this one after having another air fryer for the last few years. I really like it!
- Meat Thermometer - Essential for knowing when the chicken is properly cooked. I really like this digital thermometer because it's cheap and easy to read.
- Silicone Spatula - A must-have for scraping all the seasonings into the air fryer from the mixing bowl.
- Mixing Bowls - Stackable mixing bowls keep the cupboards more organized and make it easy to toss ingredients together quickly.
- Magnetic Measuring Spoons - I love these magnetic ones which stay nice and organized together when storing them
Air Fryer Chicken Thighs
Tap Stars To Rate!
Ingredients
- 6 chicken thighs
- 3 Tbsp olive oil
- 1 tsp garlic powder
- 1 tsp onion powder
- 1 tsp paprika
- ½ tsp dried oregano
- ½ tsp salt - to taste
- ¼ tsp ground black pepper
Instructions
- In a small bowl, mix together the 3 Tbsp olive oil, 1 tsp garlic powder, 1 tsp onion powder, 1 tsp paprika, ½ tsp dried oregano, ½ tsp salt, and ¼ tsp black pepper.
- Brush the mixture onto both sides of the chicken thighs.
- Preheat the air fryer to 400℉ for 2 minutes.
- Add the chicken thighs to the preheated air fryer skin side down in a single layer. Cook for 20-22 minutes, flipping the chicken to be skin side up halfway through. Cook until the skin is cripsy and reaches an internal temperature of 165°F when poked with a meat thermometer.
- Remove chicken and let it rest for 10 minutes before serving.
Nutrition
Nutrition info is auto-calculated and meant to be an approximation only.