Slowly, but surely I'm making my way to creating a decent birthday cake for my daughter. For her first birthday, I was determined to make something sugar-free. The result was a smash cake that was hard as a rock. For her second birthday I started making the cake the night before(with no clue of what I was doing) and ended up with a cake that was lopsided and still raw in the center. Yes, my baking skills are a work in progress, but I like the challenge.
Before we go any further, I should also point out that there is nothing wrong with buying a cake and saving your time and energy for other things in life. Baking a cake certainly takes time and if it excites you to try, then go for it. But if it does the exact opposite and totally stresses you out at the thought of it, I'm sure there are some gorgeous cakes you can purchase at your local bakery that your kid will love just as much. Motherhood is all about balance and being real with yourself.
Alright, with that disclaimer out of the way, let's get on to the cake!
If you're a mom wanting to create a cake, and would like it to be free from artificial sugars and dyes, you know that the struggle is real. I've searched and searched for recipes and there just isn't a lot of options out there.
The truth is, I really wanted to bake a cake with only a small amount of sugar. So I baked a trial run cake to see what would happen if I used maple syrup instead of granulated sugar. The cake turned out, well, not so good. It didn't rise at all. The cake was really dense and hard - basically, it was the recreation of the smash cake I made for Lue's first birthday.
So this got me thinking: what the heck was happening here? Why were my cakes as hard as a rock? I went to good ol' Google for some answers. That's when I discovered that the sugar does more than just sweeten a cake. It also helps to moisten the cake and make it rise. A-ha! It was like everything I knew about baking (which isn't that much) had instantly changed.
Turns out water molecules are attracted to sugar, which will help the cake hold on to moisture. Also, when you cream the sugar with the butter, this adds air. And while the cake is baking, these air pockets expand, causing the cake to rise. So yes, if you want to bake a moist, fluffy cake, you need the granulated sugar.
Now, for a mama like me, someone who wanted to bake a cake with as natural of ingredients as possible, this was annoying. But I've come to terms with it. Time to embrace the sugar.
So this year I've been able to make a few major improvements to my cake making abilities. I'm certainly not perfect. But I think it's fun and I want to keep trying. I've learned a few things and I'm still working on getting better. And I wanted to share with you the results of this years' cake!
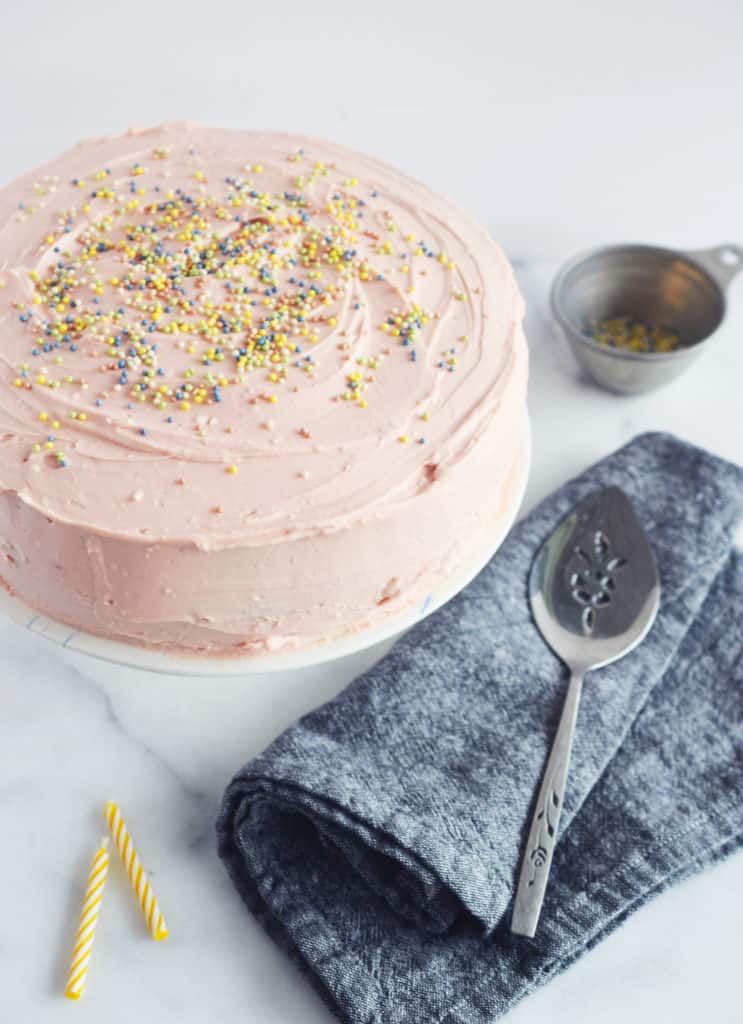
For sweeteners, I used organic cane sugar in the cake and maple syrup in the icing.
And here's the fun part: to make the pink color, I used beetroot powder. Cool huh!? And for the sprinkles I used Let's Do Organic Confetti Sprinkelz.
I baked the cake in two 9" pans the night before and wrapped them tightly in saran wrap in the refrigerator overnight. Apparently, it's much easier to slice and apply icing to a chilled cake.
The next morning I prepared the icing and added beetroot powder to color it pink. I sliced both 9" cakes in half using a serrated bread knife, but ended up only using three layers (The fourth layer turned out to be a bit wobbly, so I tossed it in the trash and moved on).
In between each layer, I spread the cream cheese frosting. Then I added a crumb coat to the outer cake and put it in the fridge again for 30 minutes.
Once it was chilled, I applied the final icing layer and sprinkles on top. I placed the cake back in the fridge before the party and then put it out on the table when the guests arrived. The result was homemade, a little imperfect, and it made my daughter soooo happy! Plus, I received many compliments on how delicious it was so that's a win in my books!
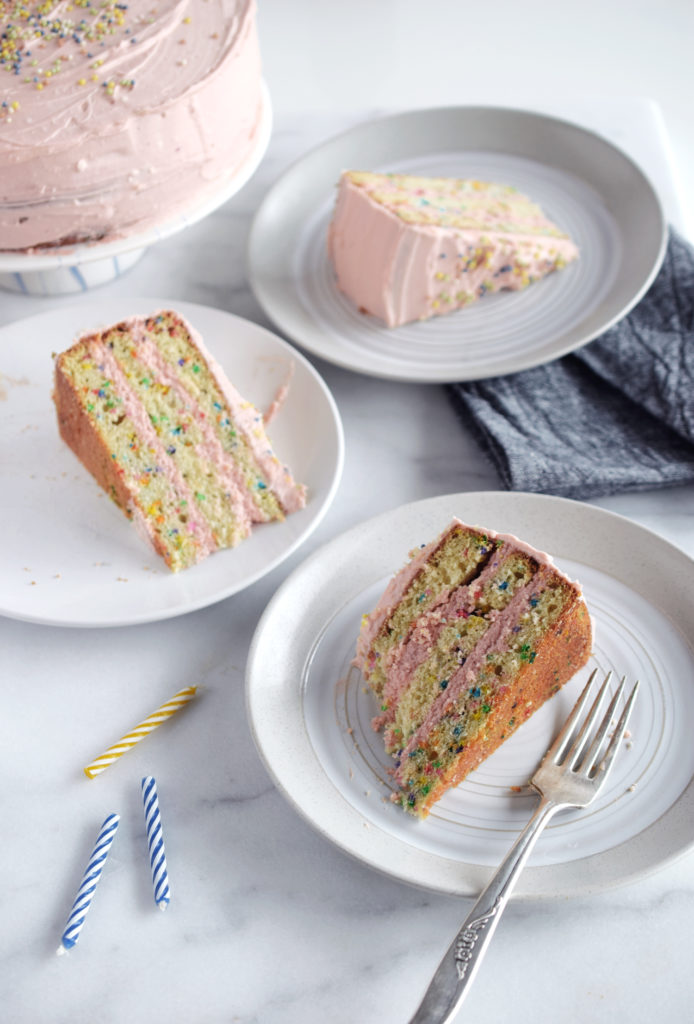
HOW TO ASSEMBLE THE CAKE:
I am by no means an expert at cake assembly. There are a lot of tutorials online from people that are far more experience than I, but here's how I do it.
- Bake the cake the night before you're ready to serve it. That way, it will be chilled and ready for icing in the morning. It's also important that you use at least 2 9". baking pans to bake the cake - If you try to bake it all in one pan, it will take way too long to cook through and you might end up with parts of the cake being cooked and other parts being raw.
- In the morning, take your two completed cakes out of the fridge and using a large serrated bread knife, carefully slice them each in half. This will give you the four layers. You might also have to slice a bit off the top layer of the cake to even out the surface.
- Next, make your icing. Once that's complete, divide ½ of the icing into another bowl. Set the rest aside in the fridge.
- On the plate that you will serve your cake, put a small dollop of icing down. Place the first layer of cake on top. The icing will act as a glue and help it to stay in place.
- Using a spatula, spread an even layer of icing on top of the first layer. Add the next cake layer on top. Then spread another layer of icing. Do this until you've completed all of your layers (either 3 or 4 total depending on how your cake turned out).
- Next, you will create a crumb coat around the cake. This is a thin layer of icing that will hold all the crumbs in. Once that's done, place your cake in the fridge for 20-40 minutes.
- When your cake is nice and chilled, you can add the final layer of icing. Use the crumb-free bowl of icing that you set aside for this step. To do this, I just take a spatula and start slathering it on evenly. I don't worry about it looking too perfect - that's what makes homemade cakes so lovely.
- Once you're done you can add any toppers you'd like including sprinkles and candles.
That's it! At this point, you can store your cake in the fridge uncovered until you're ready to serve, or you can put it out on the table as part of your display. My cake was out at room temperature for a few hours before we served it and it was great!
If you have any further questions, let me know in the comments and I'll be happy to answer them.
If this is your first time attempting a homemade cake like this, don't be afraid! These things can take a little bit of practice to gain confidence and get used to. If you're nervous, you might want to make a test cake a week or two before the party day to try it out.
Ingredients
- 1.5 cups white flour
- 1.5 cups pastry flour
- 1 tsp baking soda
- ½ tsp salt
- 2 tsp baking powder
- ½ cup sour cream
- 1 cup milk
- 1 cup unsalted butter - softened
- 1.5 cups cane sugar
- 1 Tbsp vanilla extract
- 2 egg whites
- 2 whole eggs
- ⅓ cup sprinkles
Instructions
- Preheat the oven to 350 degrees and generously coat two 9" round cake pans with oil (I like to use avocado oil spray).
- To make the cake batter you will need three bowls. First, in a medium-sized bowl, add the flour, baking powder, salt, and baking soda. whisk together and set aside.
- Next, In a small bowl, add sour cream and milk. Mix together and set aside.
- In a large bowl, add butter and sugar. Using an electric mixer, beat together until smooth and creamy. Add in vanilla and beat again until smooth. Next, beat in egg whites, one by one, and then add whole eggs and beat again.
- Add ¼ flour mixture into the butter mixture bowl, beat on low until mixed. Add ⅓ of the milk mixture, beat on low until mixed. Repeat this process with remaining flour and milk, ending with the flour mixture. When everything is in the bowl, beat on medium for an extra 10 seconds.
- Add sprinkles into the batter and stir gently until just combined. Using a spatula, scoop the batter into the two round 9" cake pans. Bake for 30-35 minutes or until cake is golden brown on top and a toothpick comes out clean.
Nutrition info is auto-calculated and meant to be an approximation only.

Ingredients
- ¾ cup unsalted butter - room temperature
- 250 g cream cheese
- ½ cup maple syrup
- 2 tsp vanilla
- 1 tsp beetroot powder - optional
Instructions
- In a medium-sized bowl, combine unsalted butter, cream cheese, maple syrup, and vanilla with an electric mixer until smooth and creamy.
- If you want to color the icing pink, add the beetroot powder. Start with 1 tsp and mix thoroughly. Then add more in small increments until you reach your desired color.
- The icing can be used immediately or stored in the fridge in an airtight container until you're ready to use.
Nutrition info is auto-calculated and meant to be an approximation only.


