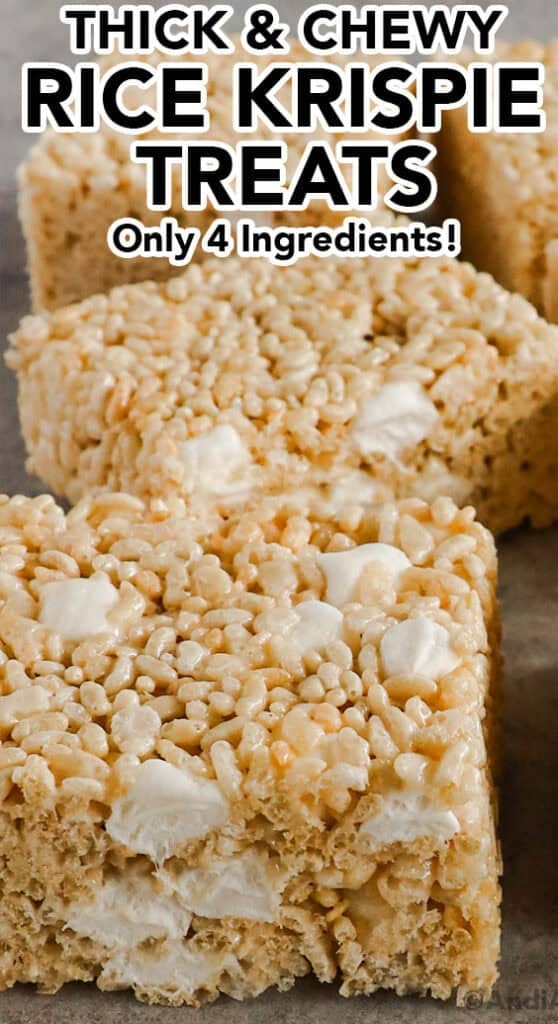
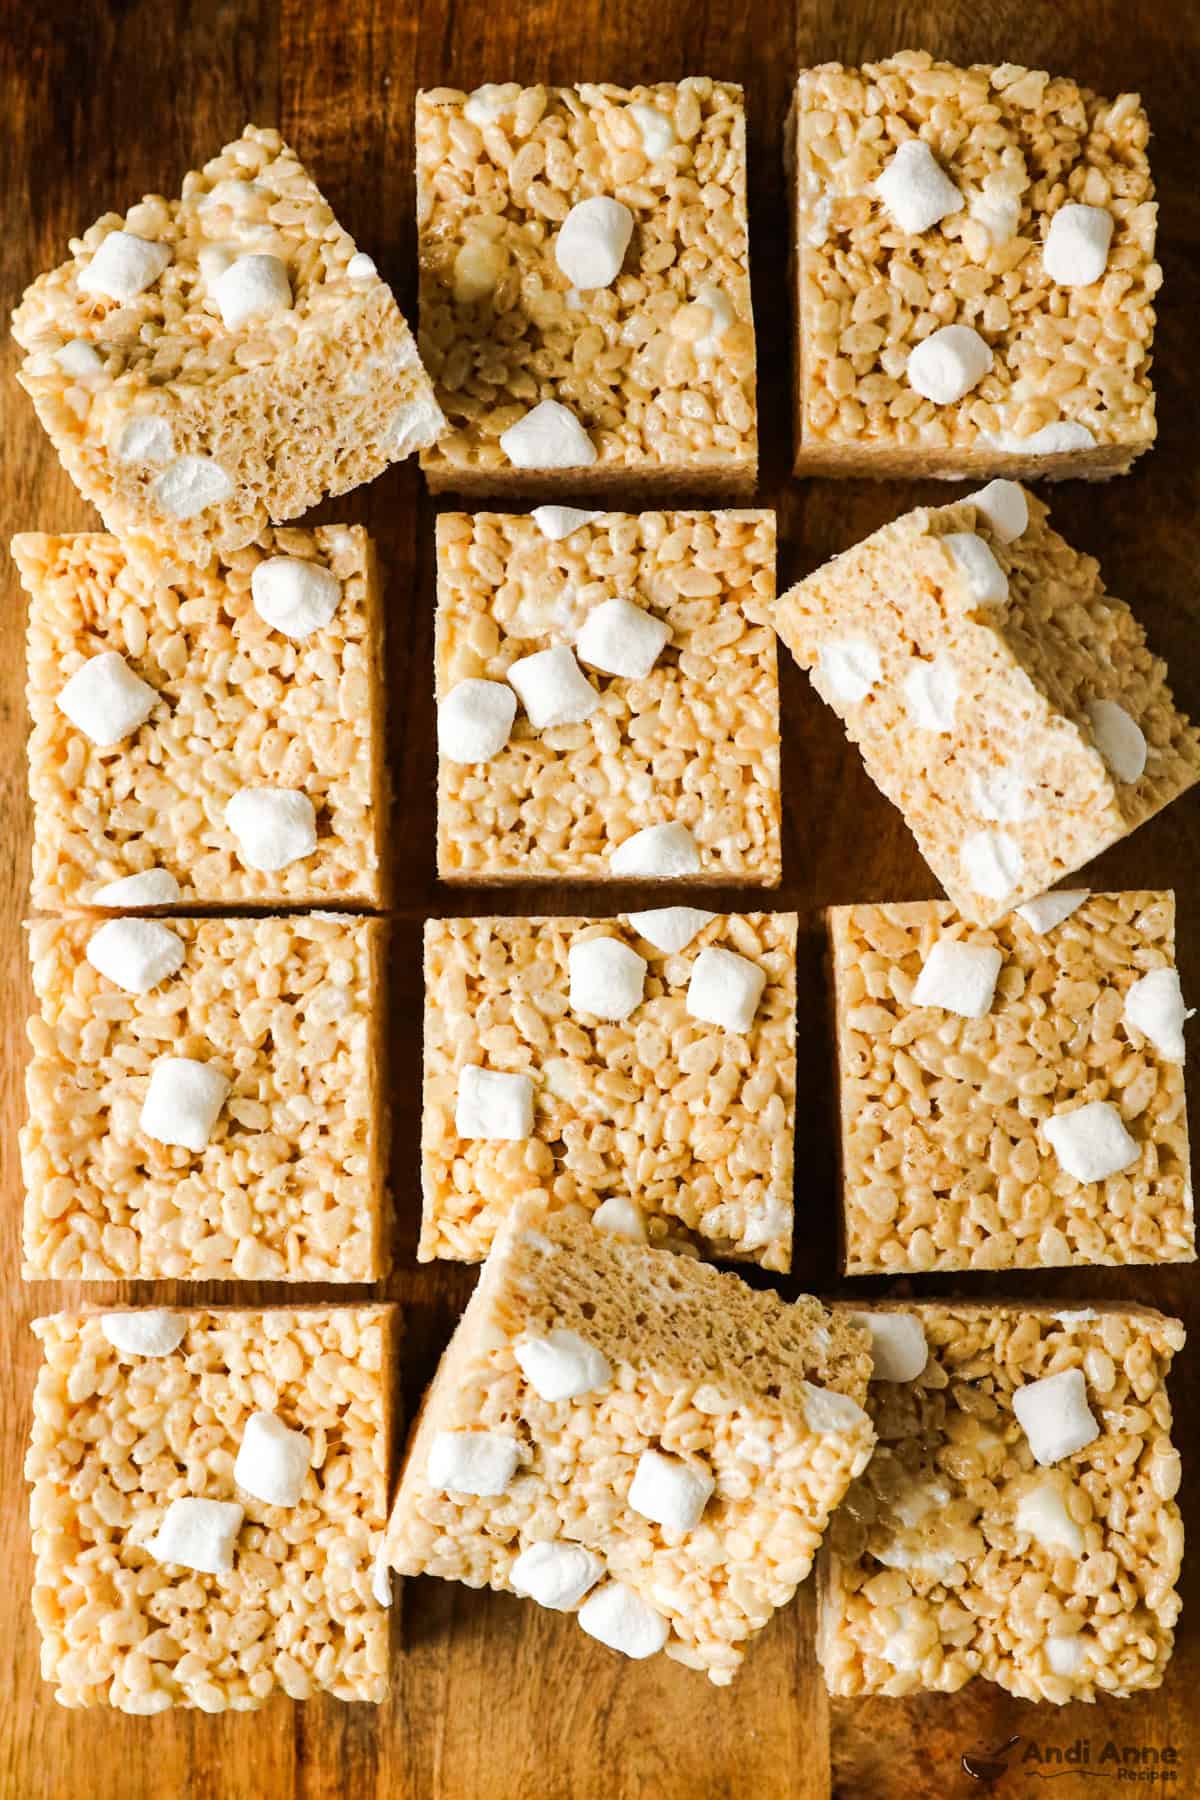
These soft and gooey Rice Krispie treats are the classic no-bake dessert everyone loves, made thicker with extra marshmallows for perfectly chewy squares that stay soft for days. 👇👇
Made with simple pantry staples like butter, marshmallows, and crispy rice cereal, they come together in one pot in about 15 minutes. They're perfect for school snacks, potlucks, or quick homemade desserts.
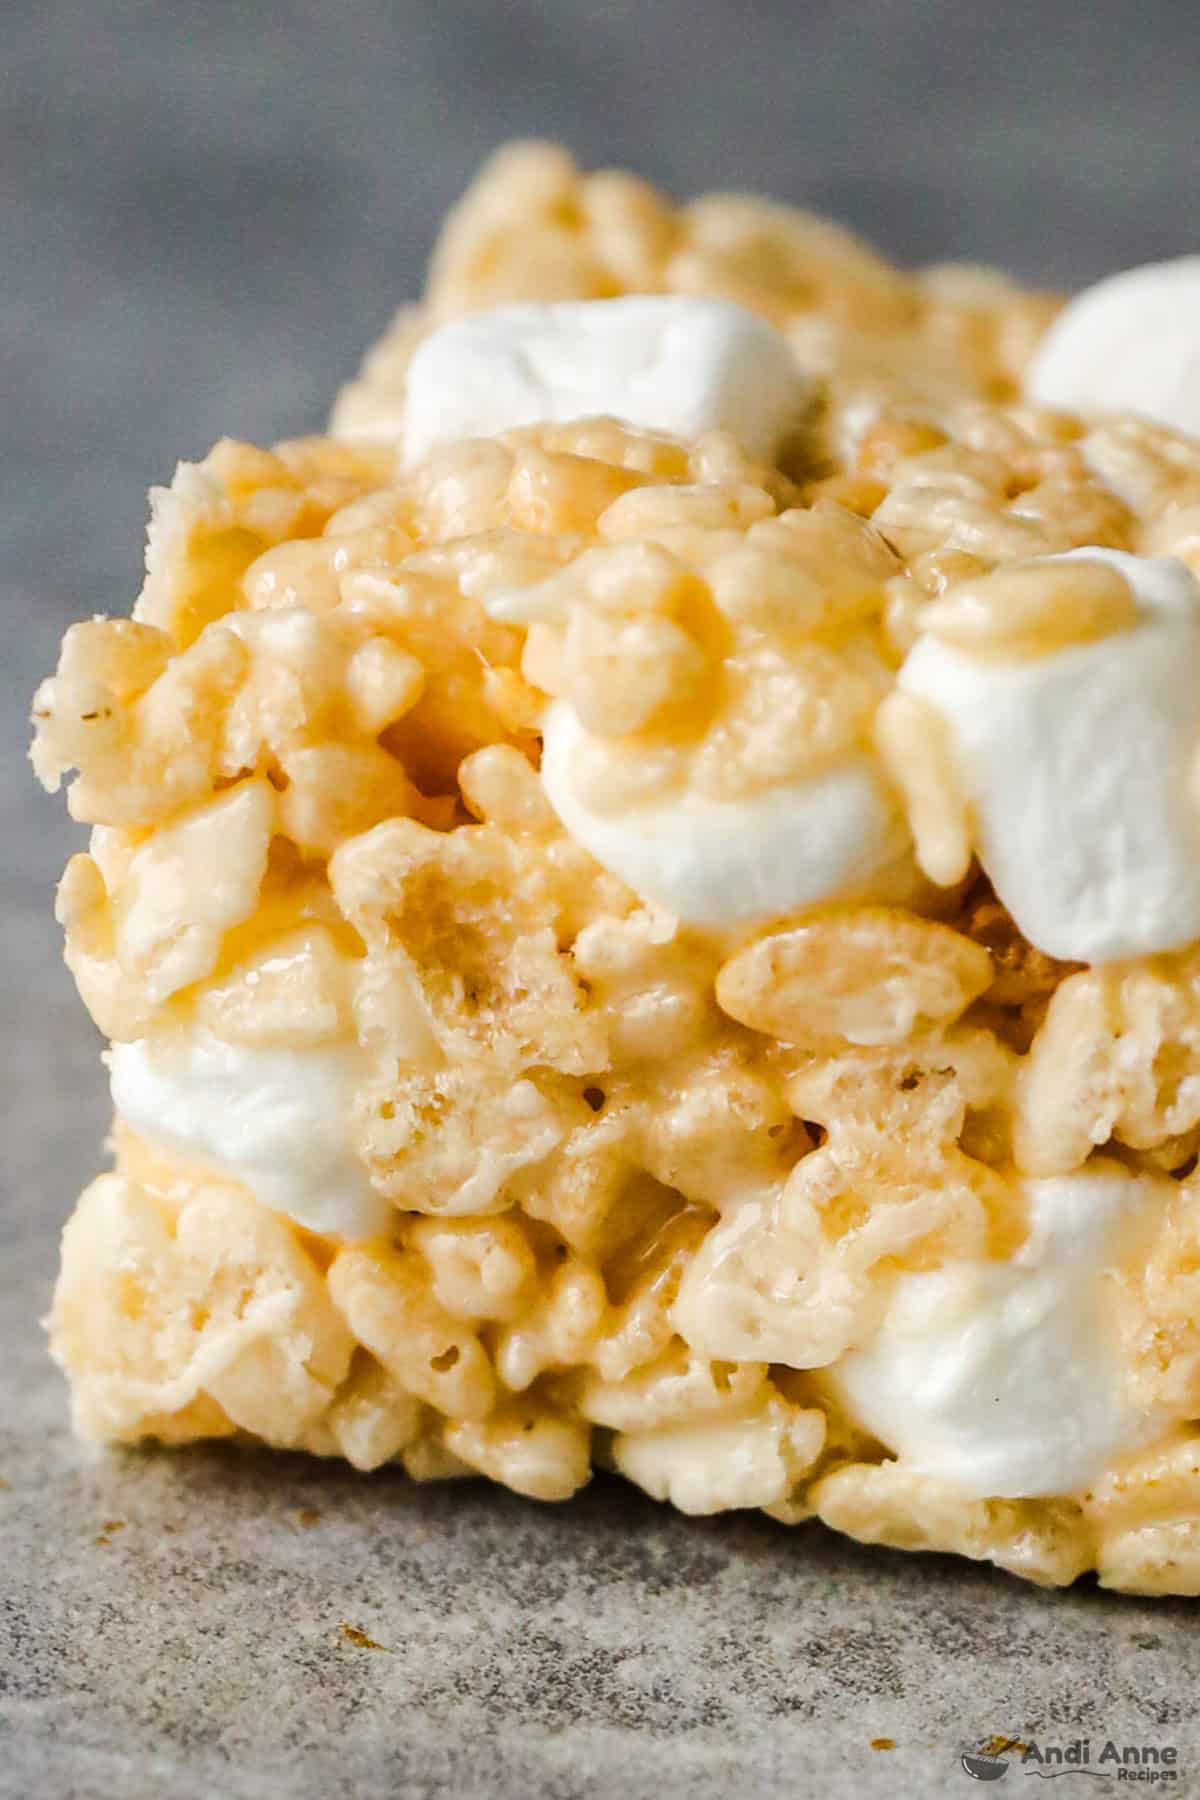
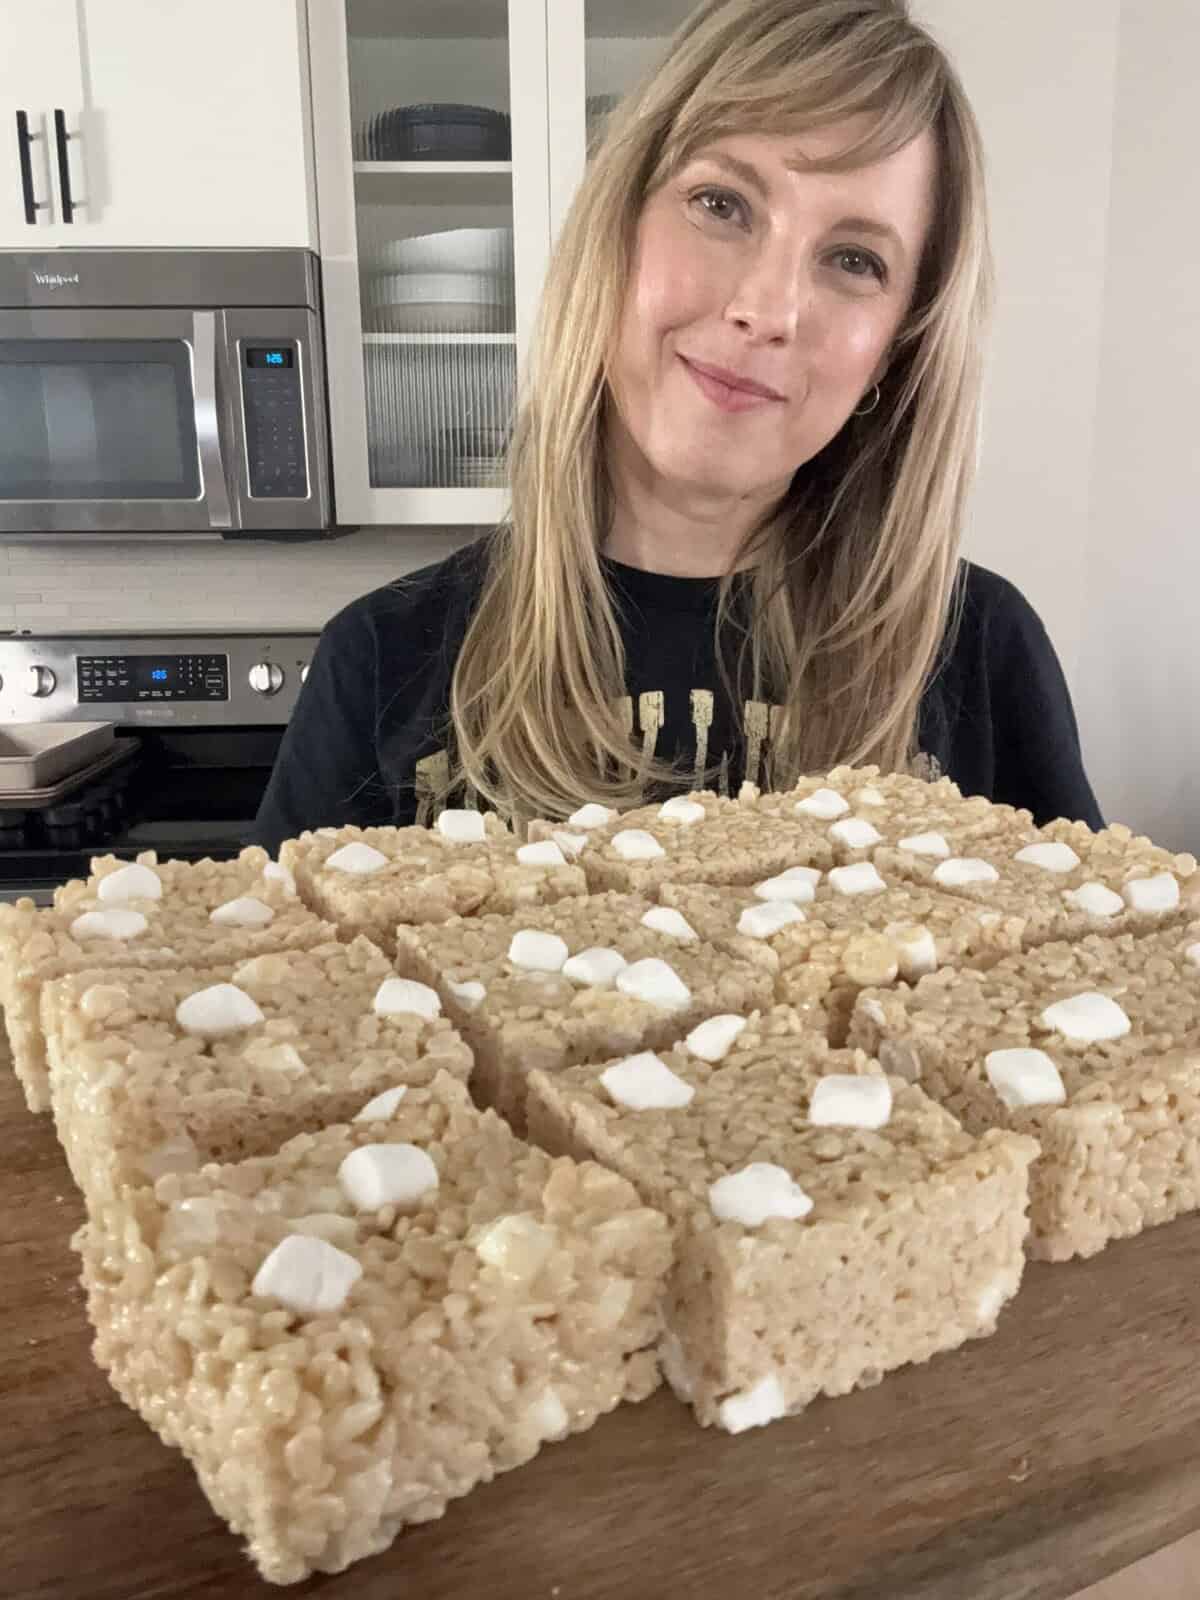
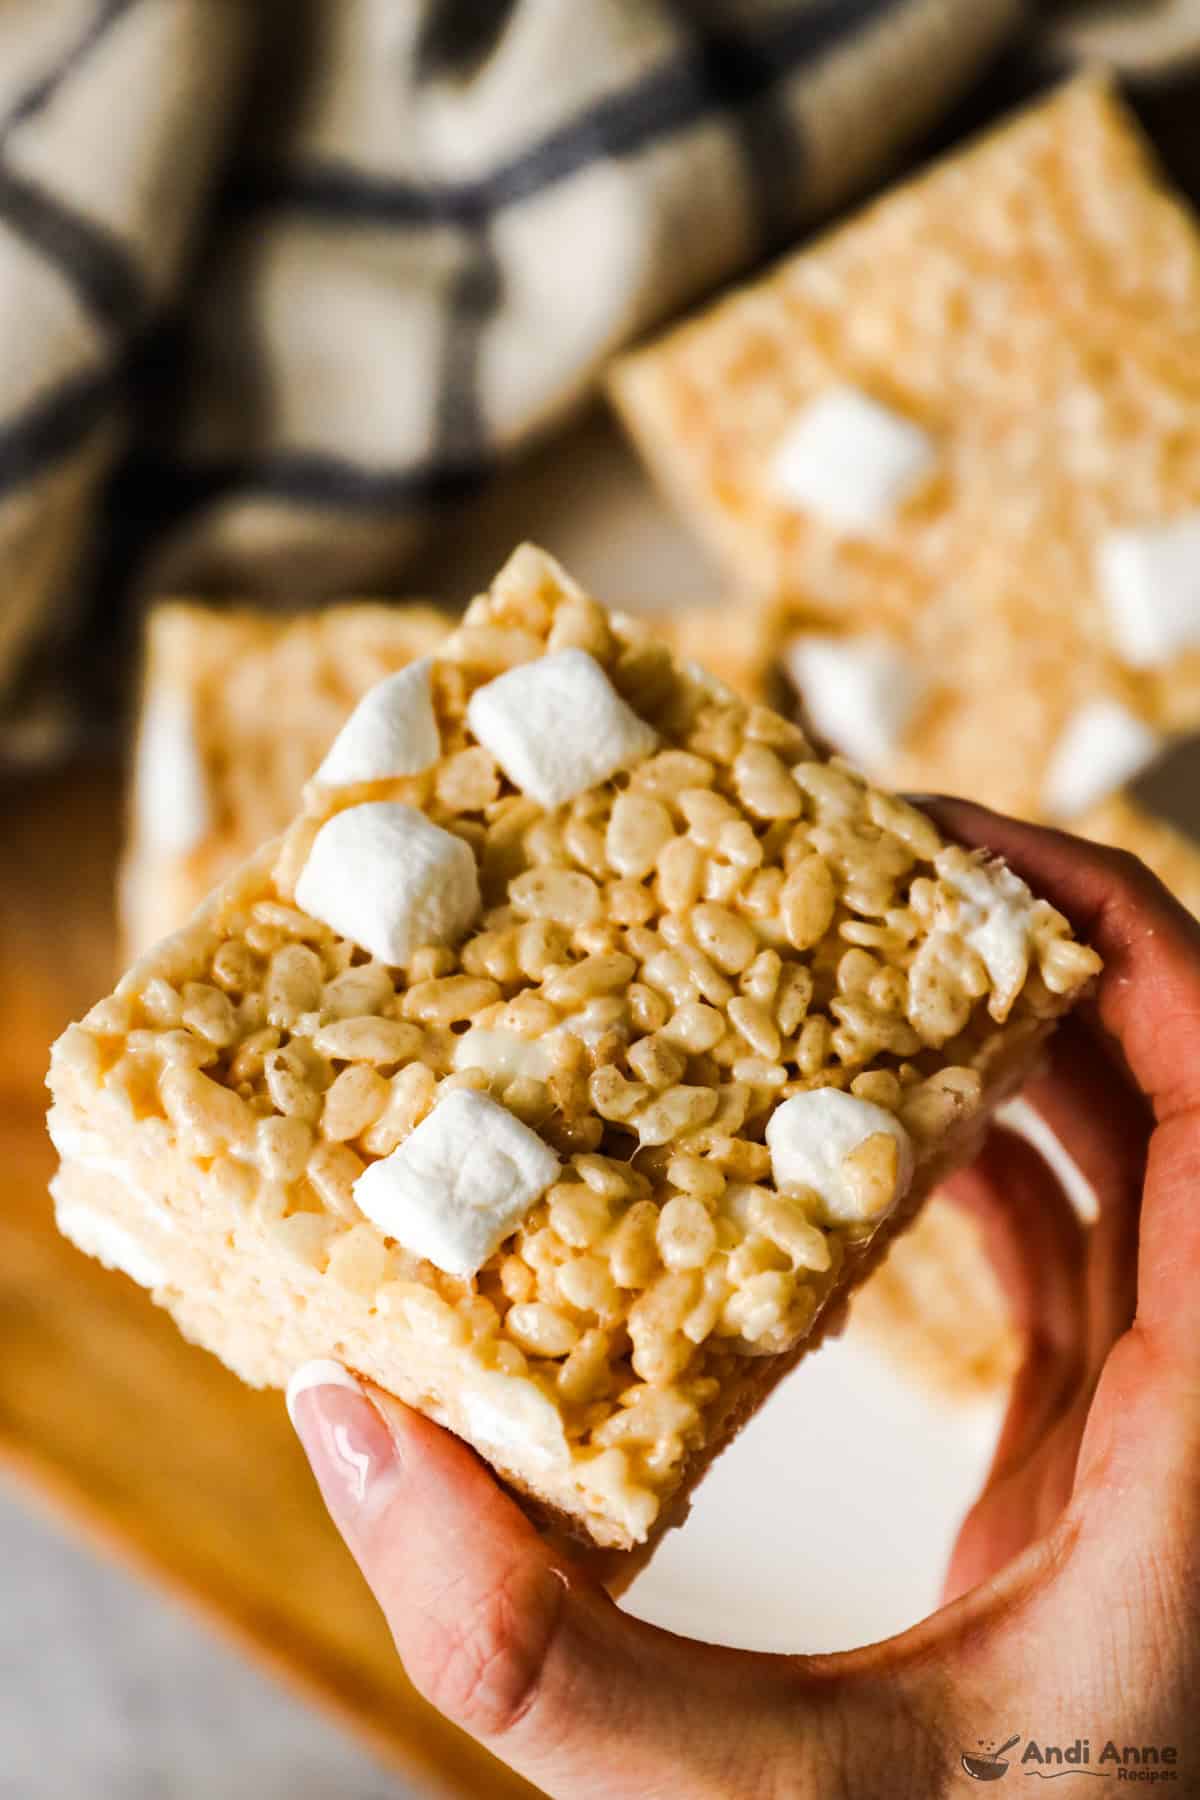
👉My version stirs extra mini marshmallows in at the end, creating soft pockets of gooey marshmallow throughout the bars. I also make them jumbo-sized so you get thick bakery-style squares instead of thin cereal bars.
Why You'll Love This Recipe
These are the best rice krispie treats if you love thick, extra-gooey squares with plenty of marshmallow in every bite.
- Extra soft and gooey texture from added marshmallows
- Jumbo thick squares that feel bakery-style
- Ready in about 15 minutes with simple pantry ingredients
- Stays soft for days instead of turning hard
- Kid-approved classic that works for parties, lunches, or homemade snacks
Note From Andi
One thing I love about homemade Rice Krispie treats is that you can control the texture. Some people love soft, gooey bars, while others prefer thick, firm squares that hold their shape when sliced.
The secret comes down to how firmly you press the mixture into the pan...
If you press lightly, the treats stay softer and extra gooey with a lighter texture. If you press the mixture firmly, the cereal packs together more tightly and creates those dense bakery-style squares.
Personally, I like pressing them a little more firmly because I love those thick, dense bars. But if you prefer softer treats, just press lightly and they'll stay extra marshmallowy and chewy.
Either way, the extra marshmallows in this recipe help keep the texture soft instead of dry.
Recipe Ingredients 👇👇
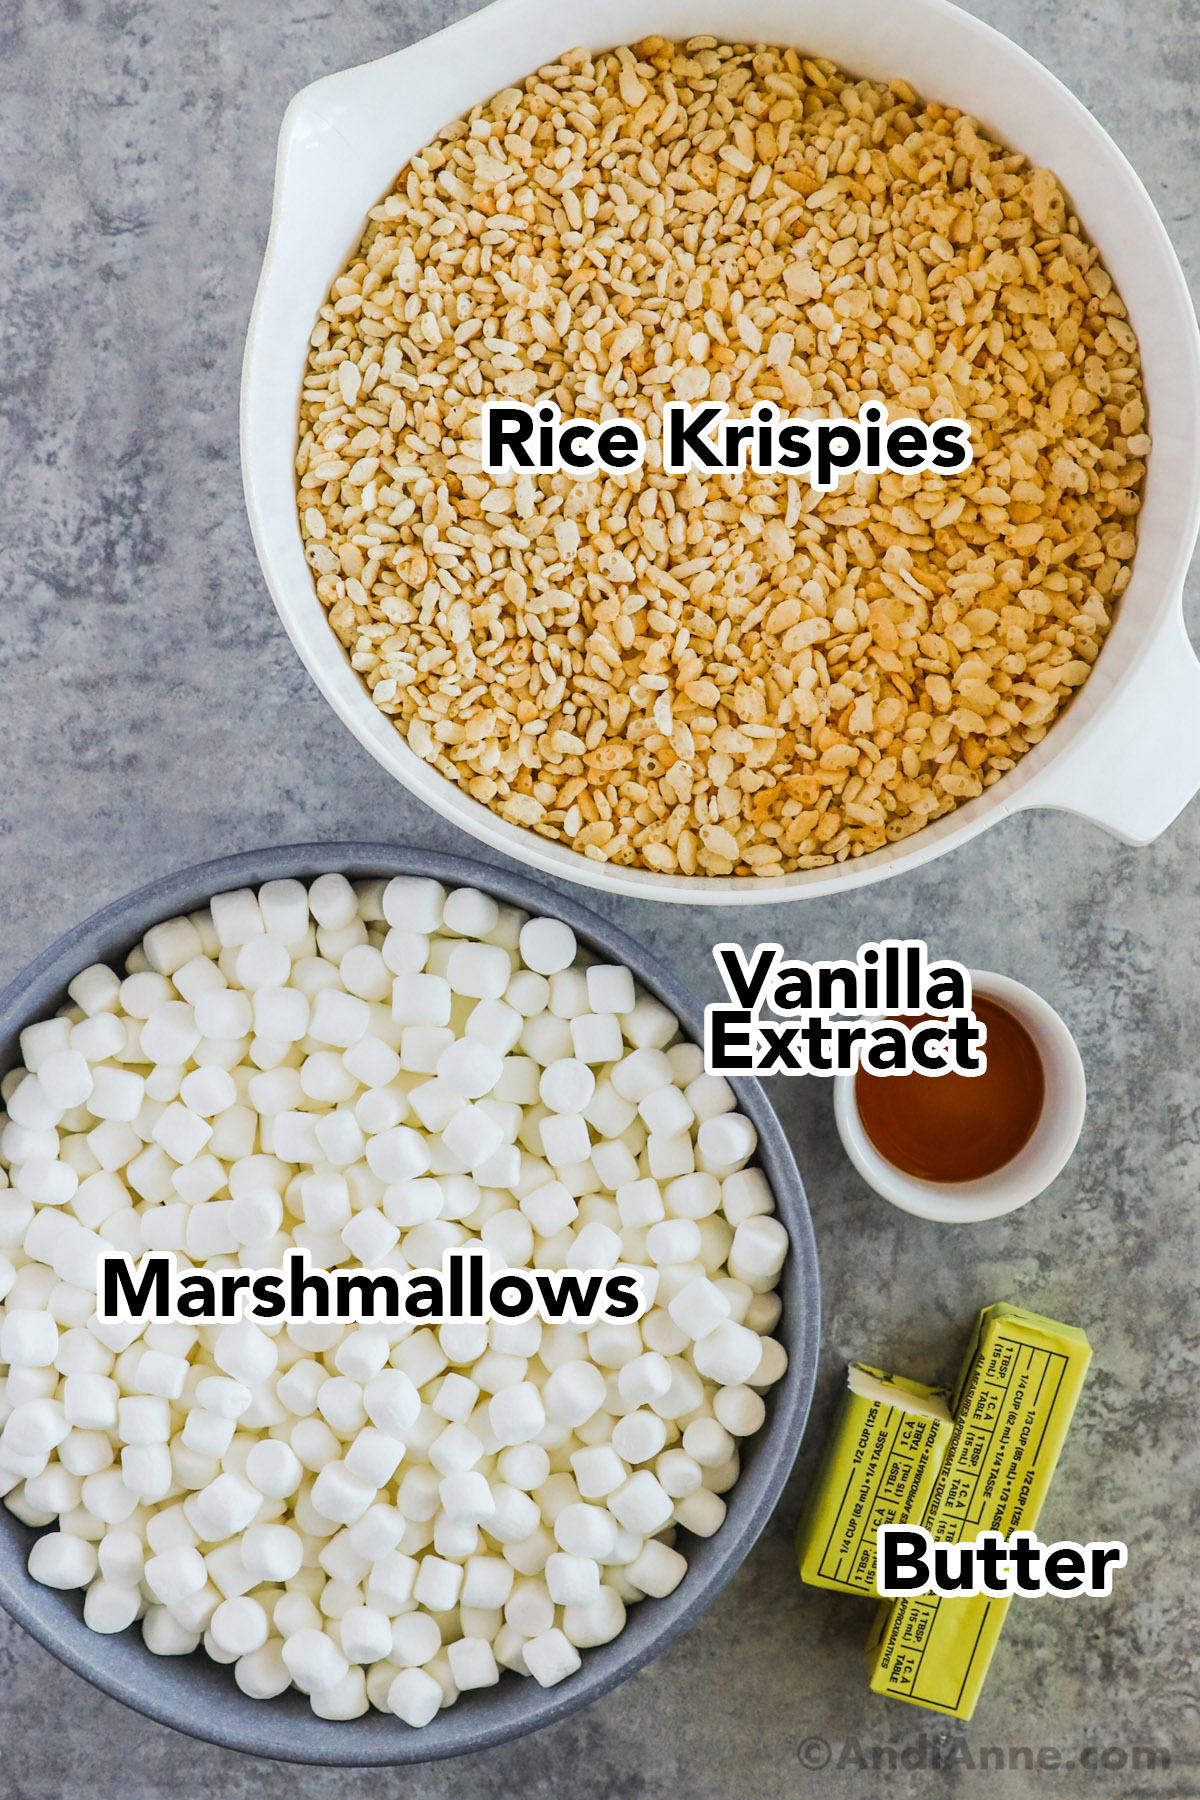
- ¾ cup salted butter - adds rich flavor and helps the marshmallows melt smoothly.
- 20 oz mini marshmallows, divided (reserve 2 cups) - this recipe uses extra marshmallows for softer bars, plus additional mini marshmallows stirred in at the end for gooey pockets throughout the treats.
- 1 Tbsp vanilla extract - adds a little extra flavor that makes the marshmallow mixture taste richer.
- 12 cups Rice Krispies cereal - classic crispy rice cereal works best, but any similar puffed rice cereal will work.
Step-By-Step Instructions 👇👇
STEP 1: Prepare the Pan
Spray a 9×11 baking dish with nonstick cooking spray and set aside.
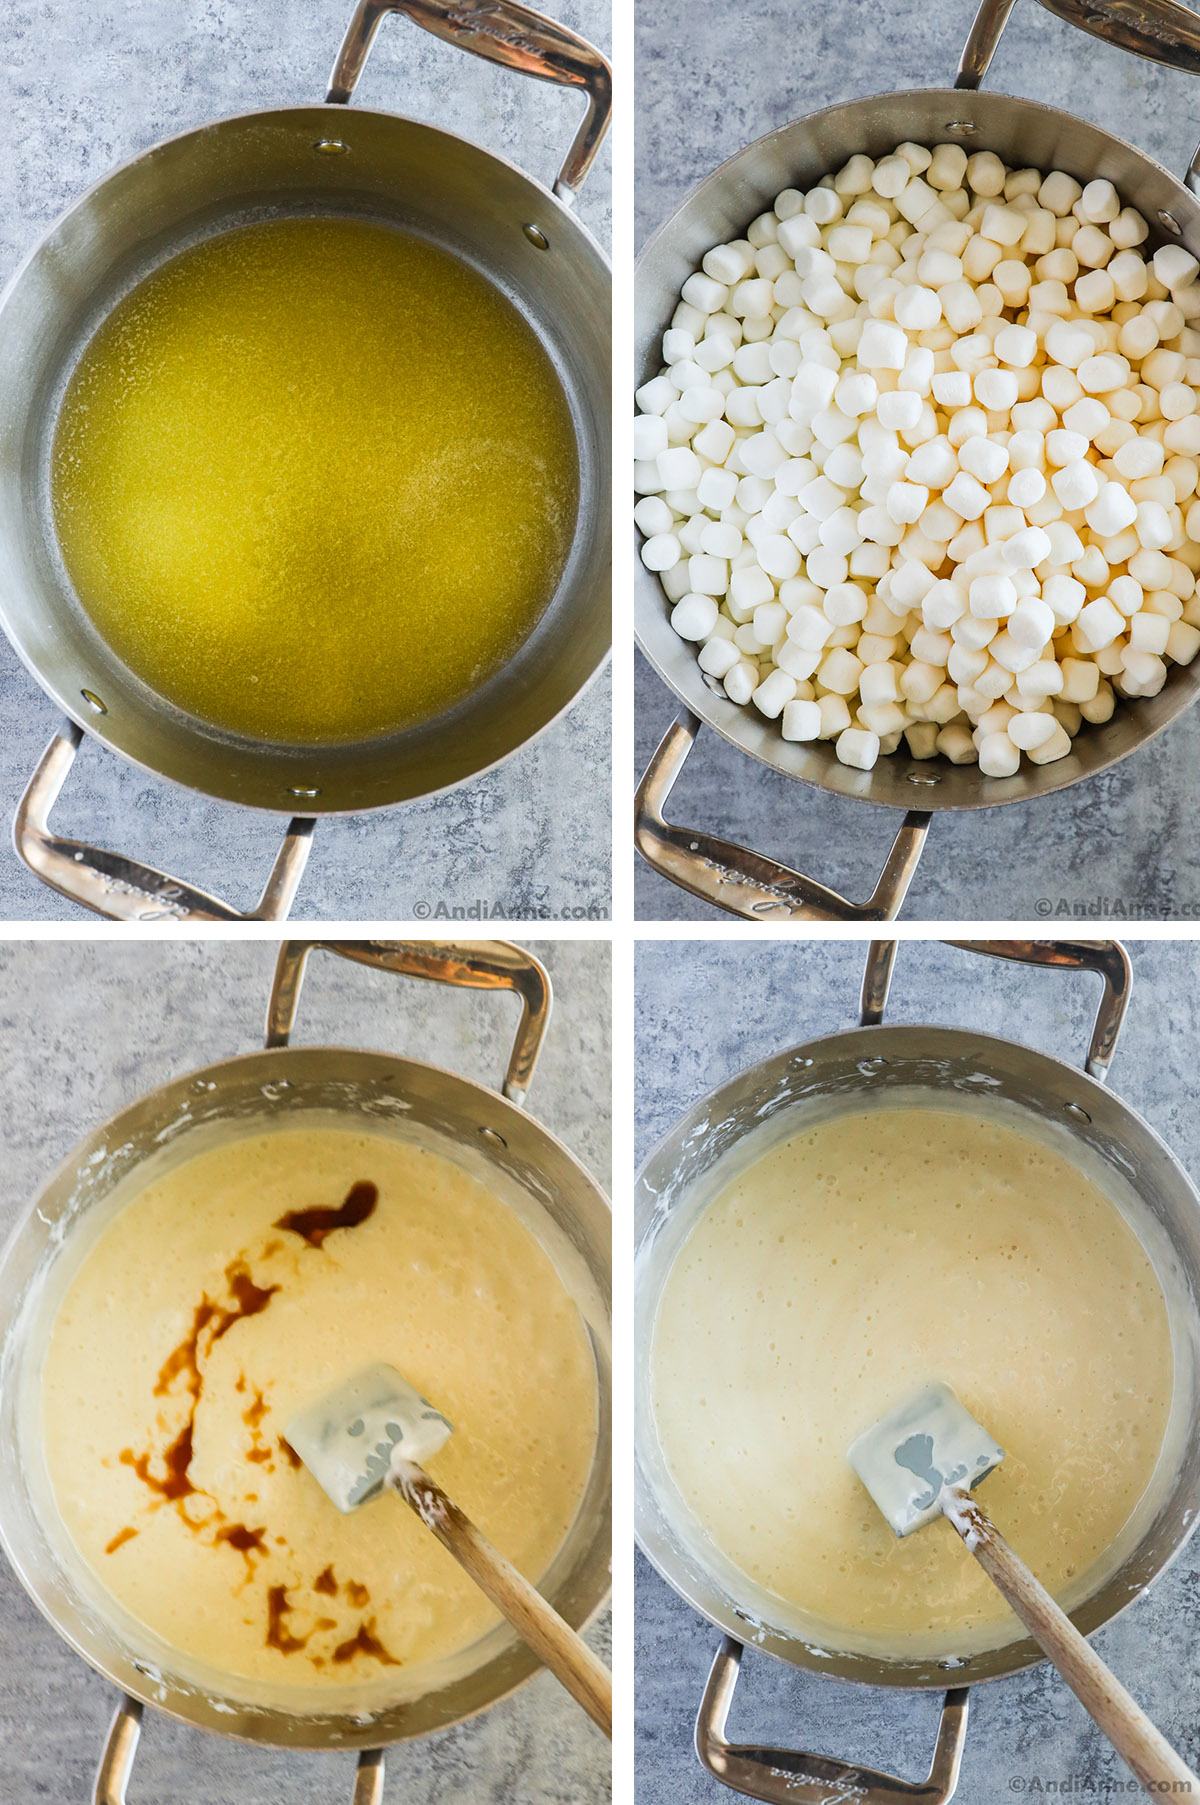
STEP 2: Melt Butter and Marshmallows
In a large pot, melt ¾ cup salted butter over medium heat. Add most of the 20 oz mini marshmallows, reserving about 2 cups for later.
Reduce the heat to medium-low and stir gently until the marshmallows melt completely, about 3-4 minutes. Avoid overheating, which can make the bars hard later.
STEP 3: Add Vanilla
Remove the pot from heat and stir in 1 Tbsp vanilla extract.
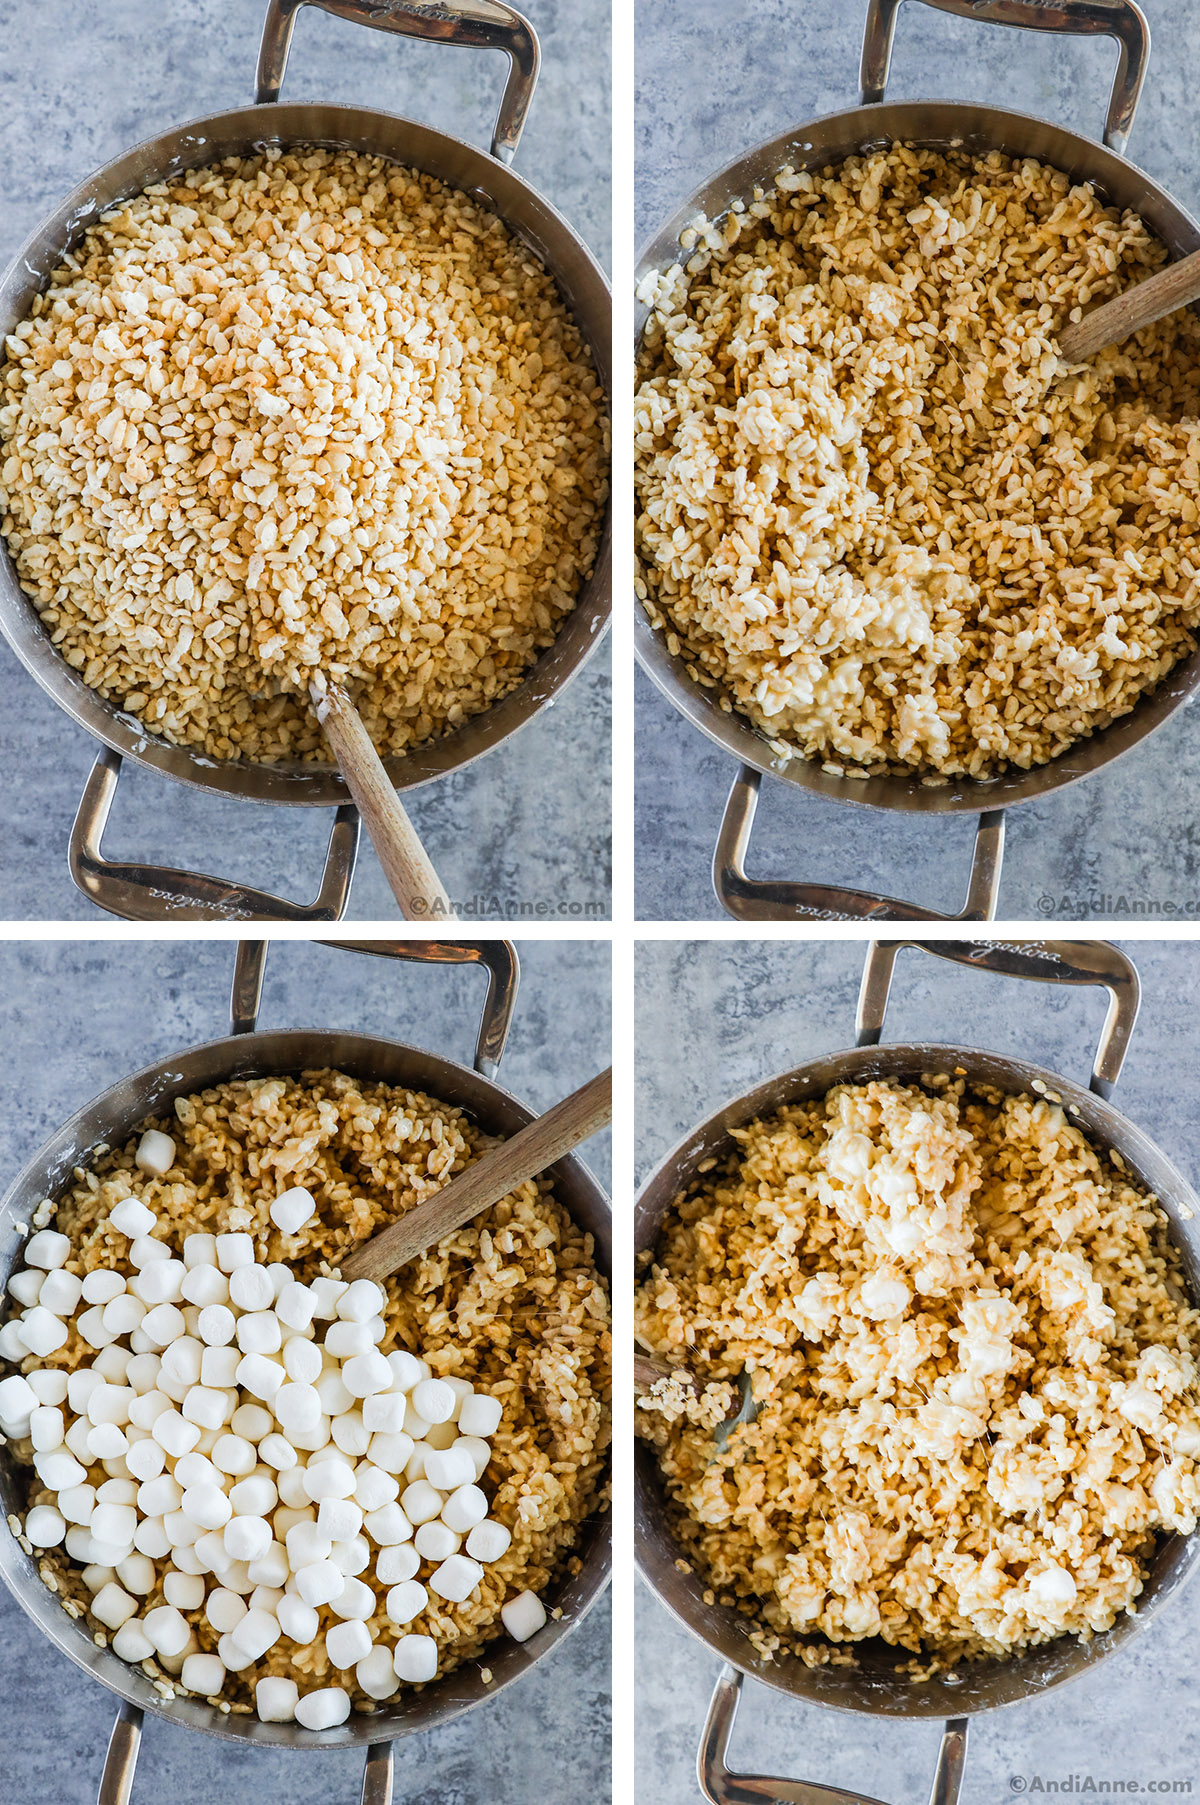
STEP 4: Mix in Cereal and Extra Marshmallows
Add 12 cups Rice Krispies cereal and the reserved 2 cups mini marshmallows.
Stir gently until the cereal is evenly coated with the melted marshmallow mixture.
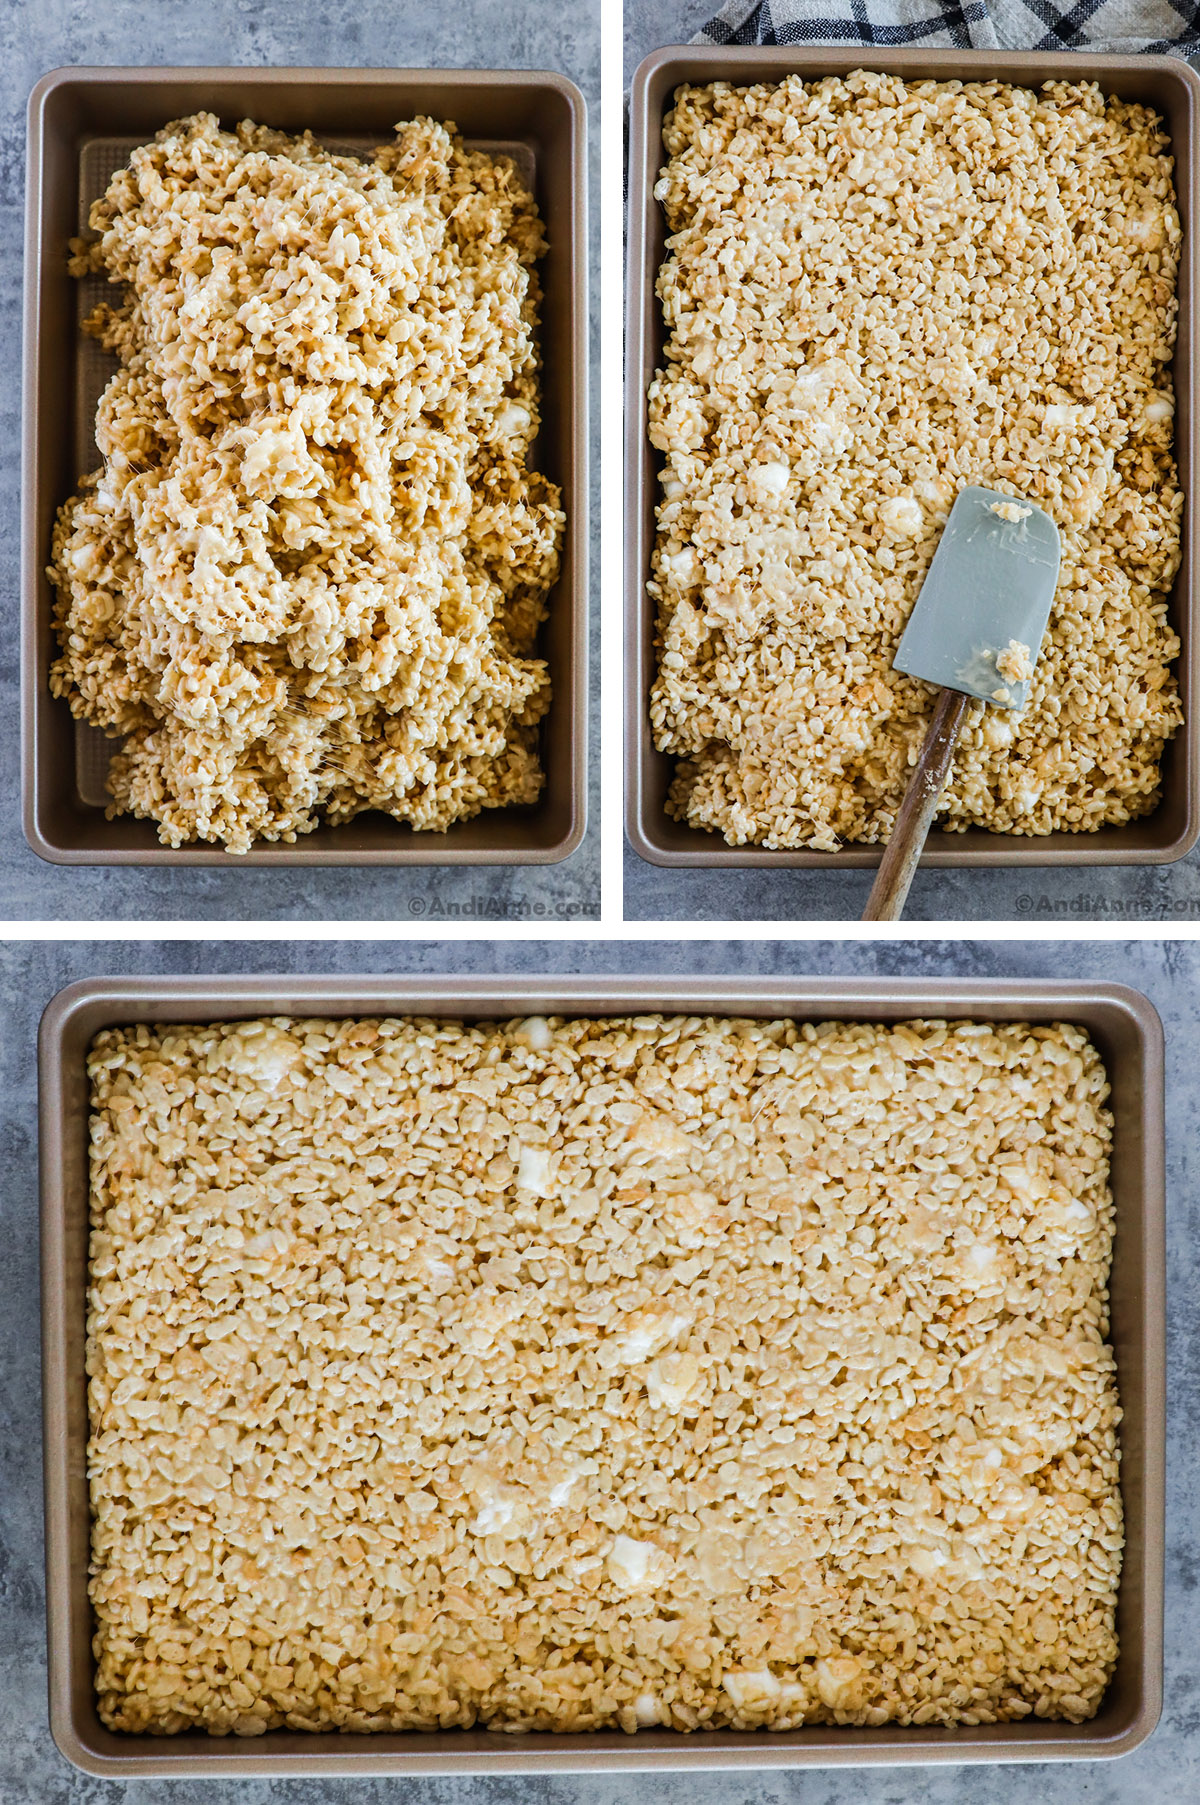
STEP 5: Press Into Pan
Transfer the mixture to the prepared baking dish.
Lightly grease a spatula with nonstick cooking spray and press gently for softer treats, or press more firmly if you prefer thicker, dense squares.
STEP 6: Let Set
Cover the pan and let the treats set in the fridge for at least 1 hour. For the cleanest slices, you can refrigerate the pan overnight before cutting.
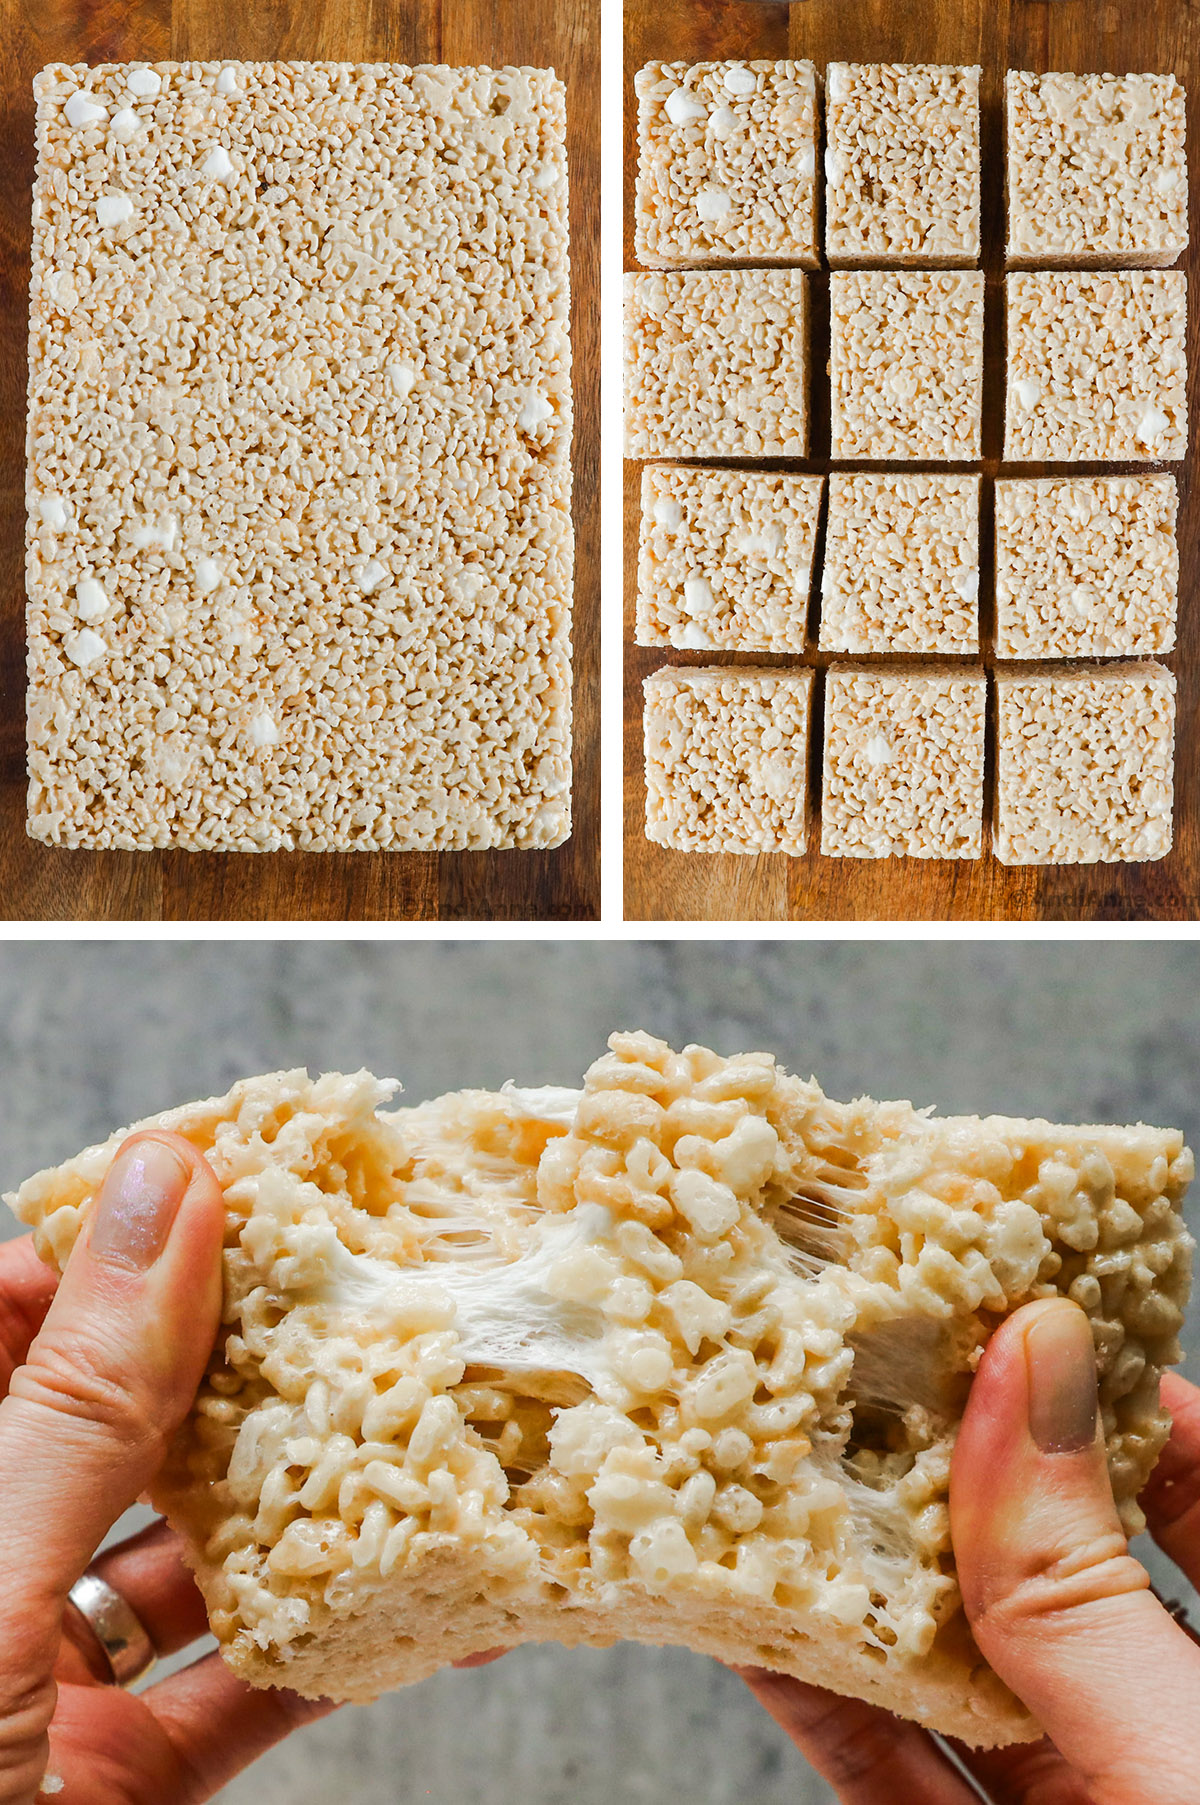
STEP 7: Slice and Serve
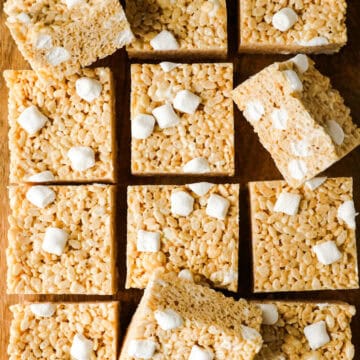
Cut into 12 jumbo squares or 24 smaller bars, then serve and enjoy.
If you enjoy easy no-bake snacks and cereal treats, you might also like these chewy No-Bake Granola Bars or my simple Homemade Cereal Bar Recipe made with pantry staples.
What Makes These Rice Krispie Treats Better
Most classic Rice Krispie treat recipes melt all the marshmallows completely before mixing in the cereal.
In this version, I save about 2 cups of mini marshmallows and stir them in at the end. Those marshmallows soften slightly but don't fully melt, which creates little pockets of gooey marshmallow throughout the bars.
I also make these jumbo-sized by pressing the mixture into a smaller pan. That gives you thick, bakery-style squares instead of thin cereal bars.
Those gooey marshmallow pockets are always the first thing kids notice when they bite into them.
Expert Tips for Soft Rice Krispie Treats
- Use a large pot so mixing is easy
- Melt marshmallows over low heat only
- Grease the baking dish well to prevent sticking
- Press lightly for chewy bars
- Add sprinkles, chocolate chips, or peanut butter for fun variations
For quick snack ideas using oats and peanut butter, try these Peanut Butter Oat Balls or explore Six Ways to Make Energy Balls for more easy variations that work great for meal prep and lunchboxes.
Why Do Rice Krispies Treats Turn Hard?
Hard Rice Krispies treats usually happen when:
- Marshmallows are melted over too high heat
- The mixture is pressed too firmly into the pan
- The recipe uses too much cereal compared to marshmallows
Keeping the heat low, adding extra marshmallows, and pressing gently helps maintain a soft chewy texture.
Variations and Add-Ins
Once you know the base recipe, it's easy to customize these treats.
- Stir in chocolate chips after cooling slightly
- Add peanut butter to the melted marshmallow mixture
- Mix in sprinkles or candy pieces for birthdays
- Drizzle melted chocolate on top
If you enjoy quick sweets like no-bake granola bars or rich cereal peanut butter bars, you'll love how easy these cereal treats are to customize.
Watch How To Make Rice Krispie Treats 👇👇
See how these soft, gooey jumbo treats come together in one pot in just minutes.
If you like sweet cereal snacks and homemade treats, this crunchy Cinnamon Sugar Chex Mix is another reader favorite, and you can even try making soft Homemade Marshmallows from scratch.
How To Keep Rice Krispies Treats Soft for Days
- Store in an airtight container at room temperature
- Keep them sealed well to prevent air exposure
- Add a slice of bread to the container to help maintain moisture
- Freeze for longer storage and thaw at room temperature
Proper storage keeps them soft for 3-4 days or longer.
FAQs
Store them in an airtight container sealed tightly so they don't dry out. When stored properly at room temperature, Rice Krispie treats can stay soft for up to one week. Extra marshmallows also keep the texture soft and gooey.
Two things usually cause Rice Krispie treats to turn hard: overheating the marshmallows while melting them or packing the mixture too tightly into the pan.
Melting the marshmallows over low heat helps keep the mixture soft. Then gently press the cereal mixture into the pan instead of packing it down firmly.
If you want softer treats, use low heat and a light press, which helps keep that soft, gooey texture.
Yes. Store sliced treats in an airtight container and freeze up to 3 months. Let thaw at room temperature before serving.
Yes. Large marshmallows work just as well, but they take a little longer to melt.
If you want those soft marshmallow pockets inside the Rice Krispie treats, you can cut a few of the large marshmallows into smaller pieces and stir them in at the end, just like the mini marshmallows in this recipe. This helps create those gooey bites of marshmallow throughout the bars.
No. Rice Krispie treats are best stored at room temperature in an airtight container, which keeps the texture soft and chewy.
That said, I'll be honest, I often keep mine in the freezer because we work our way through them slowly. They thaw quickly and freezing helps them last much longer without drying out.
Rice Krispie Treats Recipe
Tap Stars To Rate!
Ingredients
- Spray a 9×11 baking pan with nonstick cooking spray and set aside.
- In a large pot - melt ¾ cup salted butter over medium heat. Add most of the 20 oz mini marshmallows, reserving about 2 cups for later.
- Reduce the heat to medium-low and gently stir until the marshmallows melt completely - about 3-4 minutes. Avoid overheating or the treats can become hard.
- Remove from heat and stir in 1 Tbsp vanilla extract.
- Add 12 cups Rice Krispies cereal and the reserved 2 cups mini marshmallows. Gently mix until the cereal is evenly coated with the melted marshmallow mixture.
- Transfer the mixture to the prepared baking pan.
- Lightly grease a spatula with nonstick cooking spray and press the mixture into the pan. Press lightly for softer treats - or press more firmly if you prefer thick dense bars.
- Let the treats set at room temperature or in the fridge for about 1 hour.
- Slice into 12 jumbo squares or 24 smaller bars and serve.
Instructions
- Spray a 9x11 baking pan with nonstick cooking spray and set aside.
- In a large pot (it must be large!) melt ¾ cup salted butter over medium heat. Next, add almost all of the 32 oz mini marshmallows (about 2 bags), but leave 2 cups worth out (save those for later).
- Reduce the heat to medium-low and gently stir until the marshmallows melt, about 3-4 minutes. Do not leave the stove during this time as the ingredients can easily burn.
- Remove from heat and then stir in 1 Tbsp vanilla extract.
- Now add 12 cups of rice krispies cereal, and 2 cups of mini marshmallows to the pot (this step is why you need a big pot for this recipe). Gently mix everything together so that the rice krispies are evenly coated with the melted marshmallows.
- Scoop the rice krispies mixture into the prepared baking pan. Lightly spray a silicone spatula with nonstick cooking spray and use it to help spread out the mixture into an even layer.
- NOTE: If you want softer rice krispies, then press them lightly into the pan. If you want thick dense rice krispies treats (which is my personal favorite) then press the mixture firmly down into the pan.
- Cover the pan with plastic wrap and let it sit on the counter or in the fridge for at least an hour. I prefer to let them chill overnight in the fridge to get clean crisp lines when I slice them.
- Now slice into 12 or 24 servings (depending on how big you want them), serve and enjoy!
Notes
- Melt marshmallows over low heat to keep the bars soft.
- Stir extra marshmallows in at the end for gooey marshmallow pockets.
- Press lightly for softer bars or firmly for dense squares.
- Store in an airtight container to keep the treats soft.
Nutrition
Nutrition info is auto-calculated and meant to be an approximation only.