

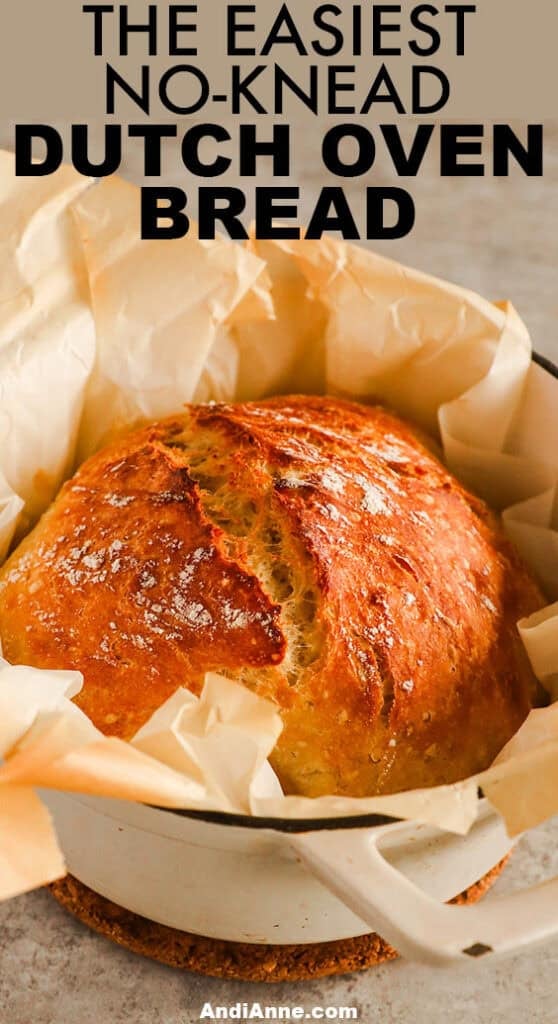
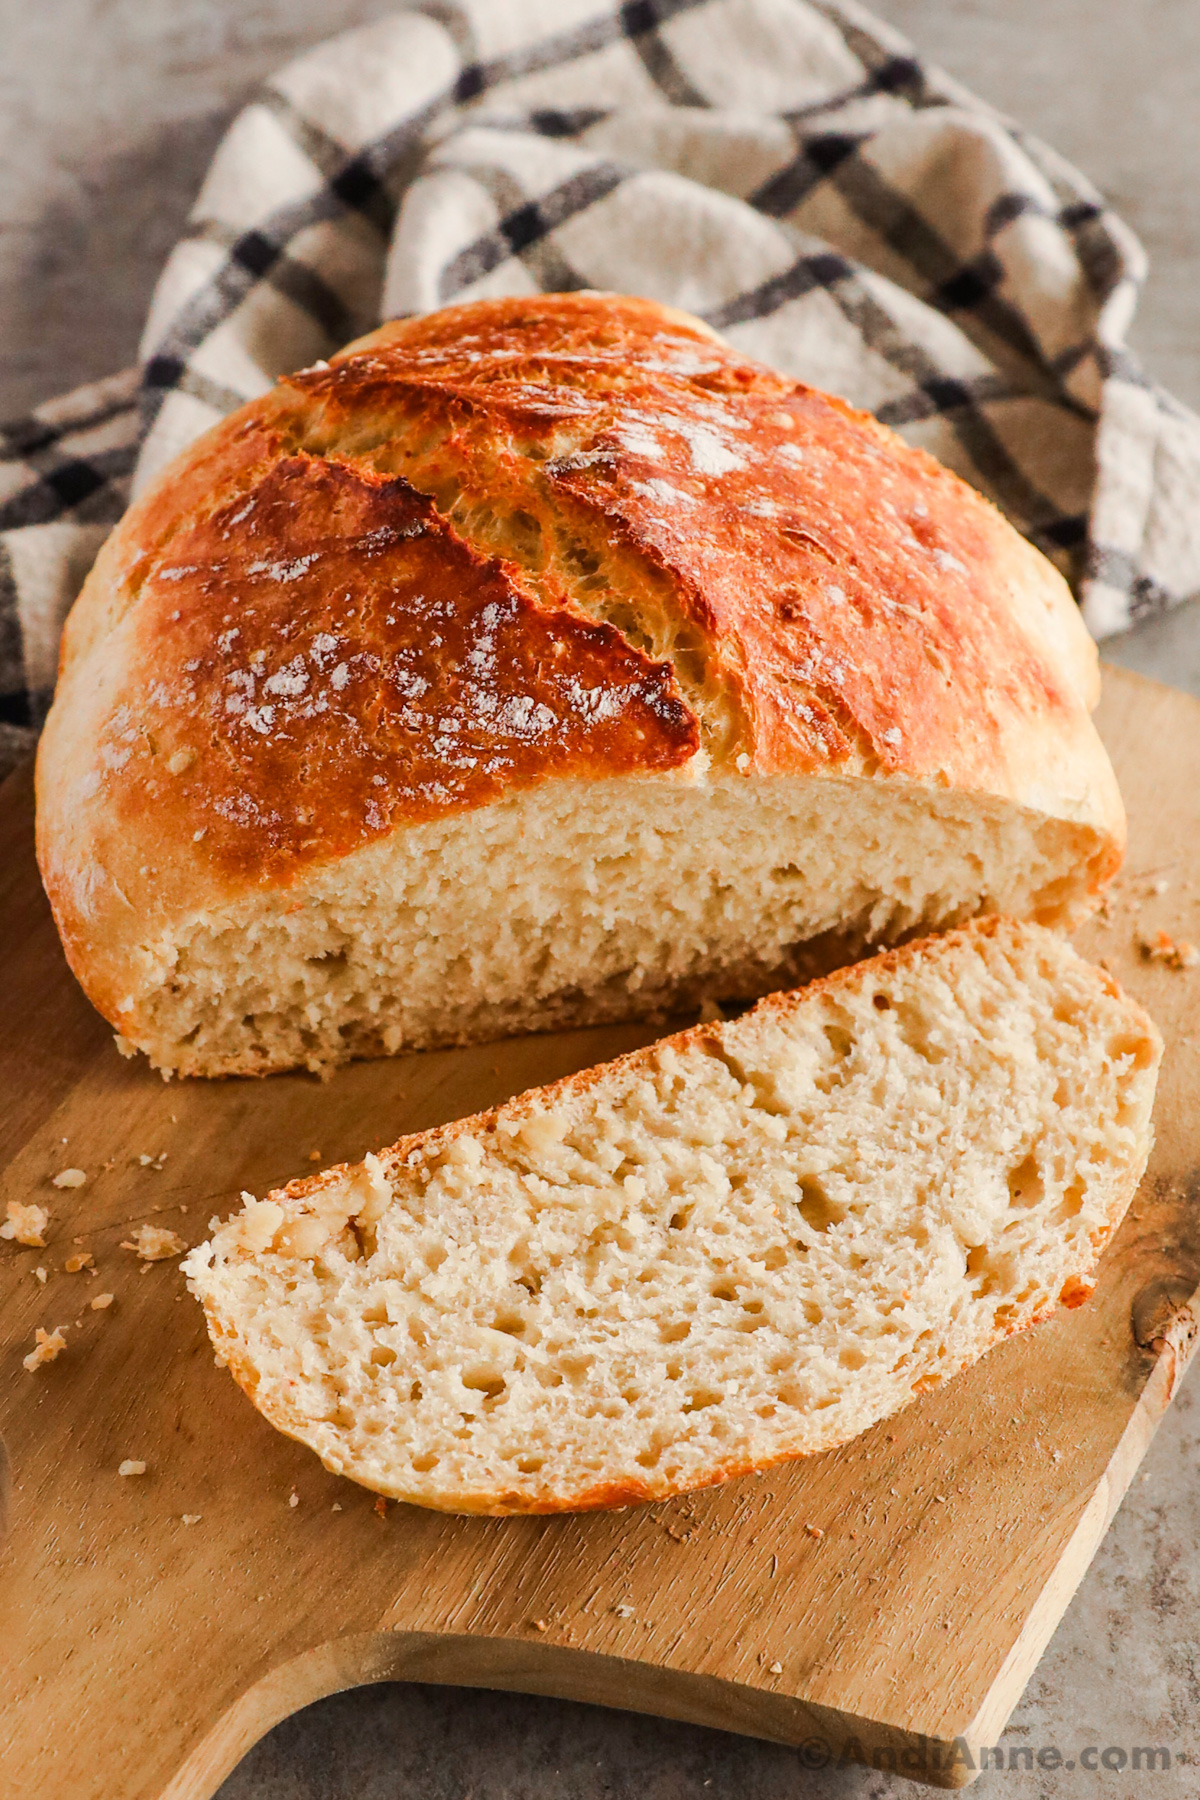
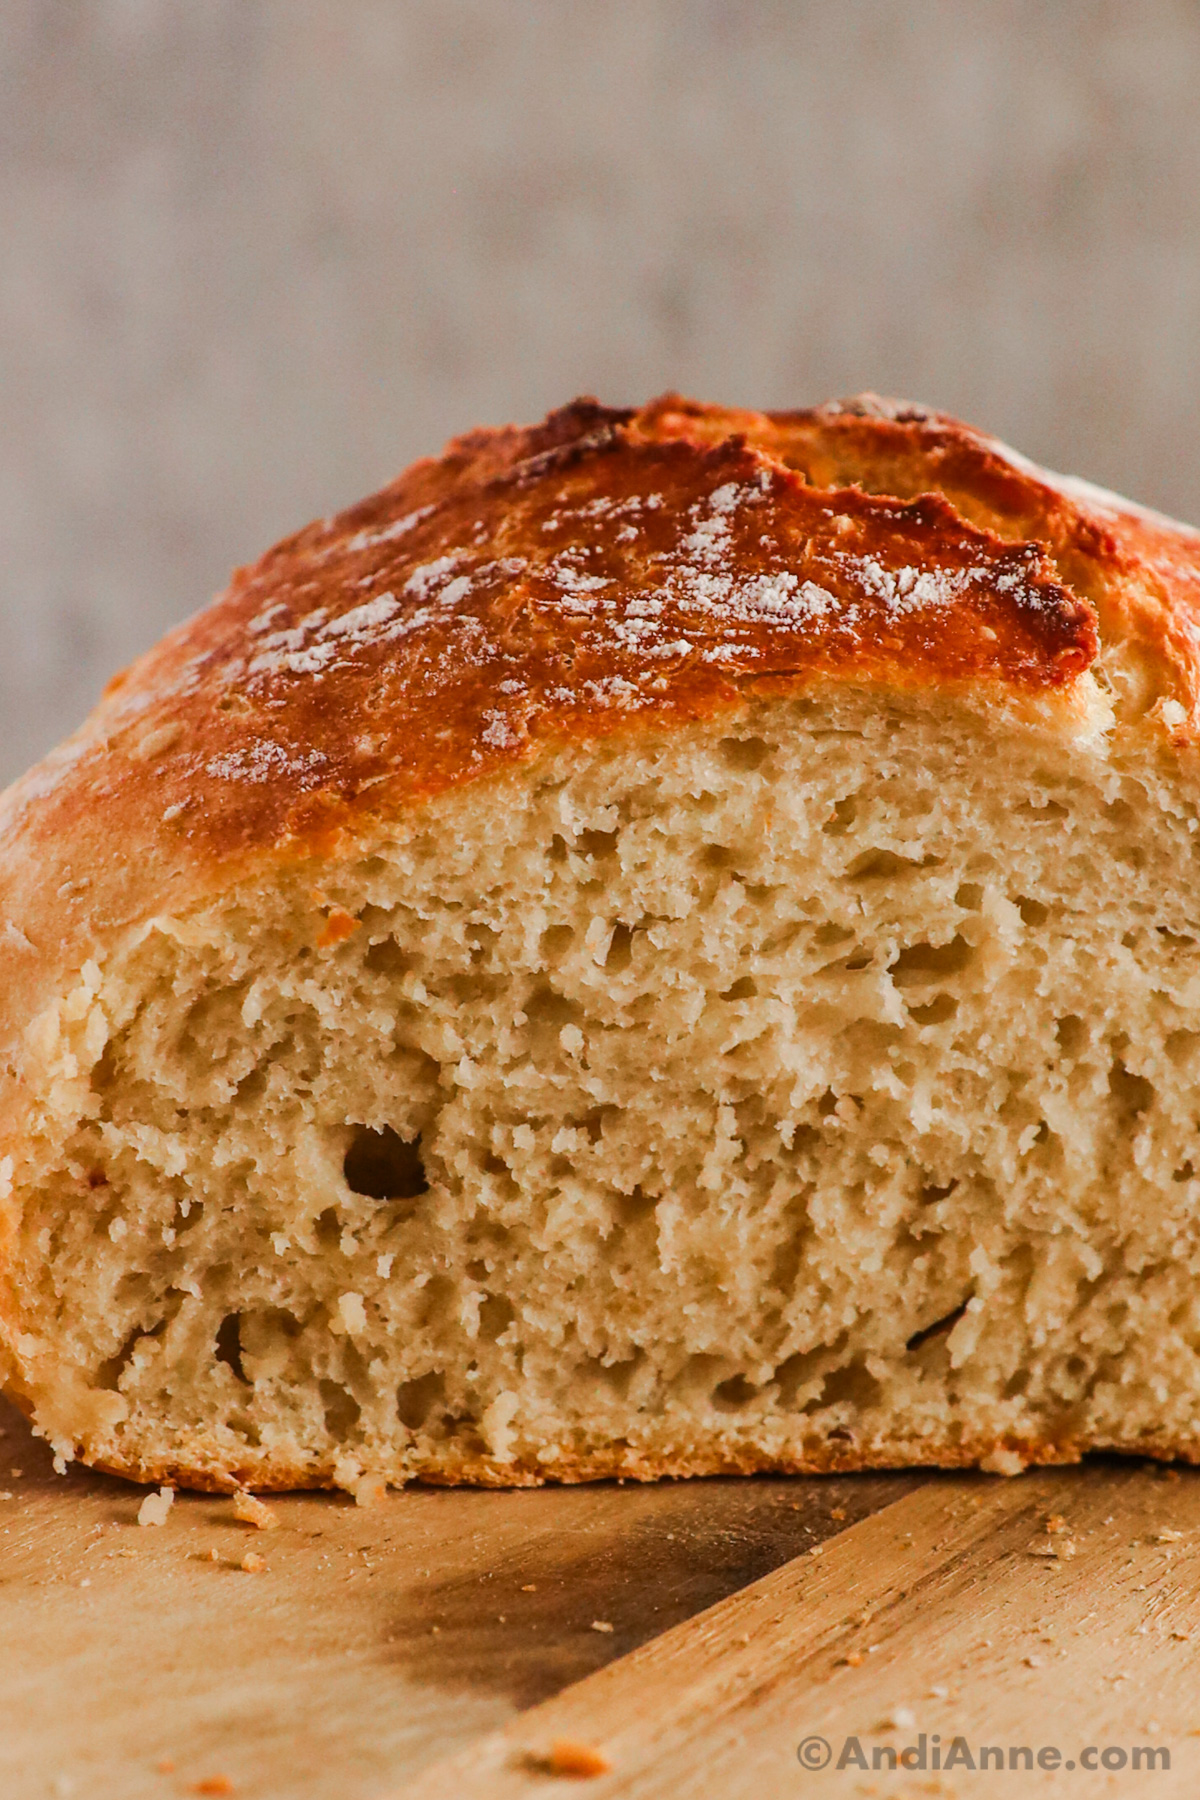
This dutch oven bread is no-knead bread that's crusty on the outside, chewy, and fluffy on the inside. It tastes similar to sourdough bread but without the "sour". With only four ingredients needed and a dutch oven pot, this recipe is the perfect easy bread to start with.
No Knead Bread Using A Dutch Oven
Many types of bread require kneading before baking, but not this one! You just mix the ingredients and let the dough sit for 2-3 hours then bake it for 45 minutes.
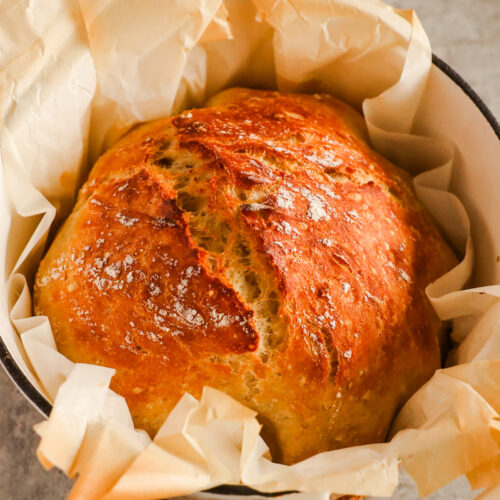
If you've been wanting to start making bread at home, this is the perfect recipe to begin with! This loaf could easily compete with artisan bread from your local bakery. It truly is beautiful!
Recipe Ingredients
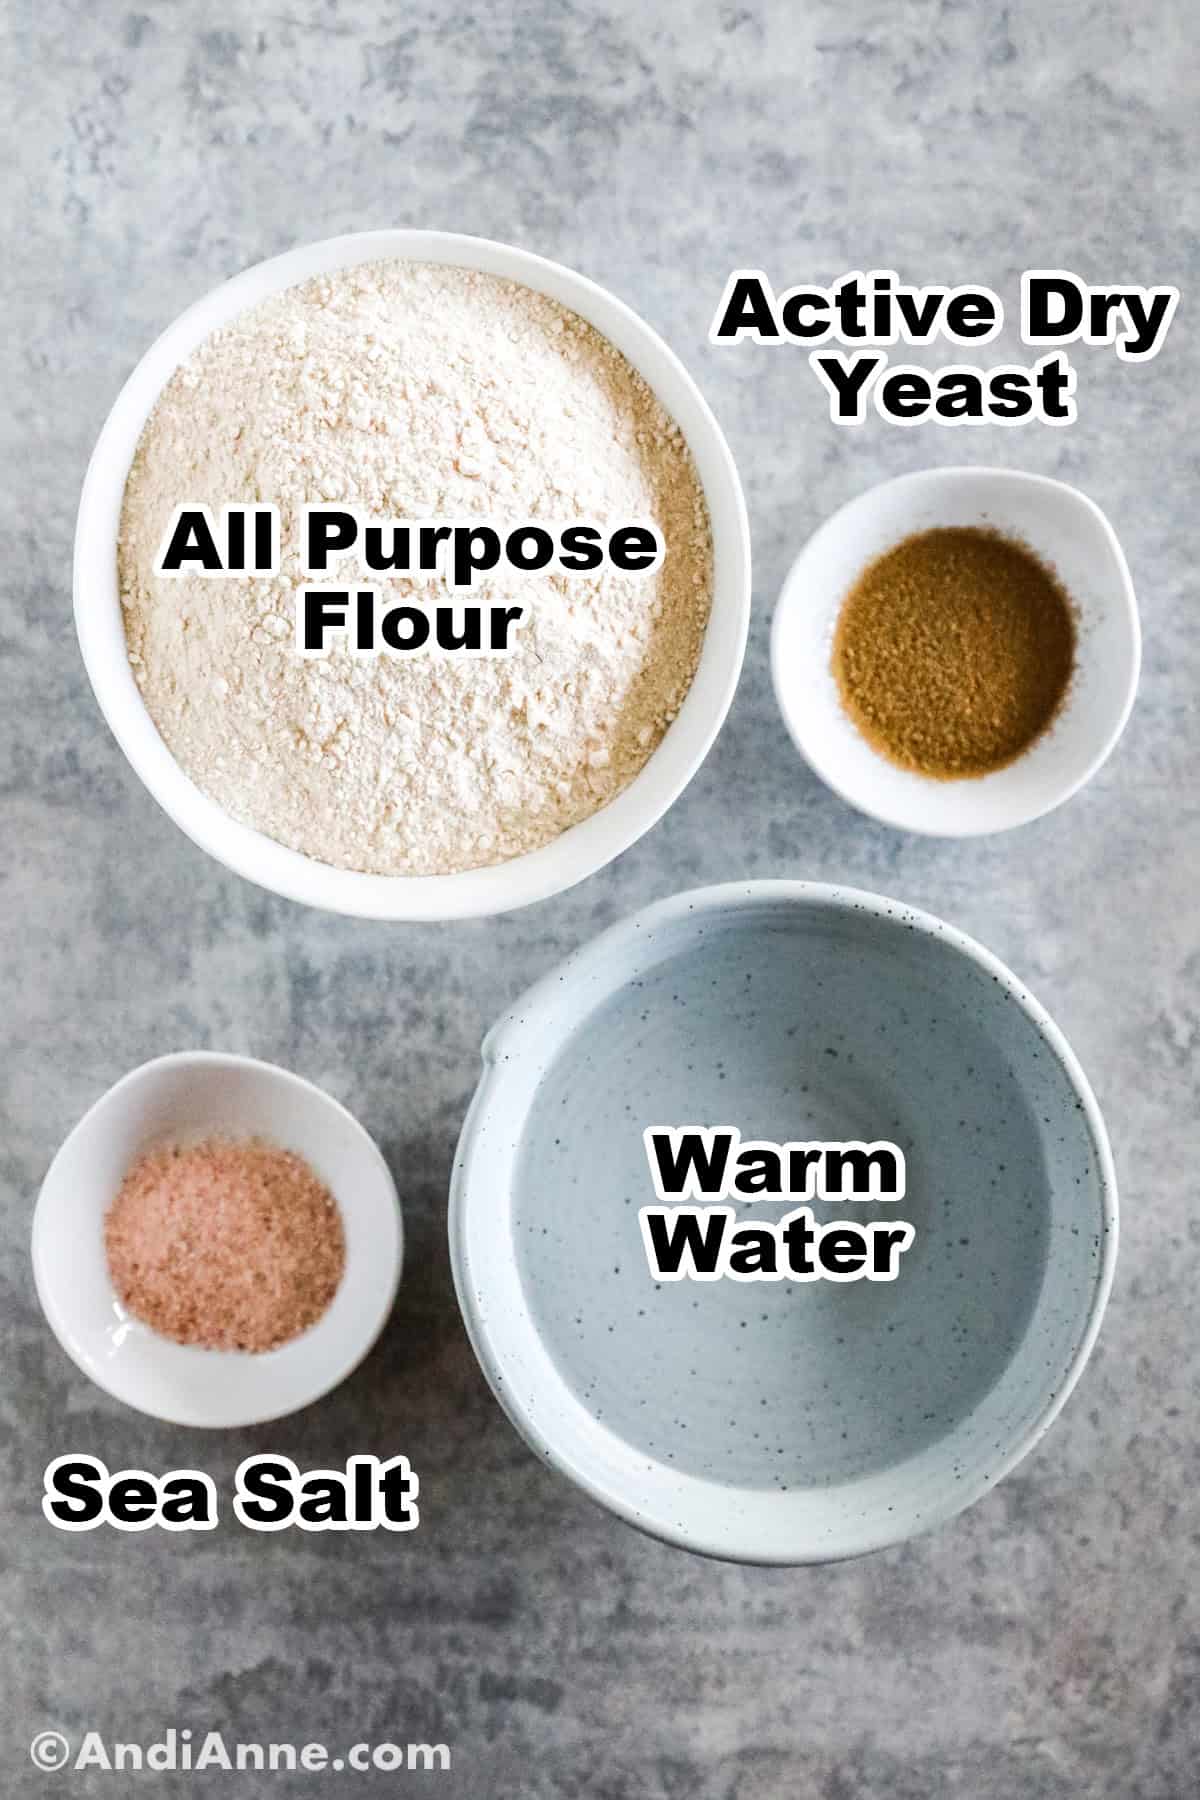
- 3 cups all-purpose flour
- 2 tsp active dry yeast
- 1 ½ tsp sea salt
- 2 cups warm water
Do I have to use a dutch oven?
No, you can use any oven-safe pot with a lid. I haven't tried it personally, but I've heard many people have success with it. The pot must be deeper with a fitted oven-safe lid.
How To Make Dutch Oven Bread
Full ingredients and instructions are also in the recipe card at the bottom of this blog post.
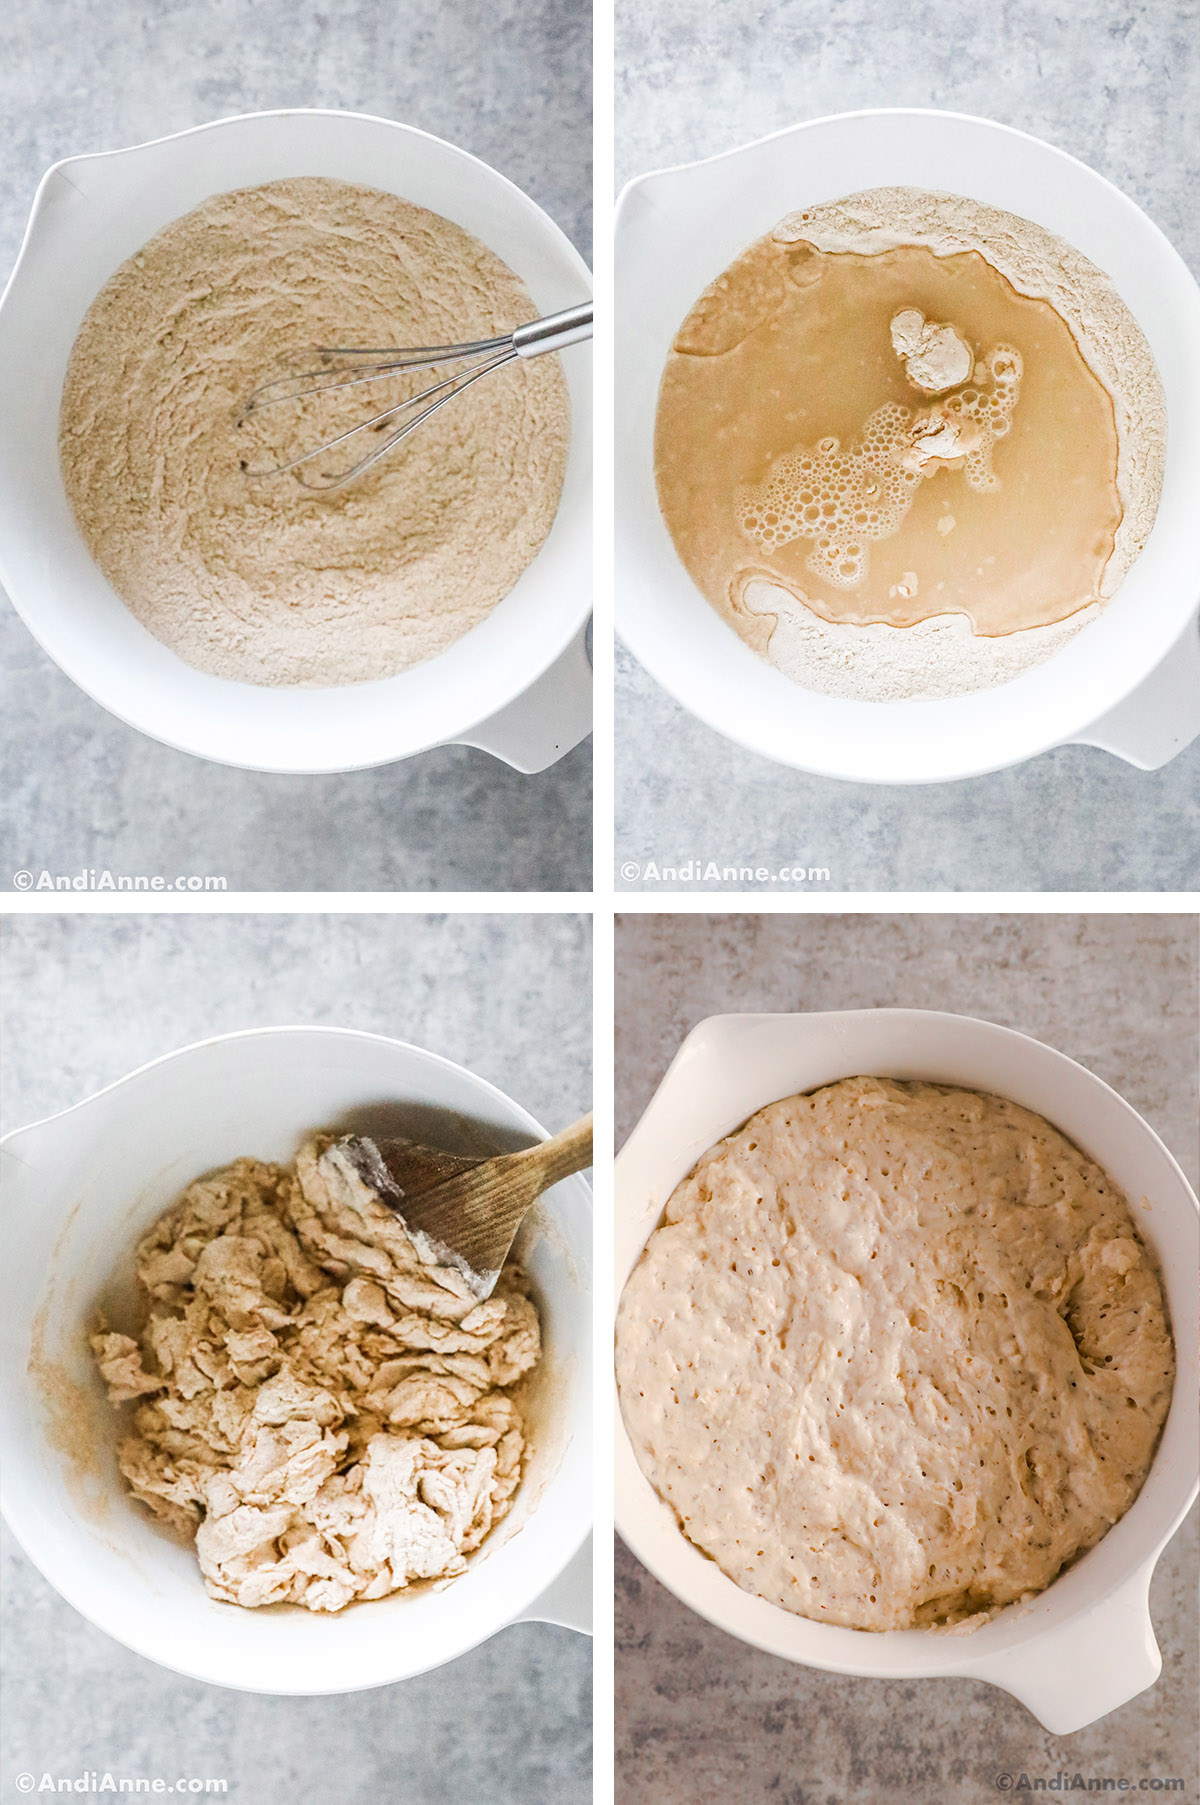
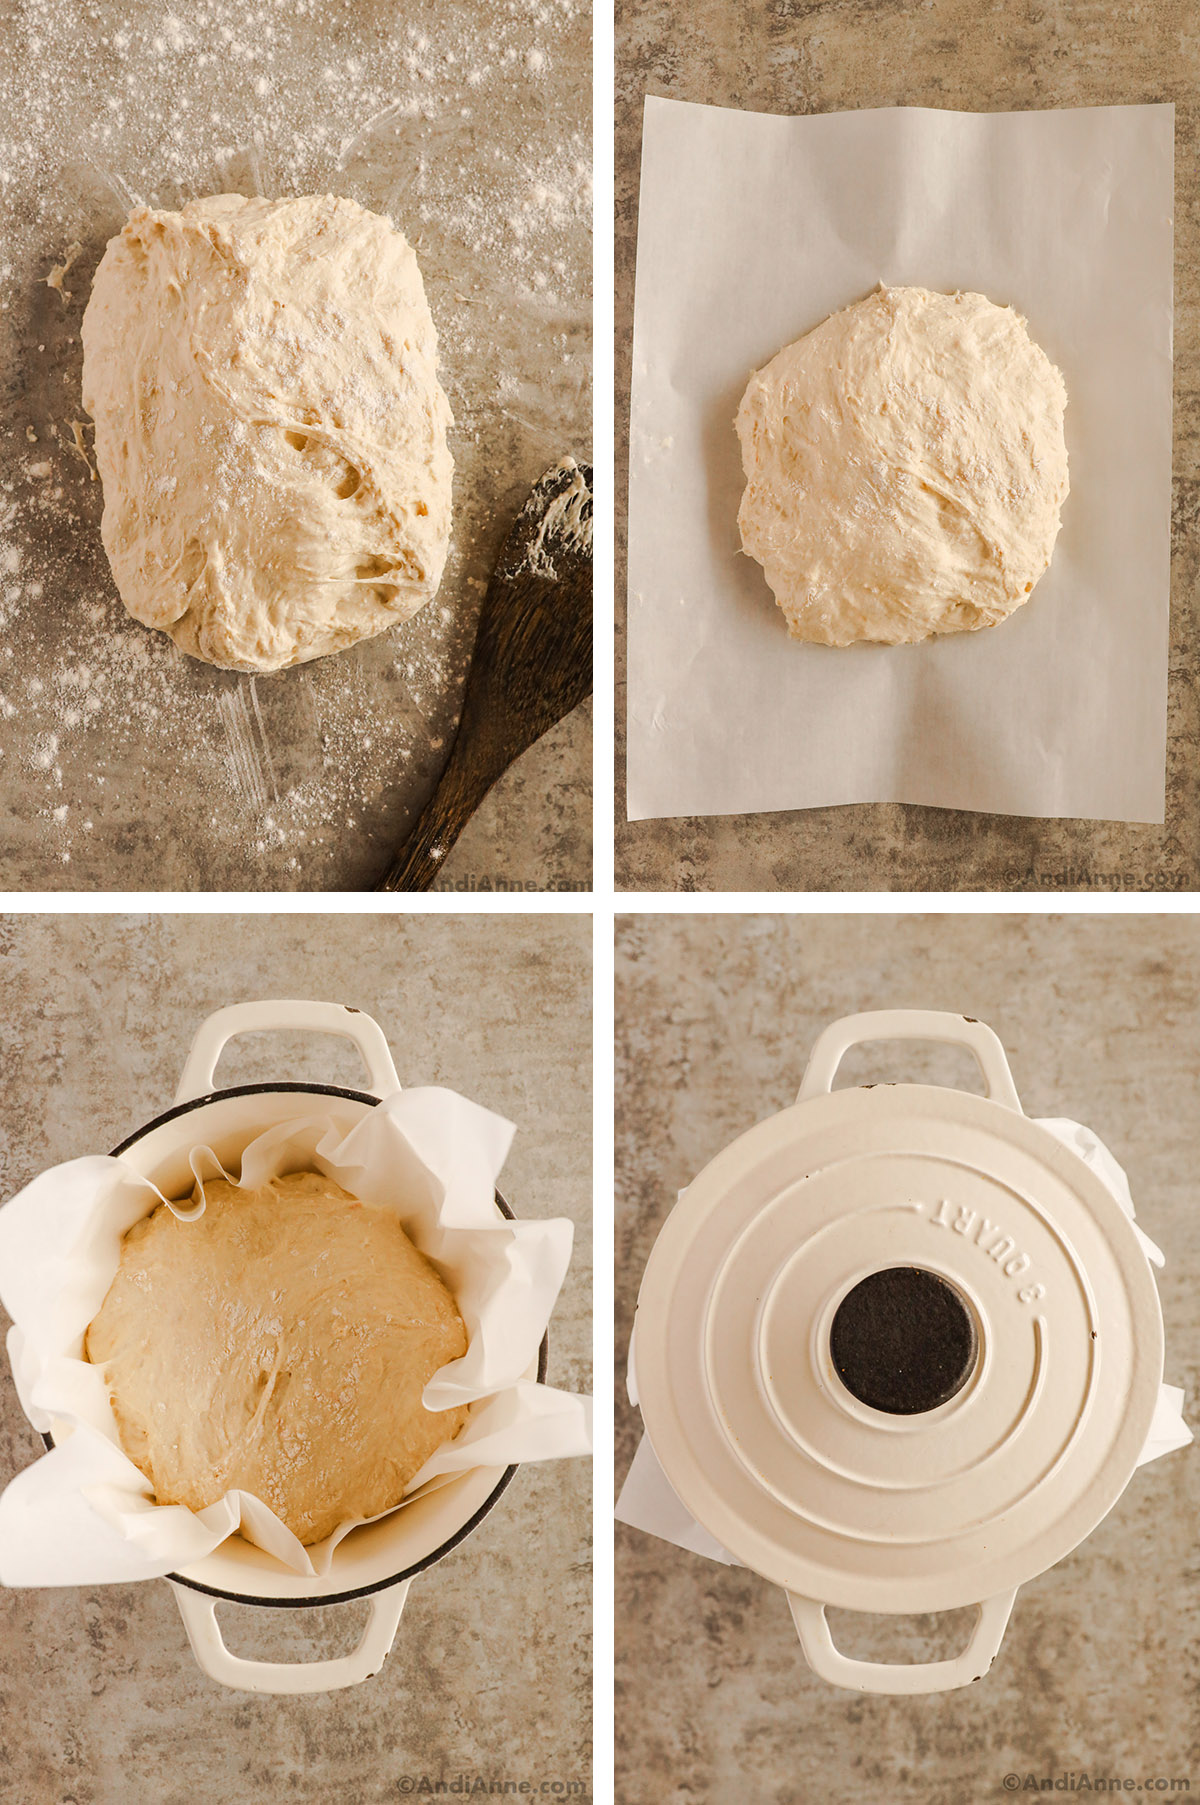
STEP 1: In a large bowl, whisk together 3 cups of all-purpose flour, 2 tsp active dry yeast and 1 ½ tsp salt. Now add 2 cups of warm water and mix together.
STEP 2: Cover the bowl with plastic wrap and place in a warm dark place away from sunlight for 2-3 hours to allow the dough to rise.
STEP 3: Place the dutch oven in the oven and preheat the oven to 450℉. The pot will be hot!
STEP 4: Now scoop the dough onto a piece of parchment paper and sprinkle a little flour on top. Place dough with parchment paper in the hot dutch oven pot.
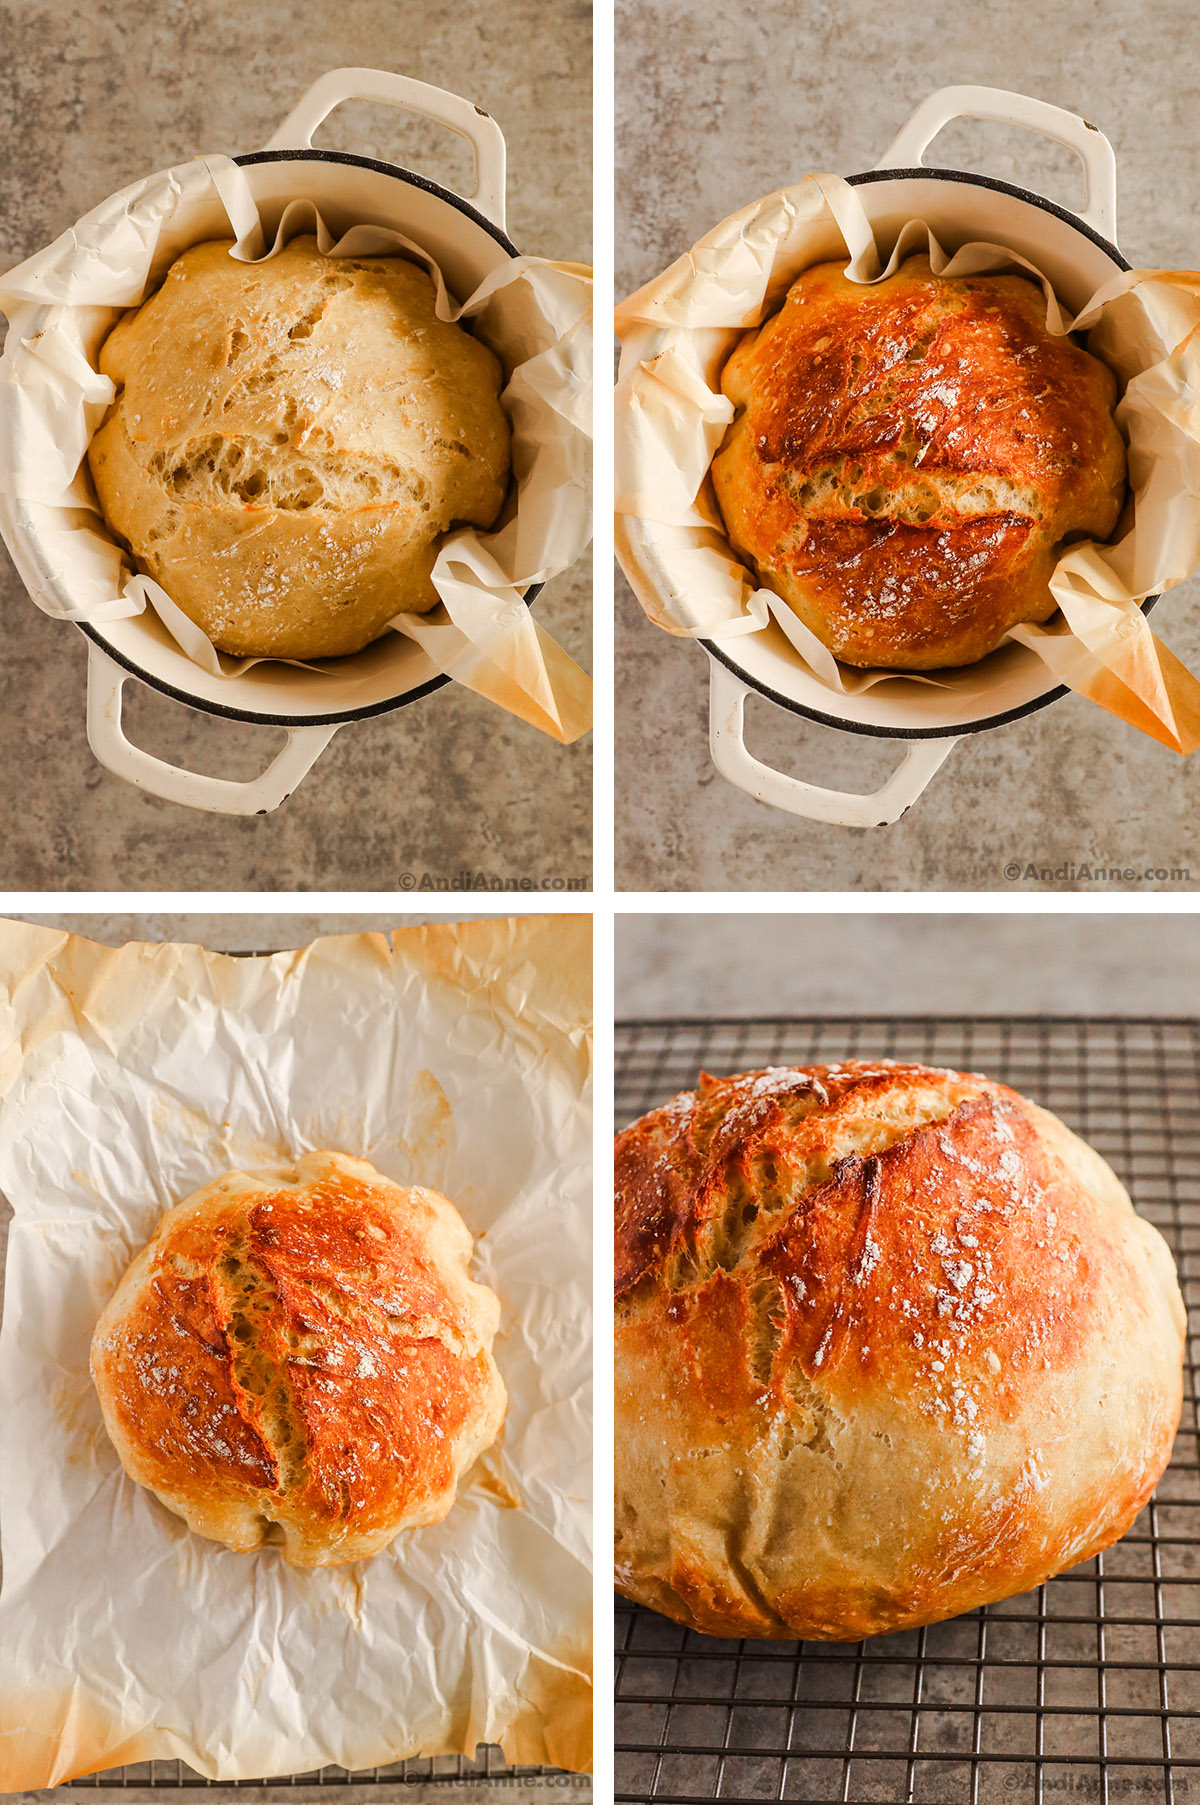
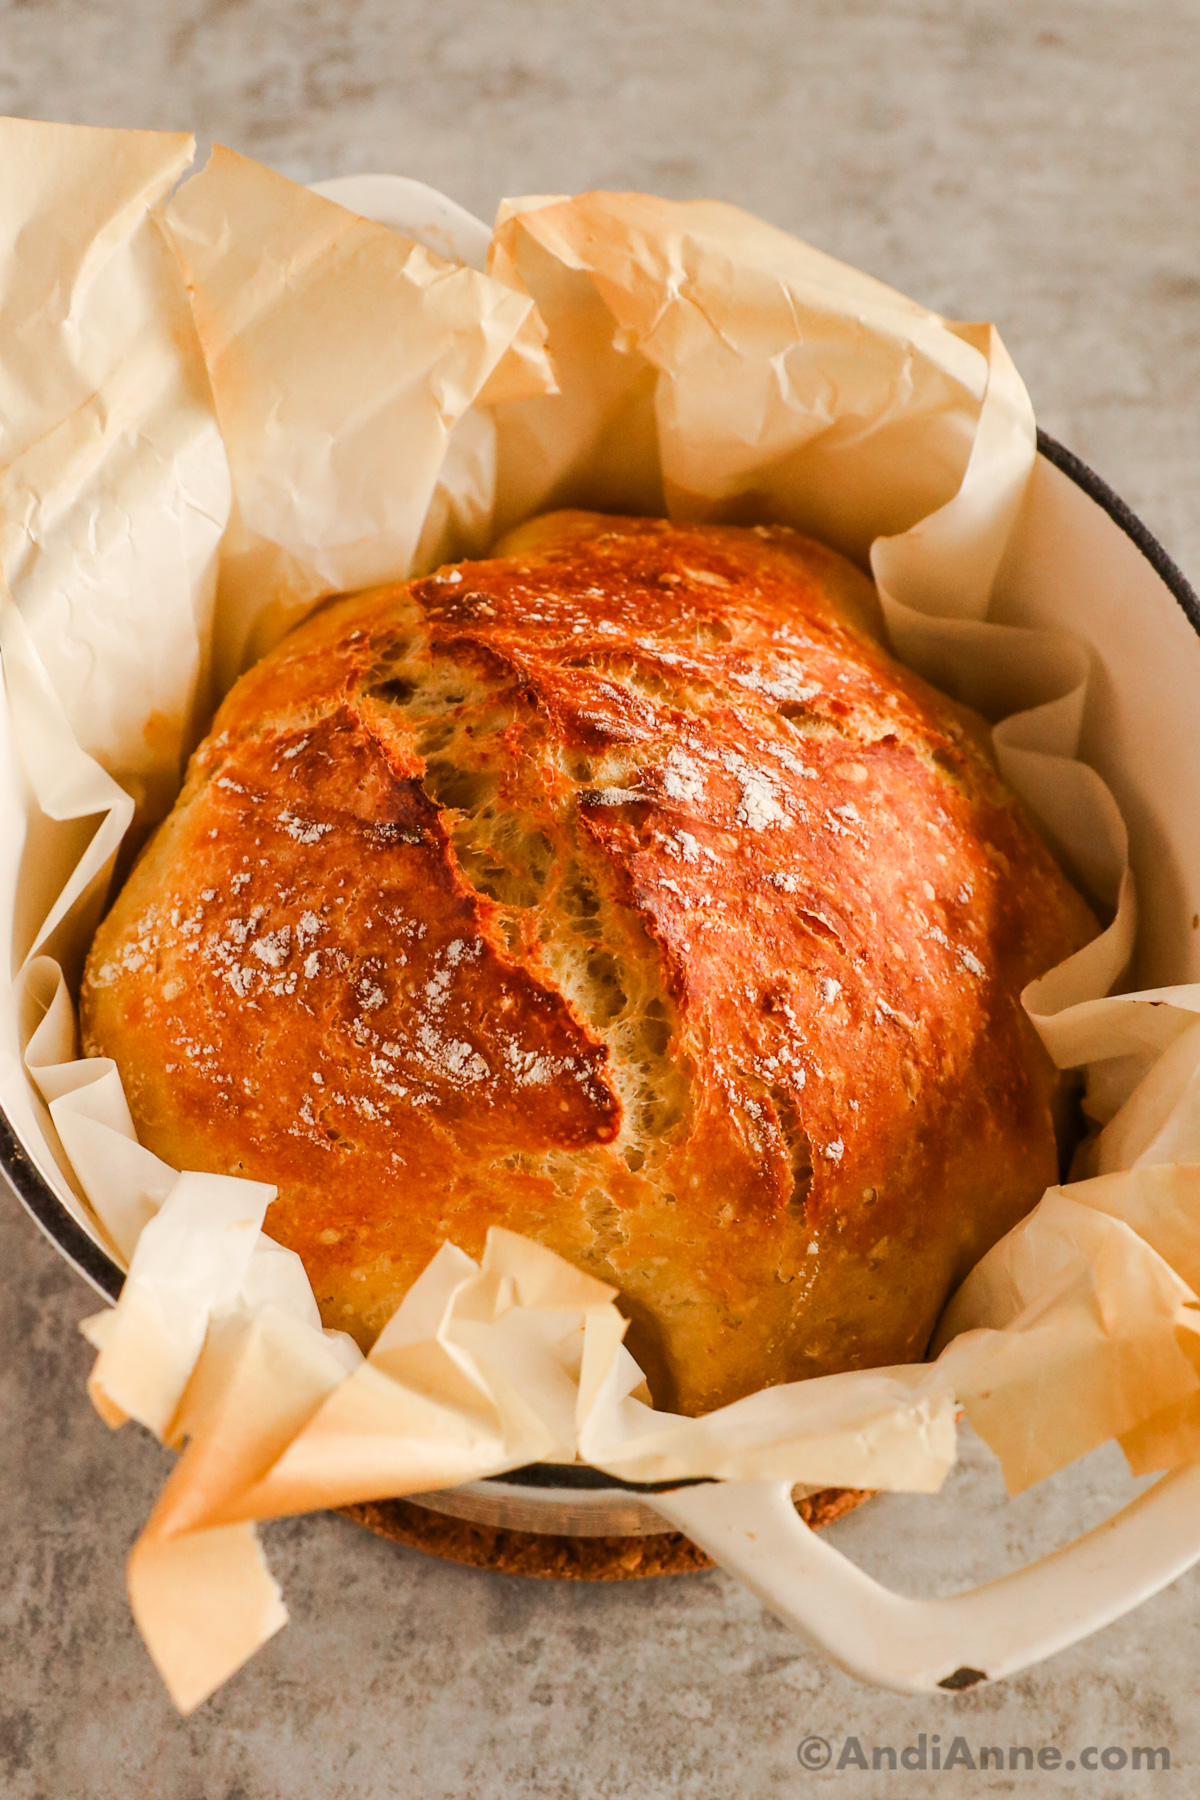
STEP 5: Cover with the lid and bake for 30 minutes. Next, remove the lid and bake for an additional 15 minutes uncovered. Let the bread cool enough to handle then transfer to a wire rack to cool completely. Use a bread knife to slice and serve.
A dutch oven is a wonderful vessel to cook bread in because it distributes heat all around the dough as it bakes, creating an even crunchy crust. I love this method because it's easy for anyone who isn't a pro bread maker (like myself). This method is basically foolproof.
Recipe Tips
- Use active dry yeast for this recipe. This will help the bread to slowly rise, which is the key to creating a no-knead bread. Be sure to use a fresh package of yeast for best results.
- You don't have to use bread flour for this recipe. You can use all-purpose flour or half whole wheat, half all-purpose.
- The water should be room temperature, not hot and not cold. Anything hotter than 105°F (40°C) could potentially kill the yeast. If this happens the dough will not rise.
- Hot fresh bread is the best time to serve! It will have a crispy crust and warm fluffy inside.
- The parchment paper created creases in my bread as it baked. I don't think this is a big deal, but if you want a perfectly round loaf, then grease the inside of the dutch oven and place the dough directly in there to bake.
How To Store Leftovers
- To Store - This bread can be stored at room temperature and wrapped tightly in plastic wrap. It will stay freshest for up to two days and will start to go stale after that. But stale bread makes great toast, french toast, and bread crumbs!
- To Freeze - I recommend slicing the bread first before freezing. Wrap the bread tightly with plastic wrap and then add it to a freezer bag. Remove as much air as possible and the loaf can be stored in the freezer for up to 6 months.
Tools For This Recipe
(Amazon affiliate links) - Check out all of my kitchen essentials here.
- 3.5 Qt Cast Iron Dutch Oven - Same size as the one I used in the pictures. It's perfect for sauce making and one of my favorite pots.
- Parchment Paper Sheets - Pre-cut parchment paper sheets make baking so much easier! I use these for all my recipes.
- Measuring Spoons - I love these magnetic ones which stay nice and organized together when storing them
Dutch Oven Bread
Tap Stars To Rate!
Ingredients
- 3 cups all purpose flour
- 2 tsp active dry yeast
- 1 ½ tsp sea salt
- 2 cups warm water
Instructions
- In a large bowl, whisk together 3 cups of all-purpose flour, 2 tsp active dry yeast and 1 ½ tsp salt. Now add 2 cups of warm water and mix together.
- Cover the bowl with plastic wrap and place in a warm dark place away from sunlight for 2-3 hours to allow the dough to rise.
- Place the dutch oven in the oven and preheat the oven to 450℉. The pot will be hot!
- Now scoop the dough onto a piece of parchment paper and place it in the hot dutch oven pot. Cover with the lid and bake for 30 minutes. Next, remove the lid and bake for an additional 15 minutes. Let the bread cool enough to handle then transfer to a wire rack to cool completely. Use a bread knife to slice and serve.
Nutrition
Nutrition info is auto-calculated and meant to be an approximation only.


V says
I am waiting for my bread to rise but I’m a little bit worried that this recipie is legit. I mixed it once and it was like soup, so I felt that I had measured something wrong. When I made it again it came out the same but this time I am letting it go. If the pics are real on this recipie then it is written wrong. I’ll get back.
Andi says
Hello. I am so sorry that this recipe didn't work out for you. That is certainly never my intent! I always want my recipes to be successful for readers!! These photos are from when I made the recipe, but I will have to revisit it again to see what happened for you. Thank you for your honest feedback.