Learn how to make delicious homemade marshmallows with this easy recipe that skips the artificial ingredients for a truly sweet, fluffy treat!
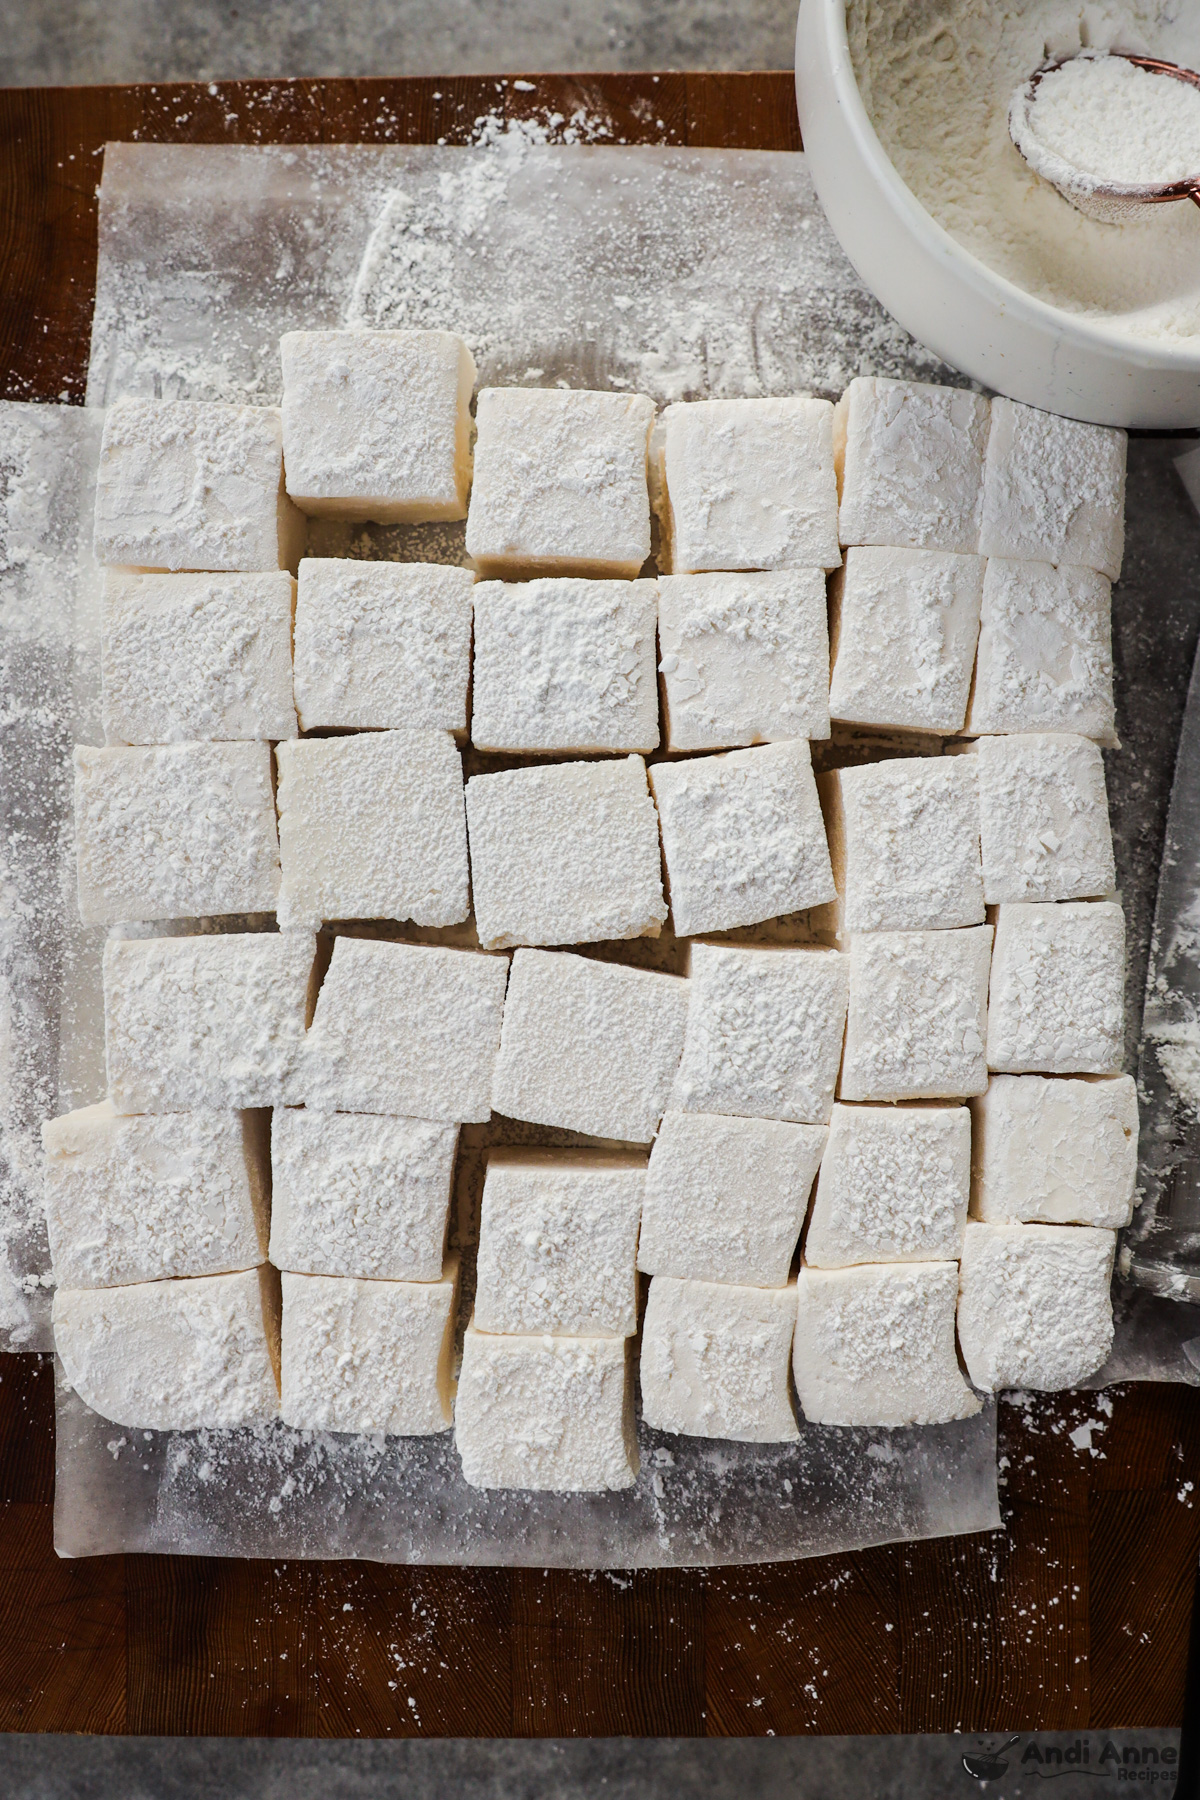
A Quick Overview
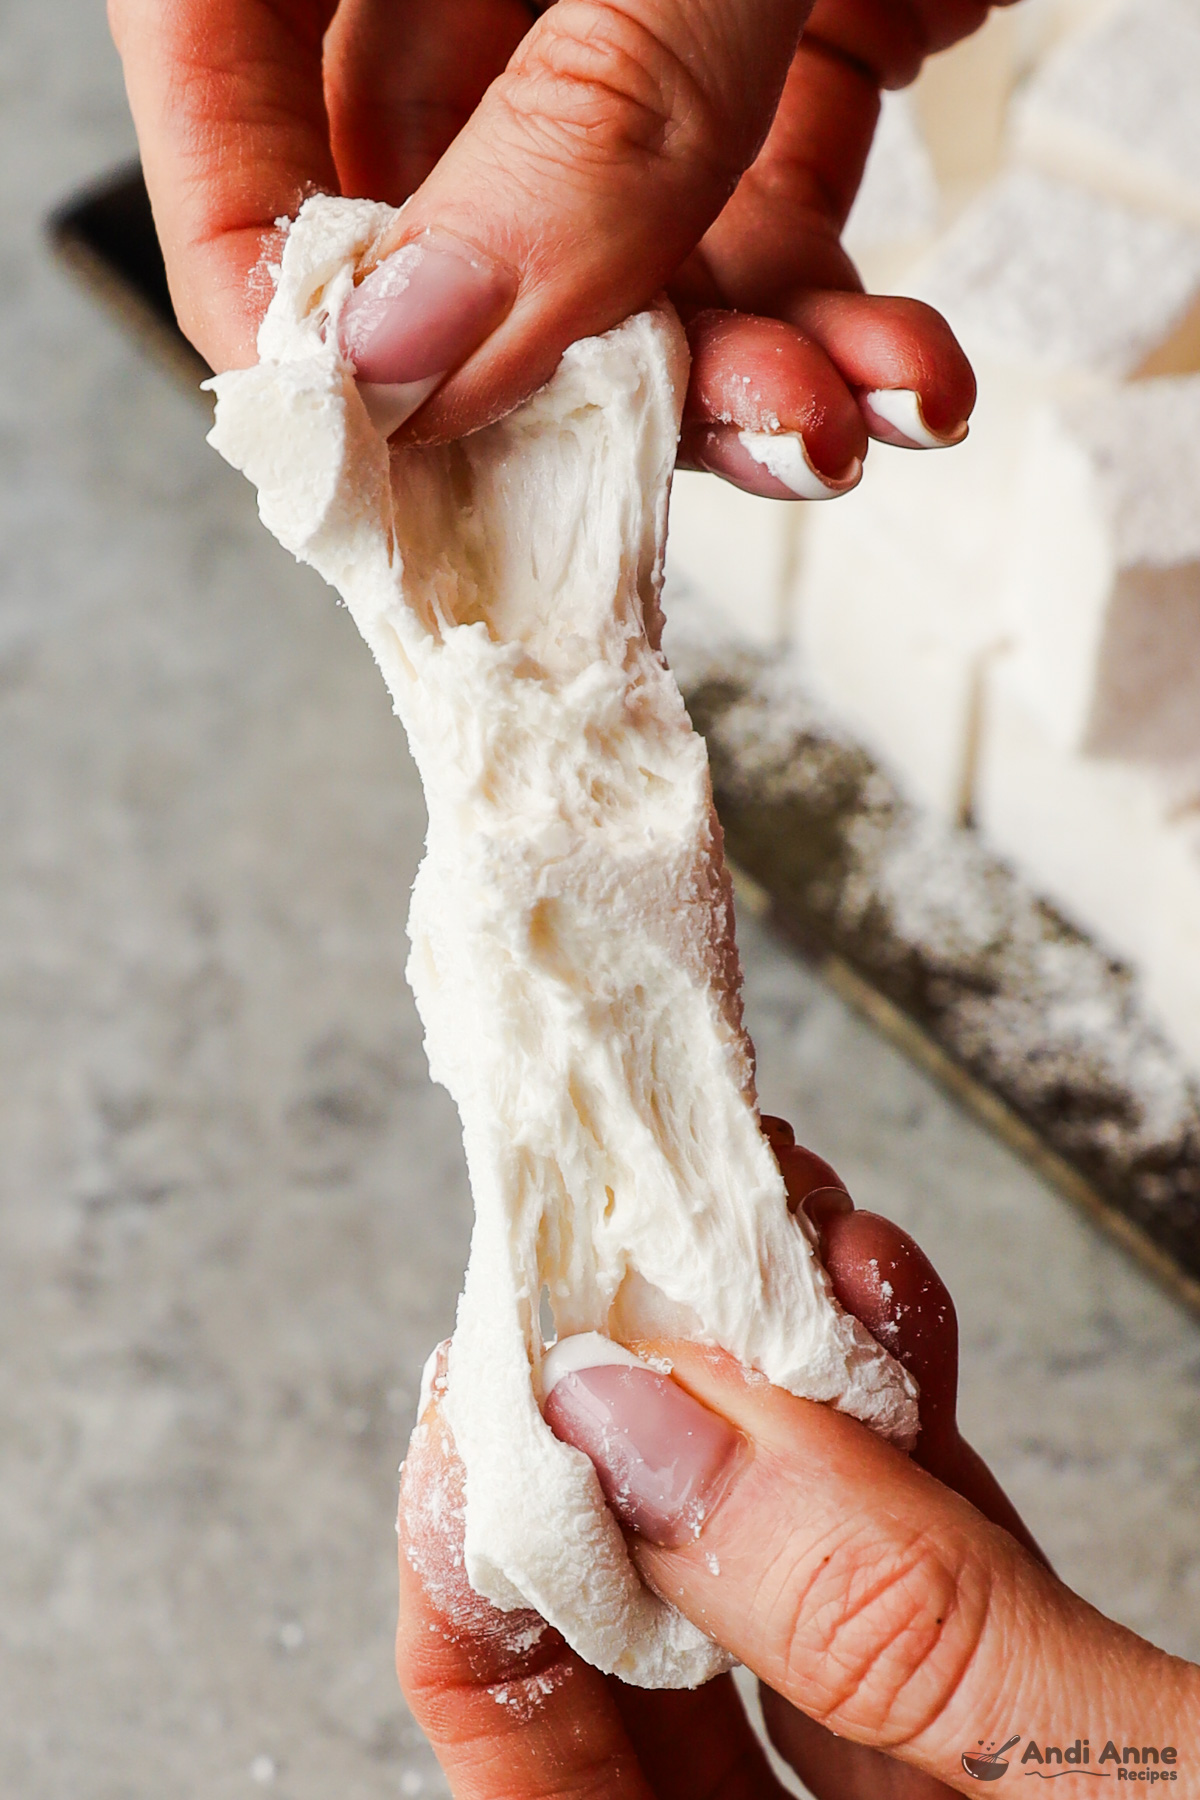
Oh my gosh, you guys, I am so in love with homemade marshmallows! This was my first time making them, and honestly, I was a little intimidated at first. You know how it is-there are so many steps that seem super important, and you don't want to mess anything up. But let me tell you, once I actually got into it, I realized it's so much easier than I thought!
First of all, the marshmallow liquid smells amazing as it's mixing. Like, you can already tell it's going to be good just from the smell! And the marshmallows themselves? Absolutely delicious. They taste so much better than store-bought ones-trust me. Plus, they're made without high fructose corn syrup or preservatives that you find in the packaged versions.
Now, there are a few key steps you want to make sure you follow when you're making these. I've added some tips throughout the recipe and made the important details bold so you won't miss them. But other than that, I have total faith that you'll be able to make these and share them with your family! Seriously, you got this. Can't wait to hear how they turn out!
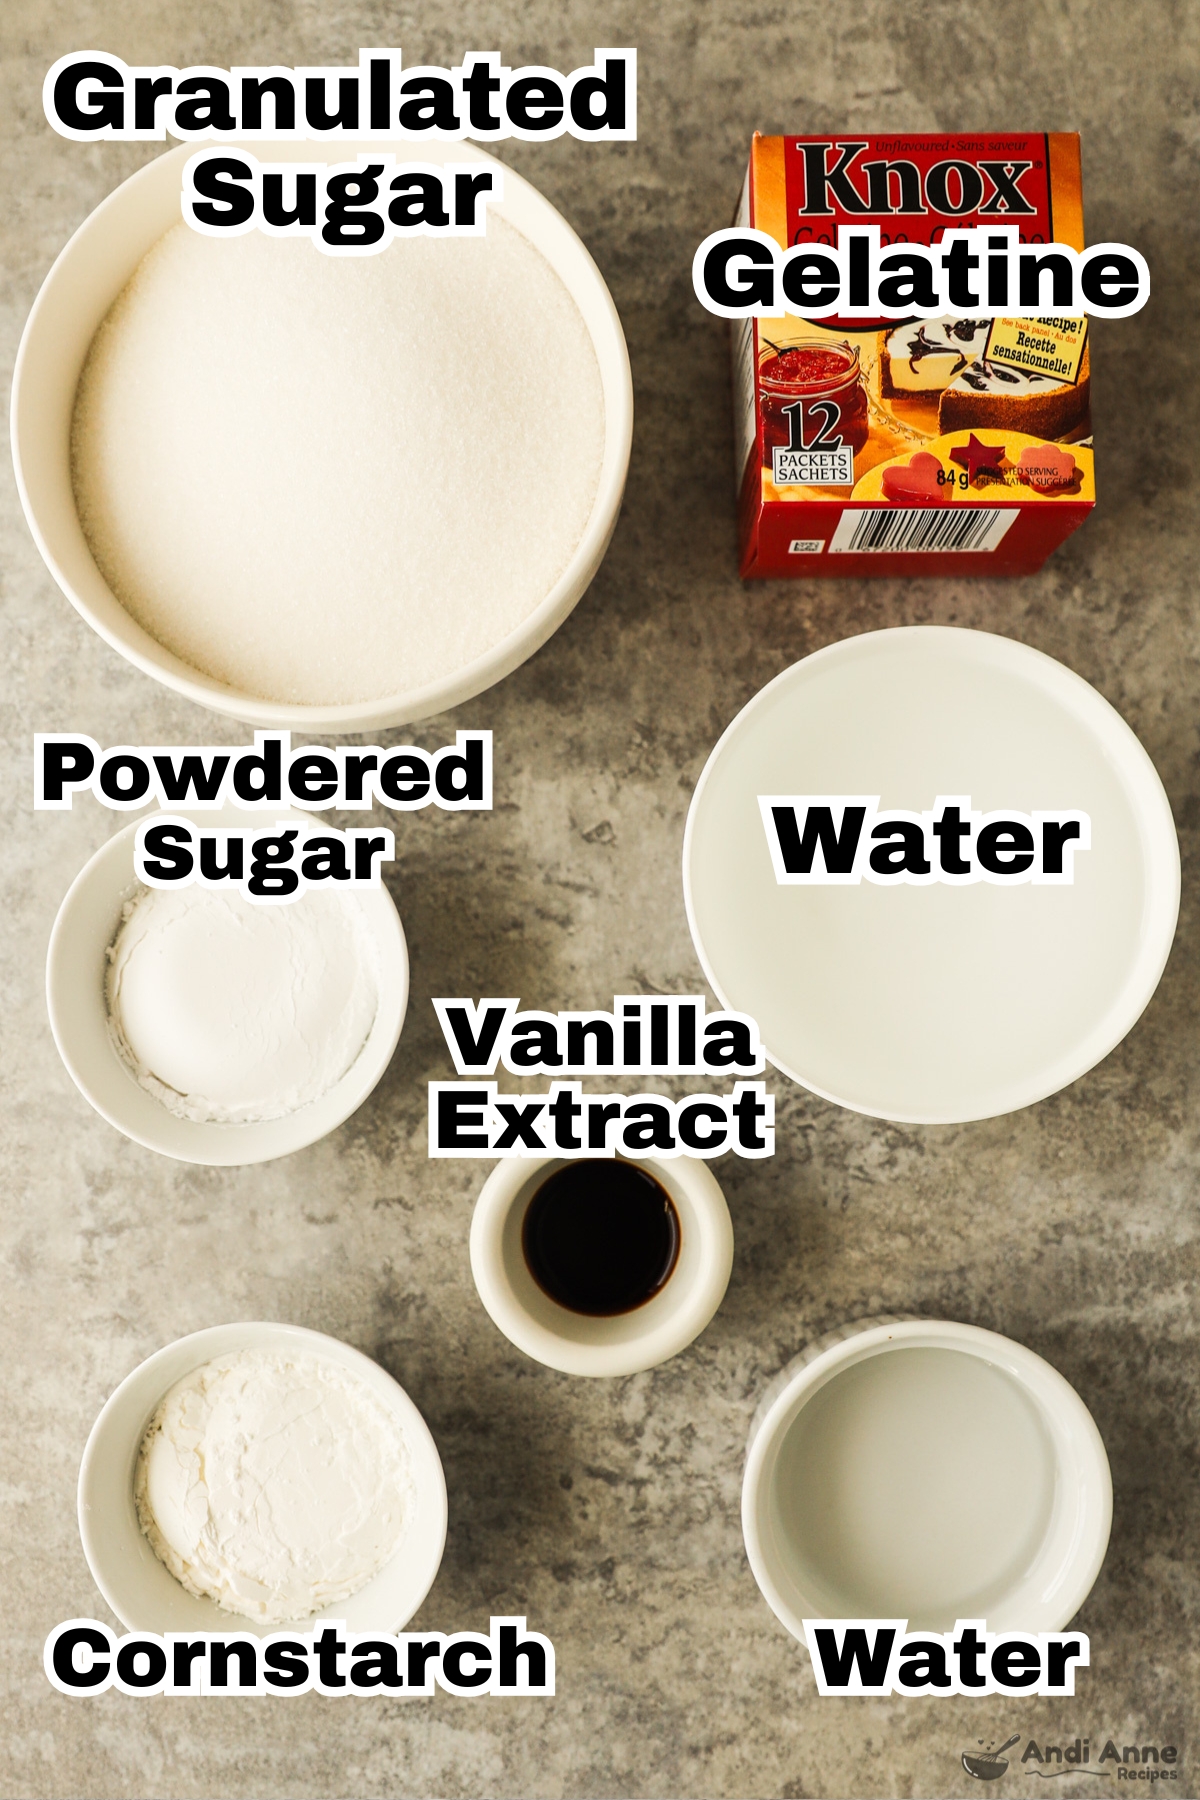
Recipe Ingredients
- 3 Tbsp gelatin - equals 3 packets knox gelatin
- ⅓ cup cold water - this water should be cold
- 3 cups granulated sugar
- 1 ½ cups water - doesn't matter what temp this water is
- 1 ½ tsp vanilla extract
- 2 Tbsp cornstarch
- 2 Tbsp powdered sugar
Kitchen Equipment You'll Need:
- 8x8 baking pan - this will give you the perfect thickness of marshmallows
- Candy thermometer - helps to figure out the temp for the sugar syrup, but it's also possible to make them without
- Parchment paper - needed to prevent marshmallows from sticking
- Nonstick cooking spray - essential for preventing marshmallows from sticking
- Electric hand mixer - For making the marshmallow fluff
How To Make Homemade Marshmallows
Full ingredients and instructions are also in the recipe card at the bottom of this blog post.
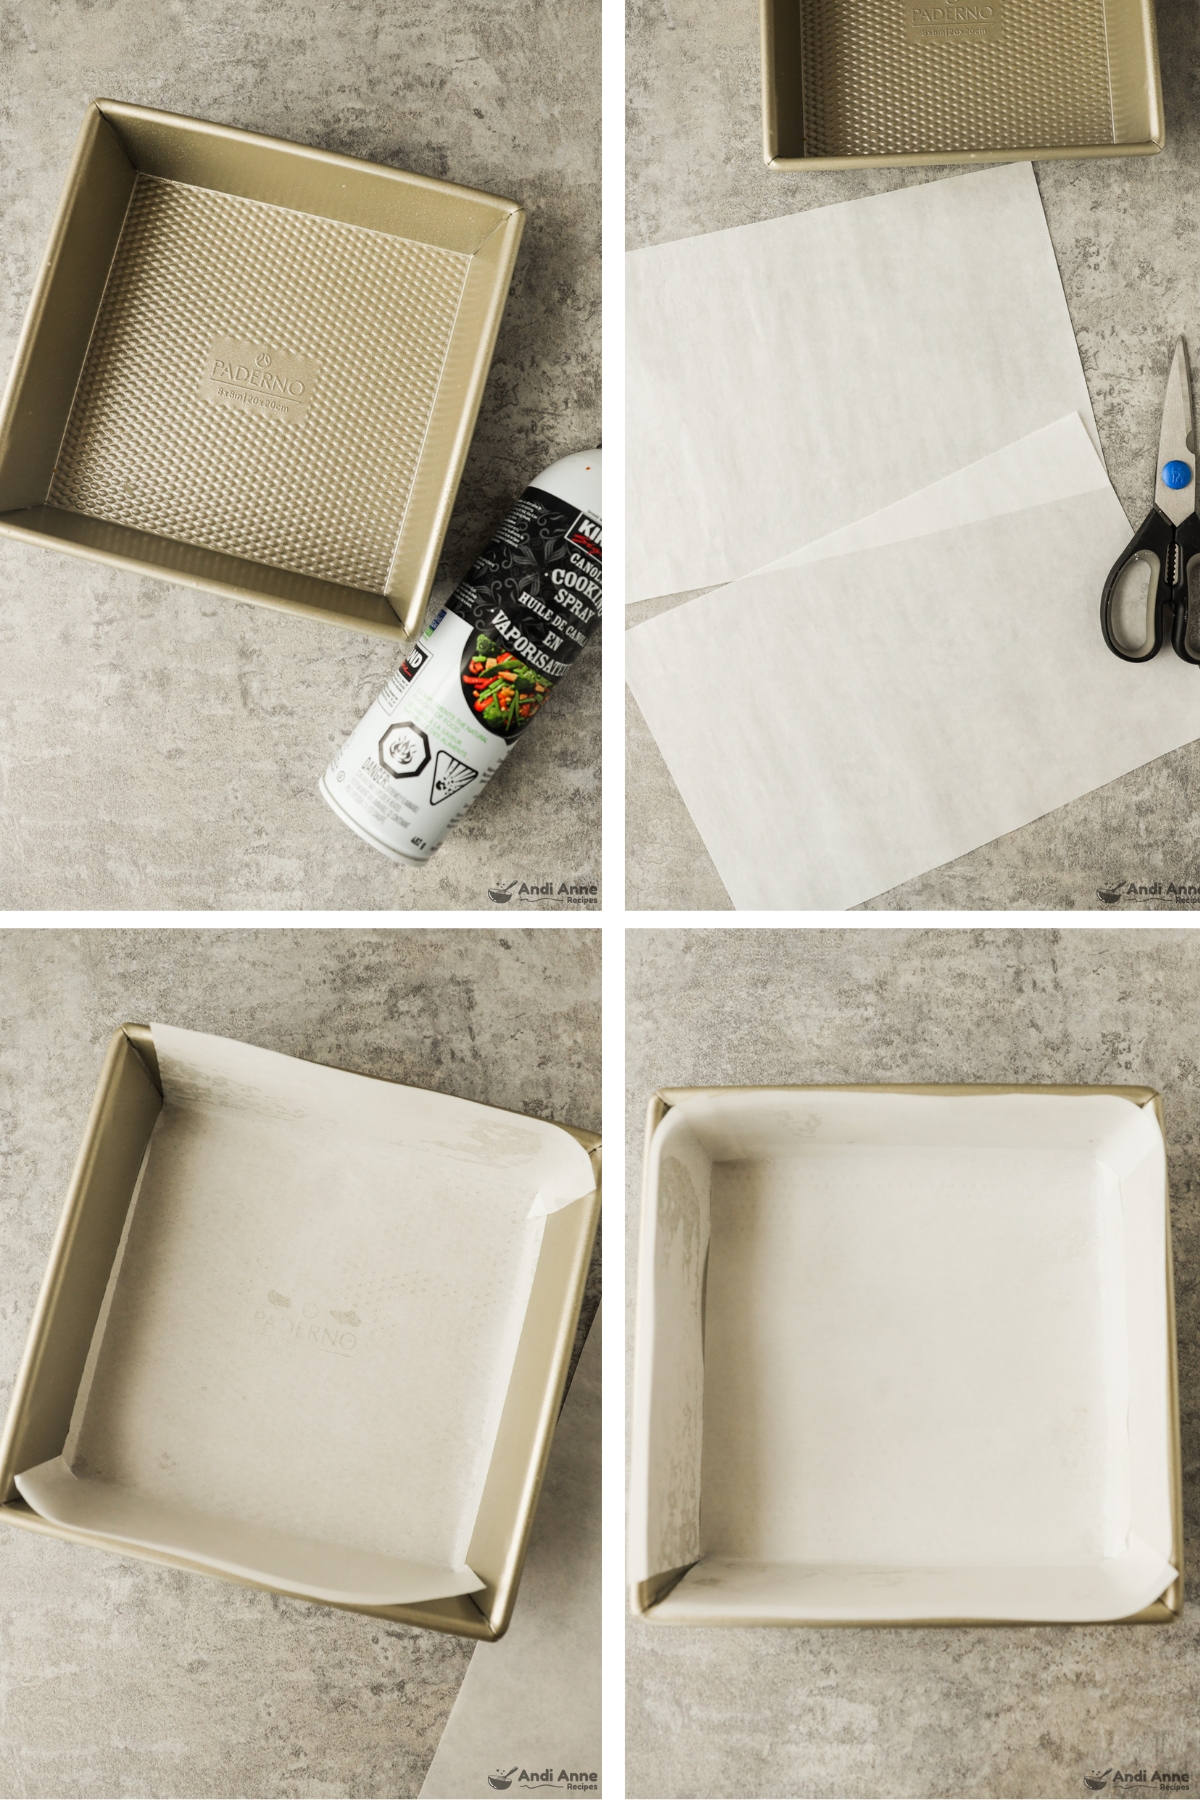
STEP 1 [PREPARE THE PAN]: Spray an 8x8 baking dish with nonstick cooking spray (The cooking spray will help parchment stay put). Cut two strips of parchment paper that are 8" wide. Place one strip in the pan so that it covers the bottom and sides. Next place the other parchment piece in the opposite direction (see photos above). Parchment paper should now cover the baking pan's bottom and sides.
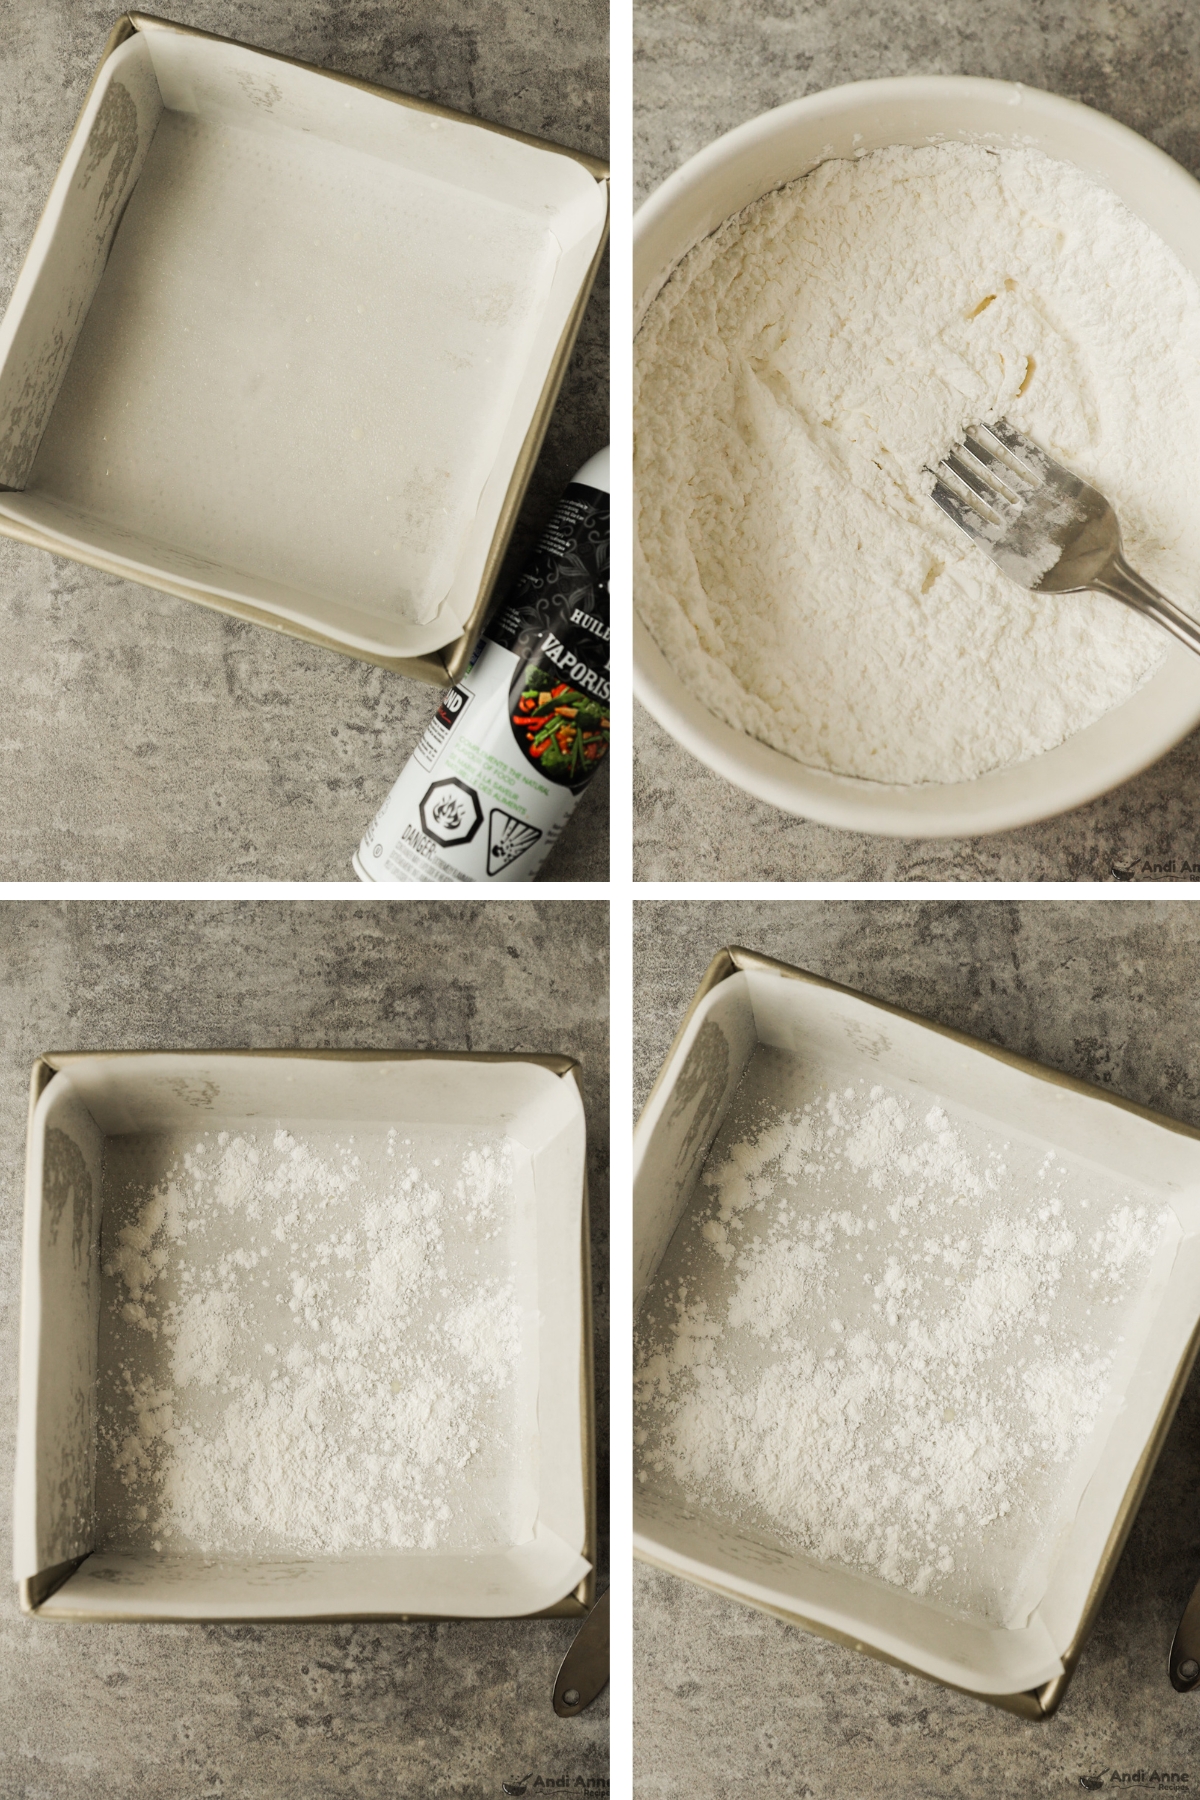
STEP 2: Now spray the parchment paper in the baking pan with nonstick cooking spray again.
STEP 3: In a small bowl, mix together 2 Tbsp cornstarch and 2 Tbsp powdered sugar. Sprinkle 1 Tbsp of this mixture into the baking pan. Shake the pan over the sink to help cover the bottom and sides with the powder. This is an important step so that the marshmallows won't stick!
TIP: The mixture of powdered sugar and cornstarch helps keep the marshmallows from sticking to your hands, pan, and each other. Coat the pan generously, and even sprinkle some on top of the marshmallows once they've set.
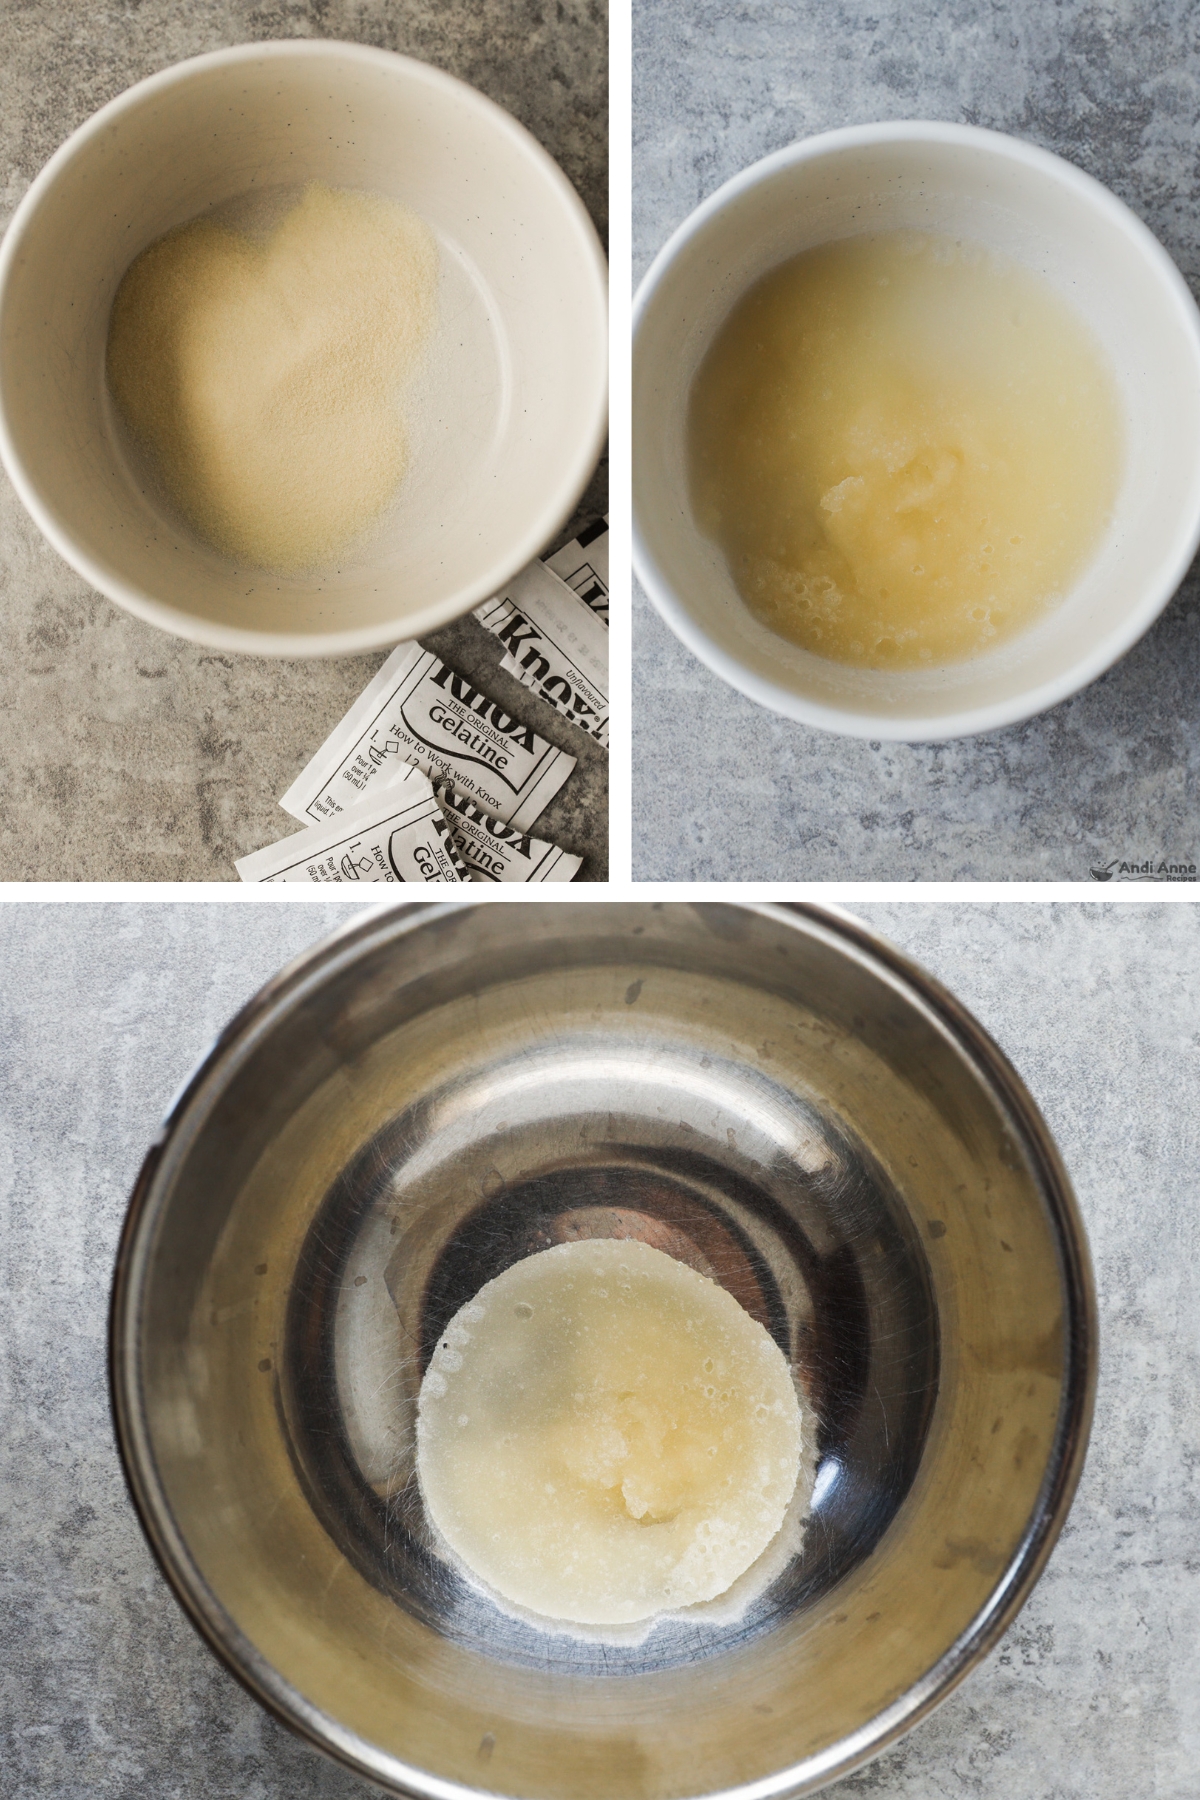
STEP 4 [SOAK THE GELATIN]: In a medium bowl, sprinkle 3 Tbsp of gelatin over ⅓ cup cold water. You do not need to mix together! Let the gelatin soak for a full 10 minutes to bloom and expand. It will be floppy like rubber. You can now transfer this to a large mixing bowl.
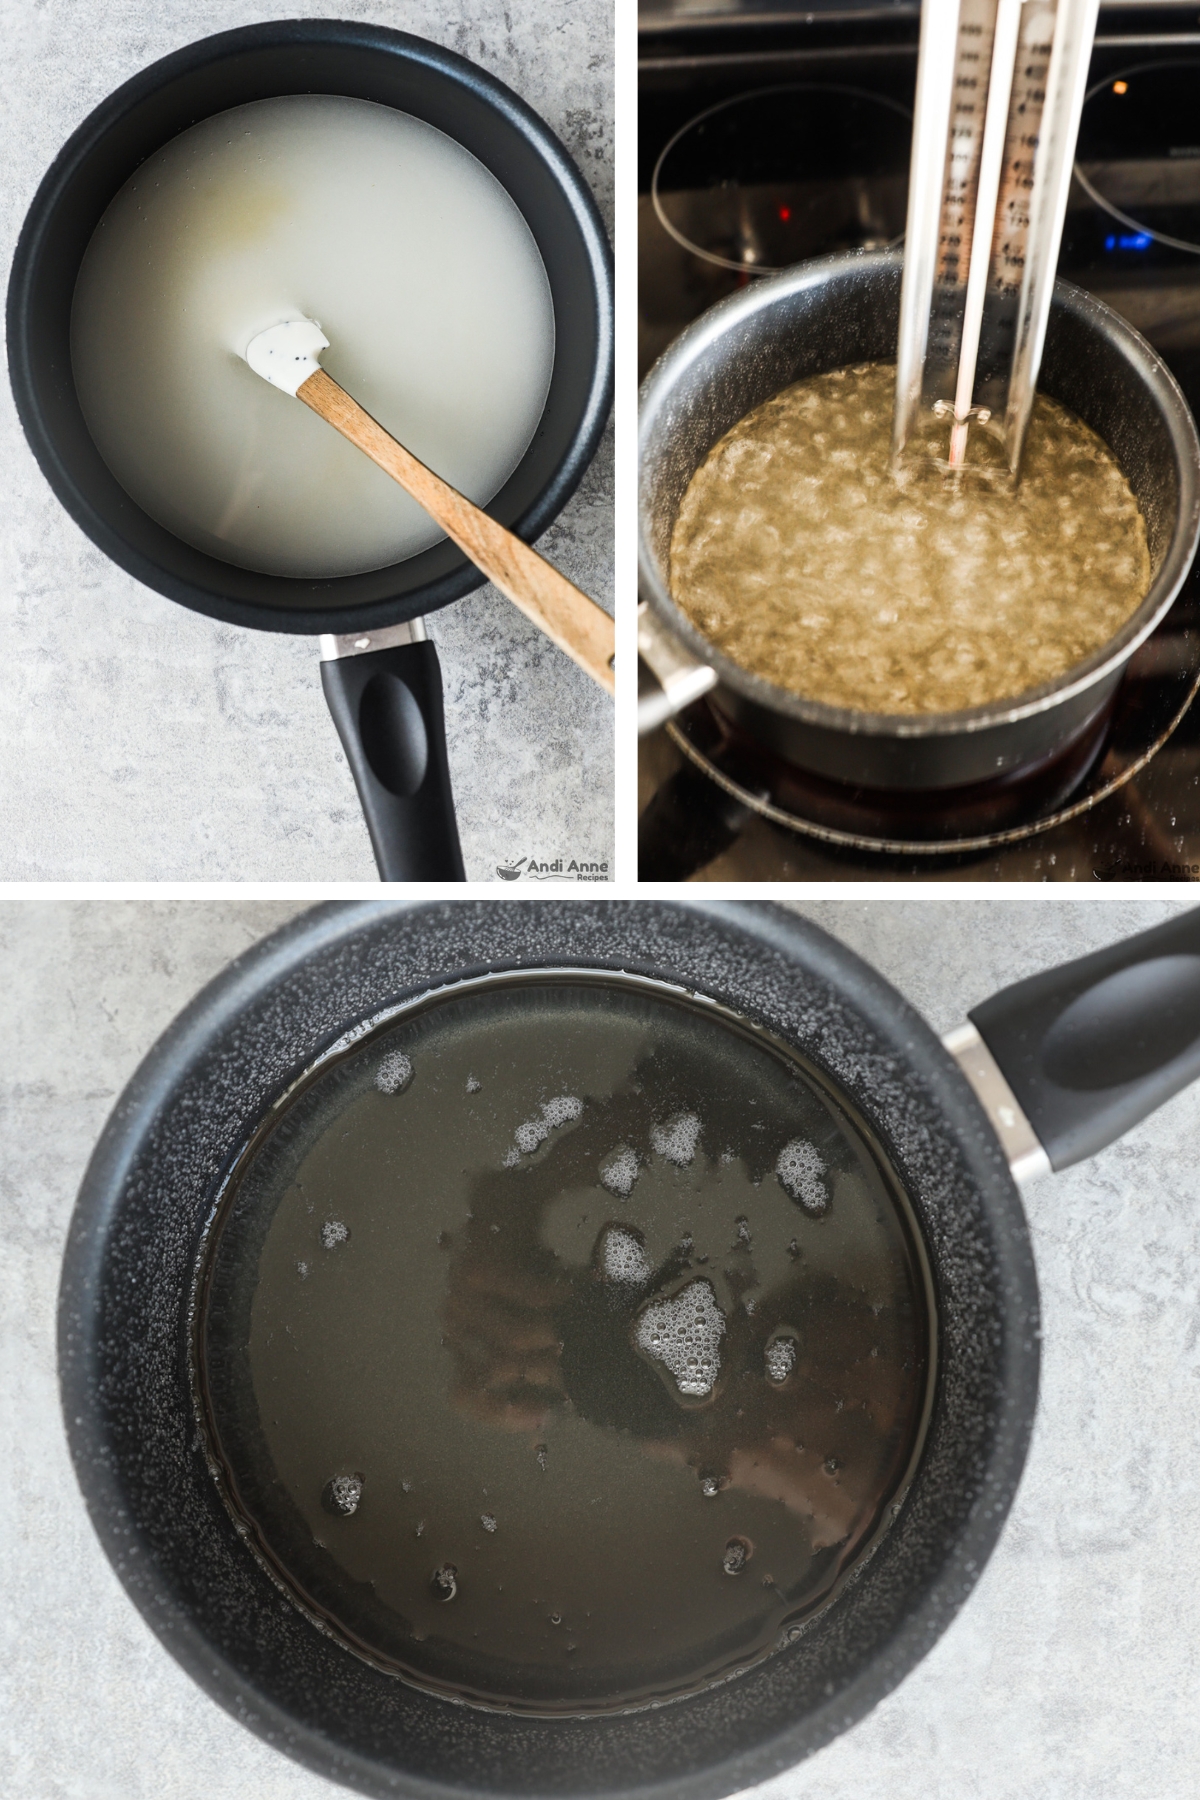
STEP 5 [MAKE THE SUGAR SYRUP]: In a small saucepan, combine 3 cups granulated sugar with 1 ½ cups water. Heat over medium-high heat, stirring occasionally, until the sugar has completely dissolved. Now turn the heat to low and continue simmering for about 10 minutes, without stirring, or until the mixture reaches 240°F (use a candy thermometer for this step). Remove the saucepan from the heat.
TIP: If you don't have a candy thermometer, it might still work - just be sure to set a timer and let this mixture simmer for a full 10 minutes on low heat without stirring!
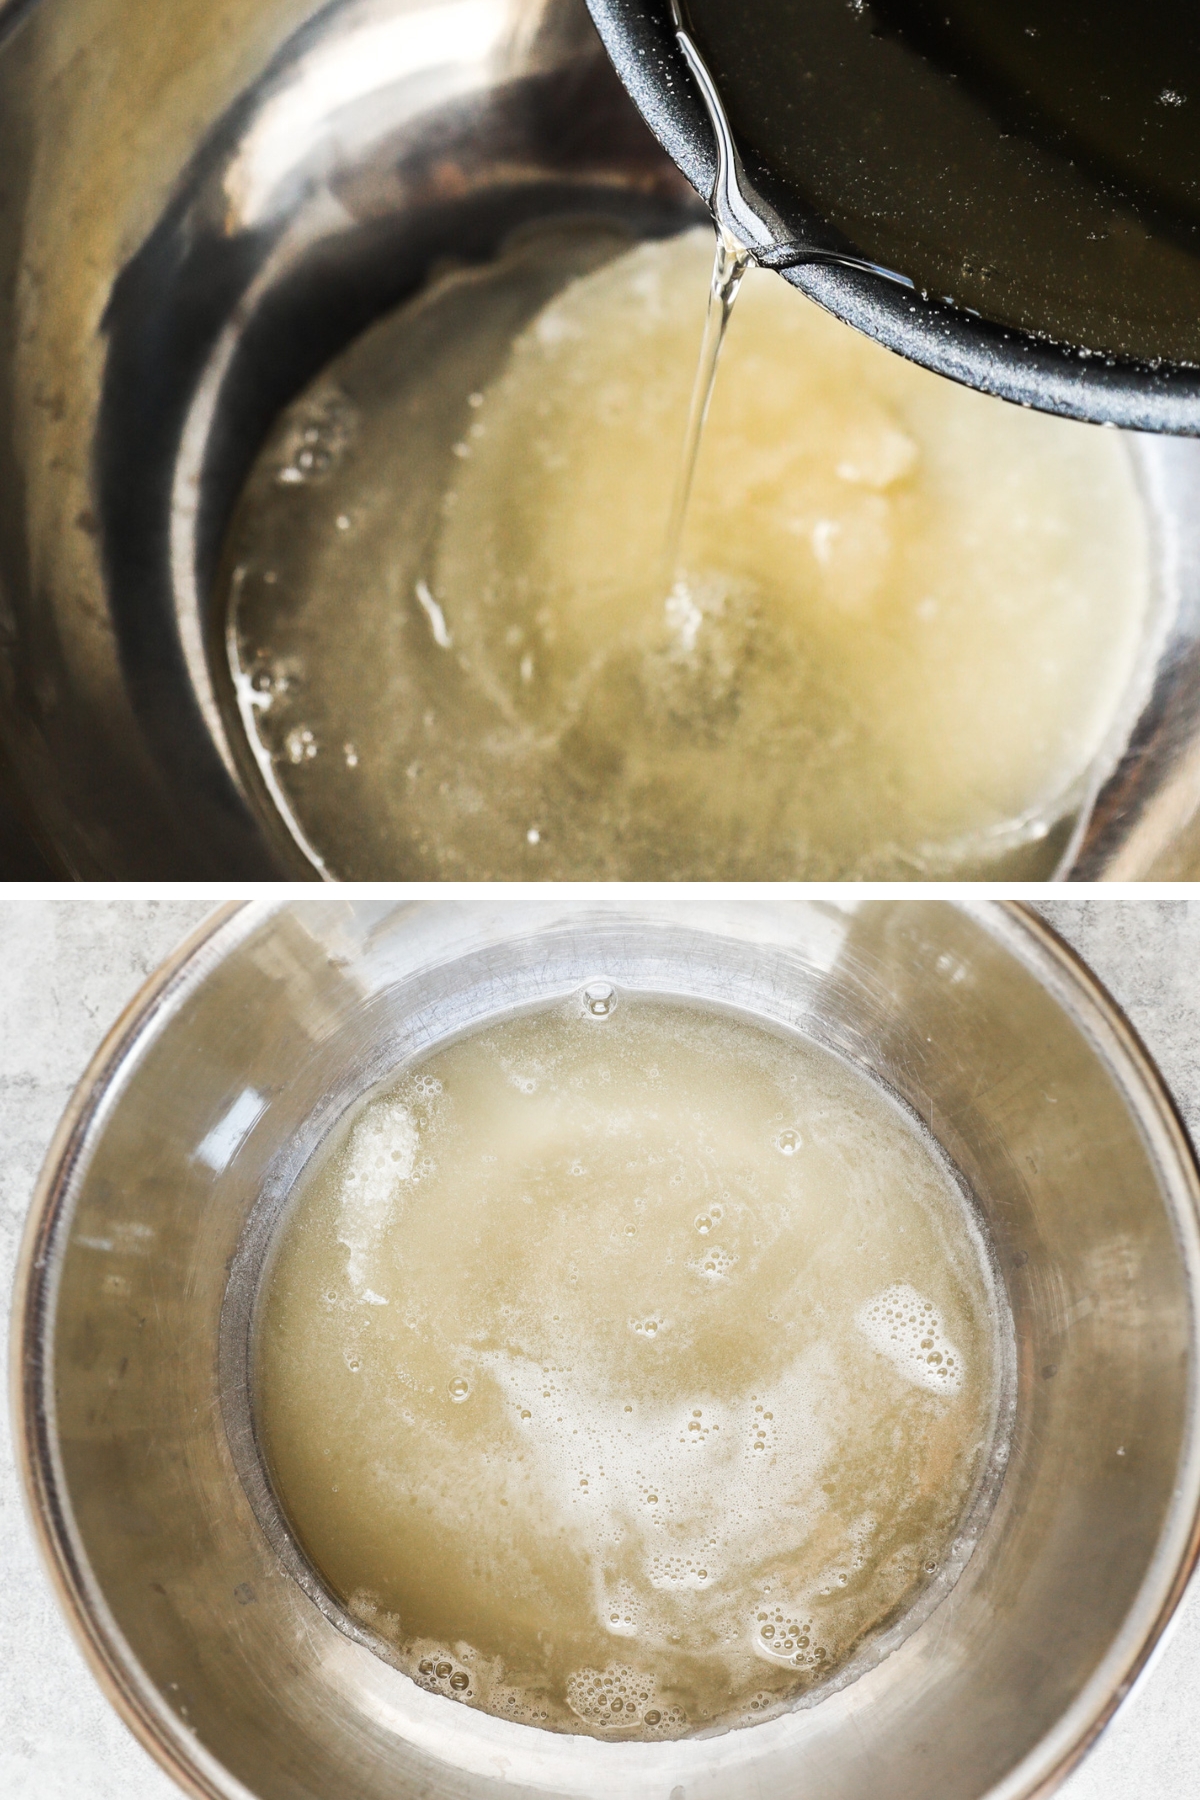
STEP 6 [COMBINE GELATIN AND SYRUP]: Slowly and carefully drizzle the hot sugar syrup you just boiled in the pot over the bloomed gelatin. Pour the syrup over the gelatin very slowly, more of a drizzle than pour-this should take about 90 seconds to do!
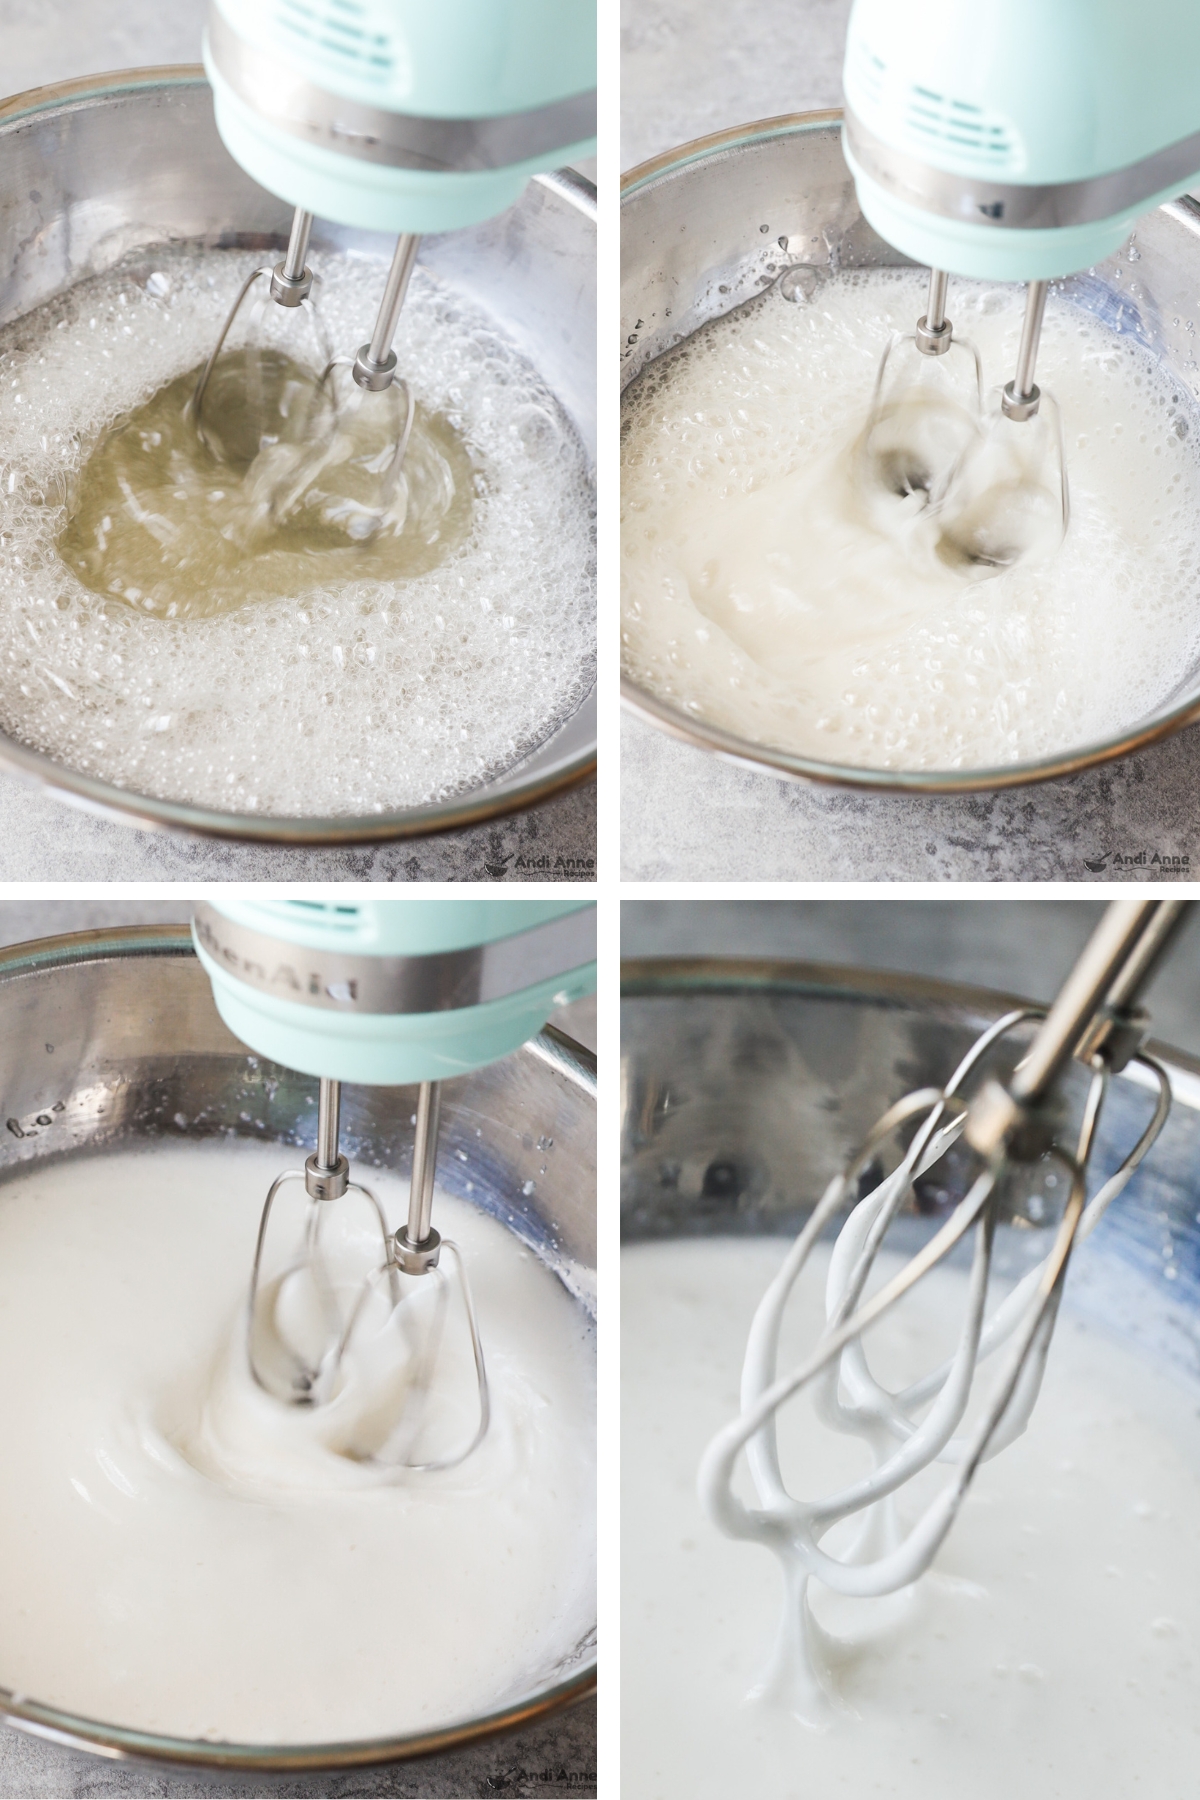
STEP 7 [MIX TO MAKE MARSHMALLOW FLUFF]: Using an electric hand mixer, beat everything together on a high speed for about 5 minutes, or until it turns white and thickens to a marshmallow fluff consistency.
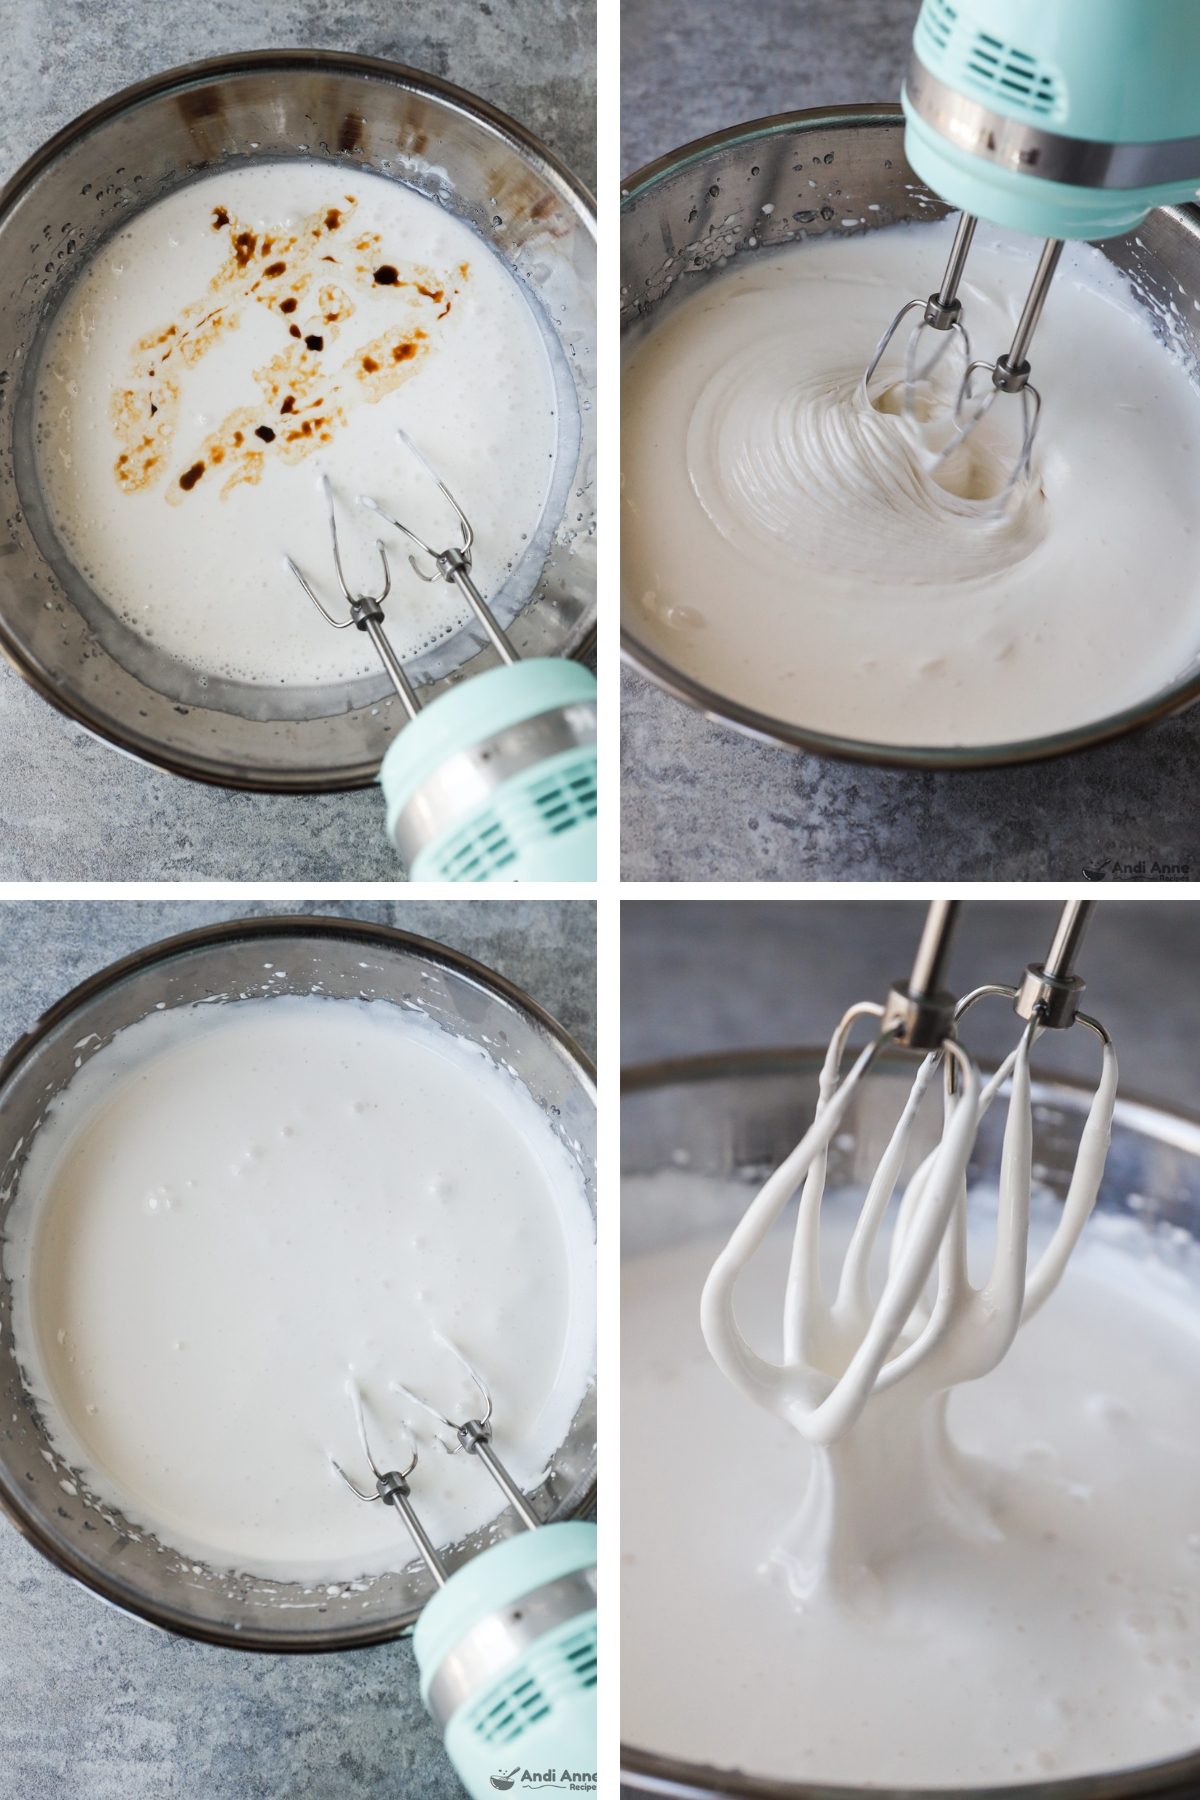
STEP 8 [ADD VANILLA]: Now add in 1 ½ tsp vanilla extract. Continue mixing for another full 2 minutes. The marshmallow liquid will have thickened even more (and it will smell incredible at this point!!)
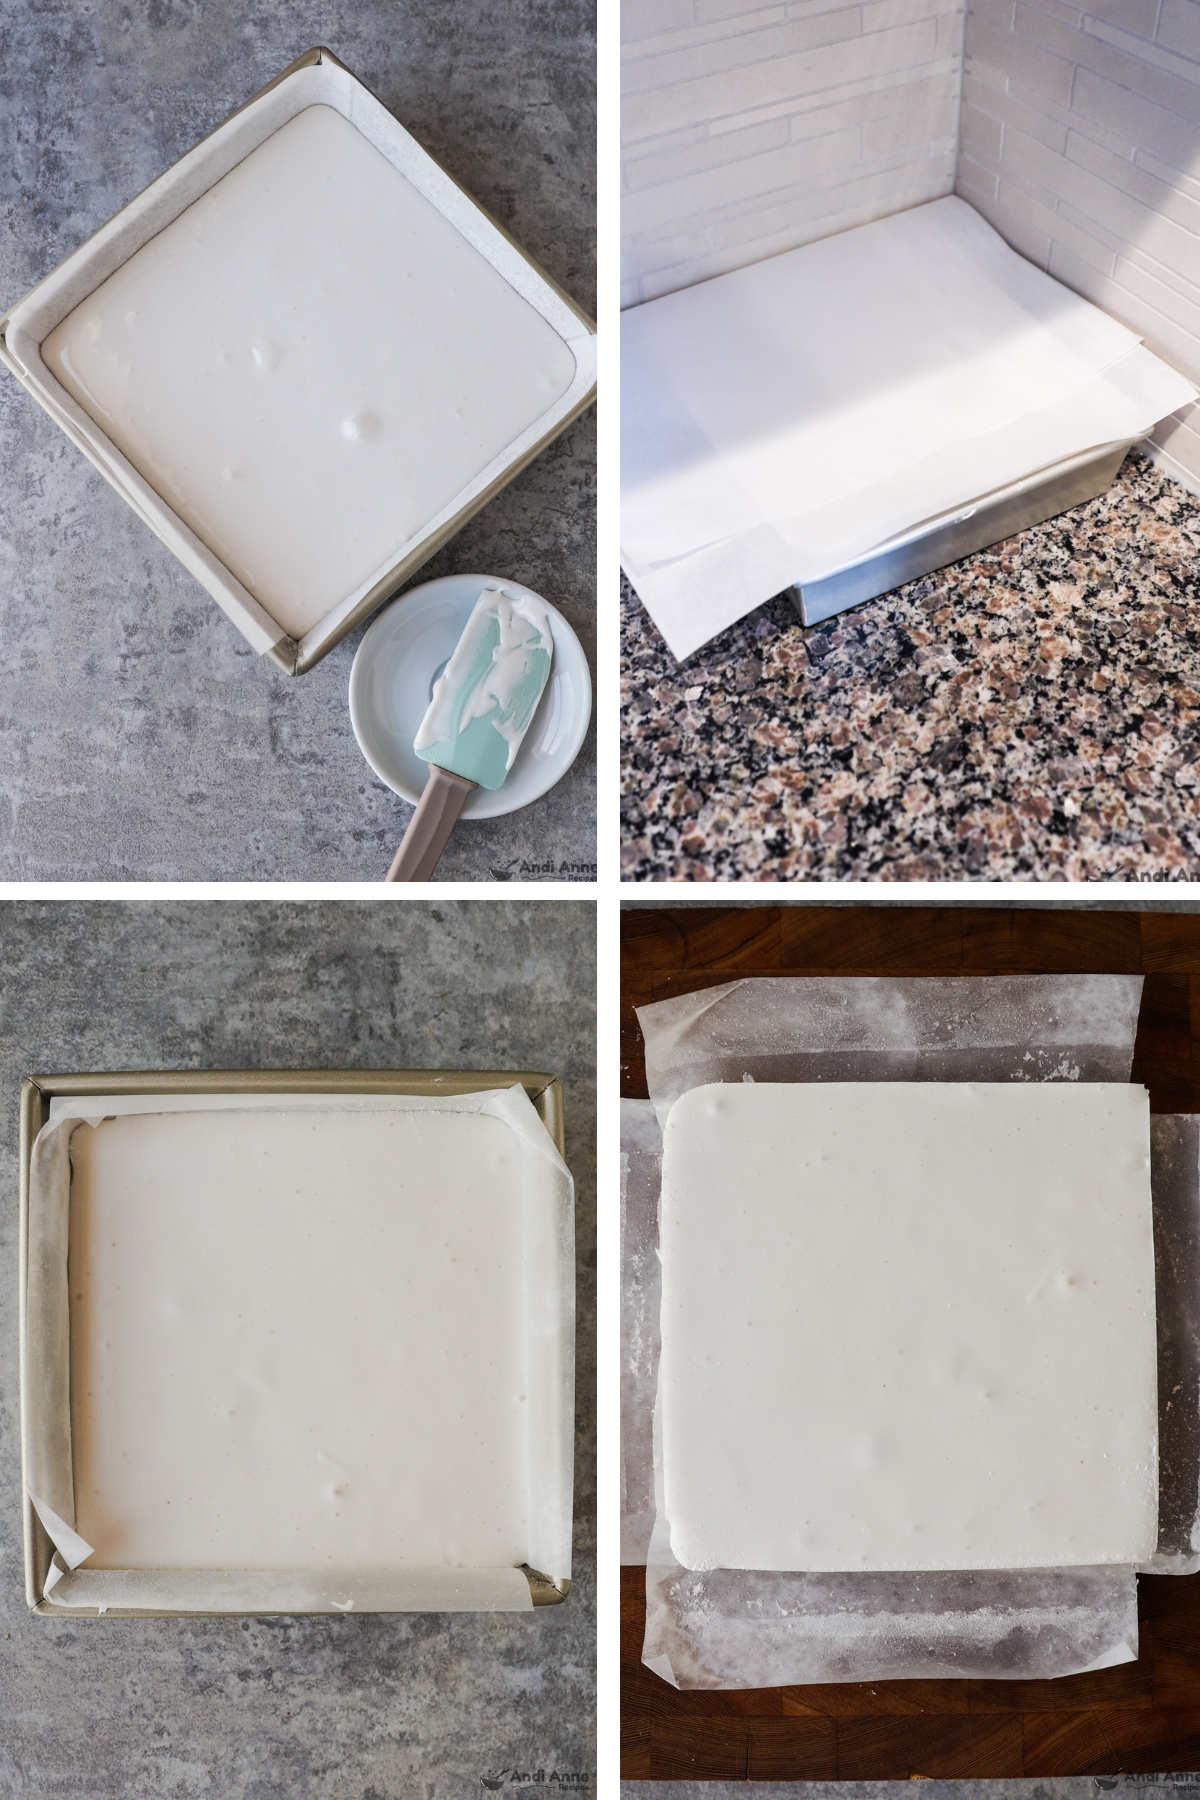
STEP 9 [TRANSFER TO THE PAN]: Use a spatula to transfer the marshmallow mixture into the prepared 8x8 pan. Smooth the top into an even layer. Let the marshmallows sit at room temperature, covered for 12 hours or overnight to fully set (just place a baking sheet over top while they set).
STEP 10: Once the marshmallow square has set, use the parchment paper to gently lift it out of the pan and transfer to a cutting board.
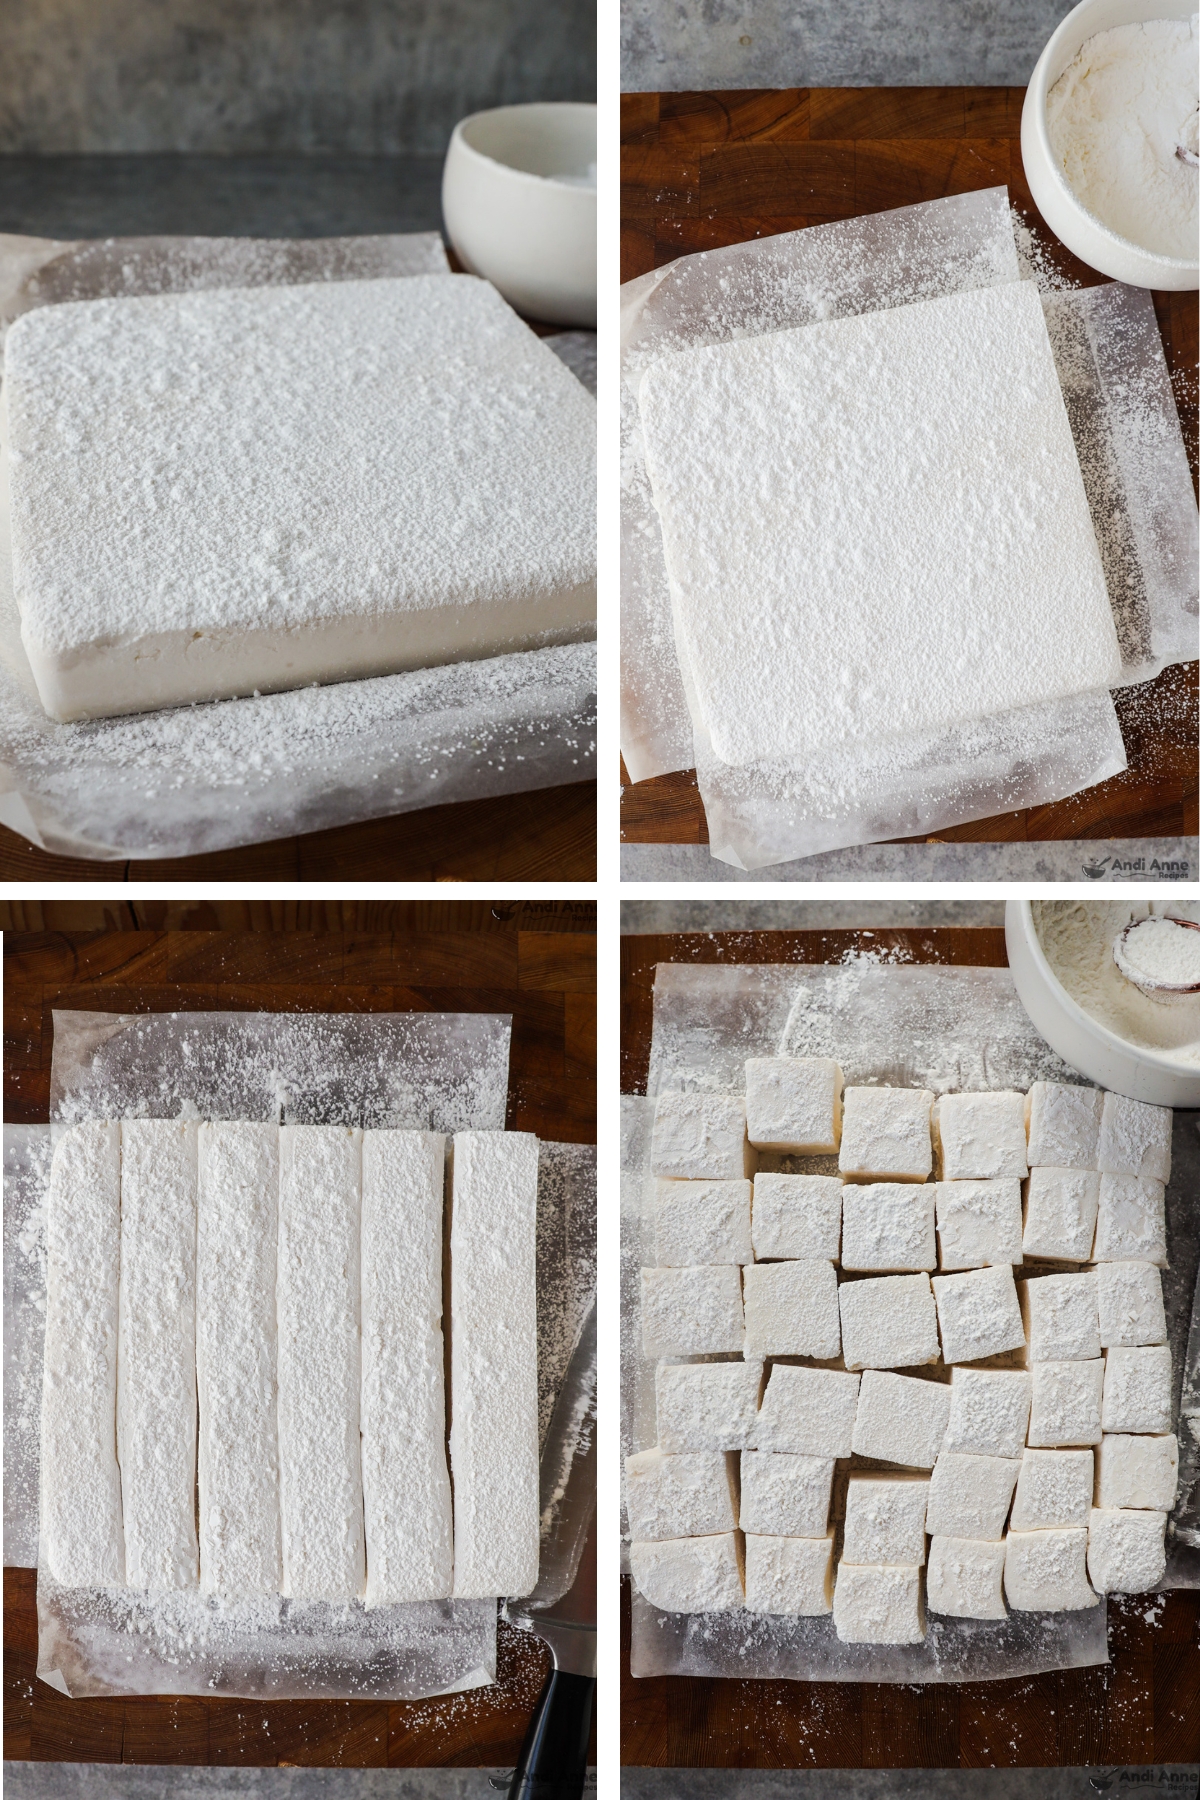
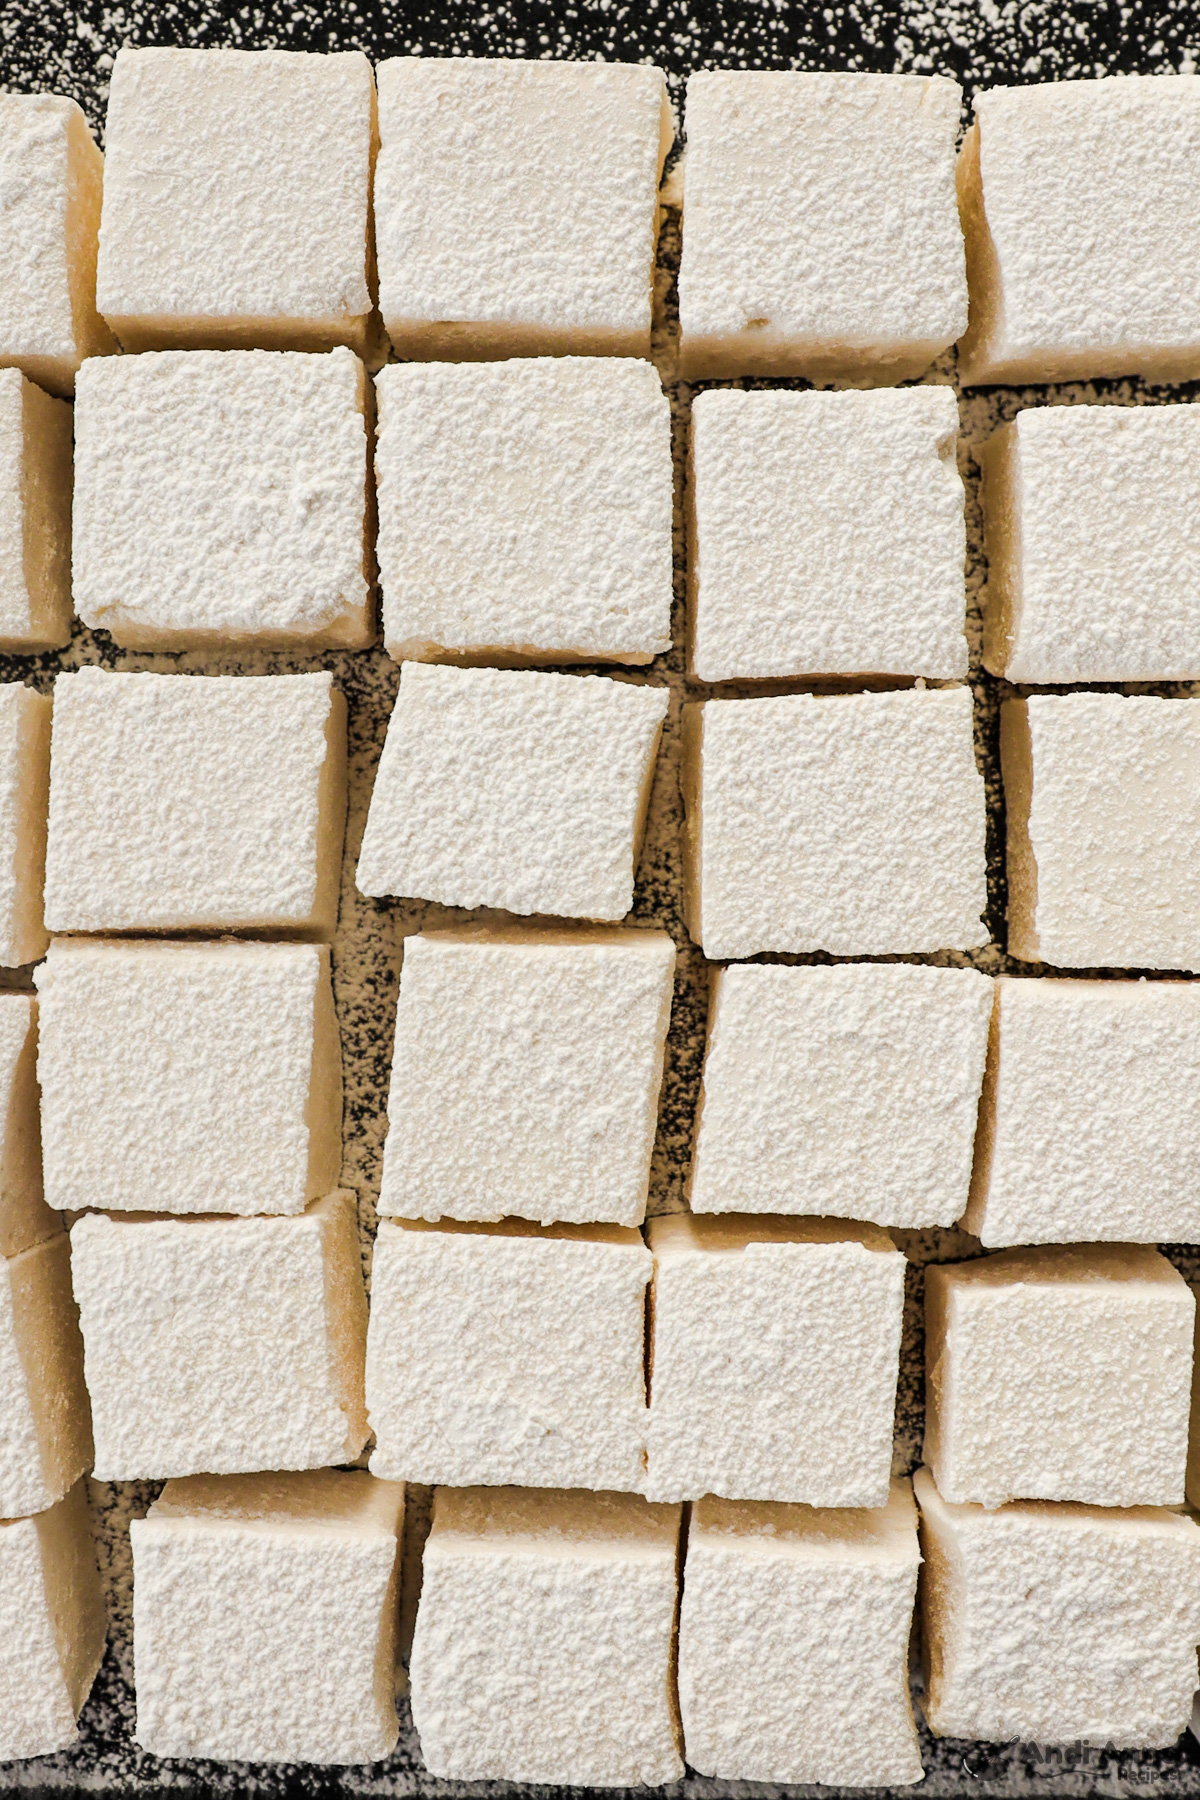
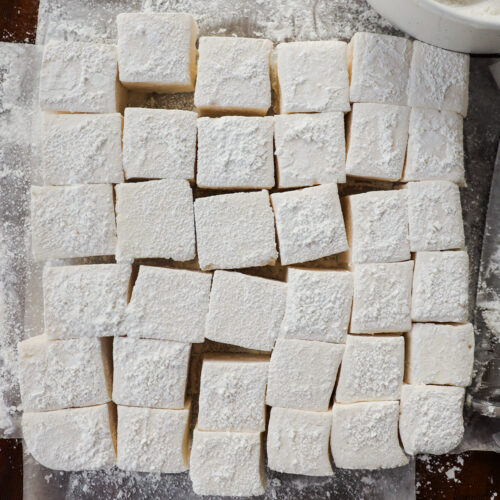
STEP 11 [SPRINKLE AND SLICE]: Just before cutting, sprinkle the remaining cornstarch/powdered sugar mixture over the top of the marshmallow square. Slice it into 6 strips, and then cut in the opposite direction to create small squares. If needed, sprinkle more powdered sugar mixture on top or on the knife to prevent sticking while cutting. Shake off any excess powder from the squares and now the marshmallows are ready to serve!
Recipe Tips
- Don't skip the gelatin blooming step! Let it sit in the cold water for at least 10 minutes. This is crucial for getting that fluffy texture and making sure your marshmallows set properly.
- Next, when you're making the sugar syrup, try to use a candy thermometer if you have one. The syrup needs to reach 240°F to be perfect. If you don't have a thermometer, no worries-just set a timer and let it simmer for 10 minutes. You can test the consistency by dropping a small amount of syrup into a glass of cold water. If it forms a soft ball, it's good to go!
- Once your syrup hits that perfect temp, don't stir it! Stirring after that can cause crystallization, which will mess up the smooth texture of your marshmallows.
- When you're mixing the gelatin and syrup together with a hand mixer, don't rush. You want to beat it on high for at least 5 minutes-this is what gives it that light, fluffy consistency.
- Marshmallows need at least 4 hours to set, but if you can, leave them overnight for the best texture. The longer they set, the better!
How To Store Leftovers
- REFRIGERATE - Store marshmallows in an airtight container at room temperature. They can last up to 2 weeks in the fridge, but they're so delicious, they probably won't last that long!
Ingredients
- 3 Tbsp gelatin - equals 3 packets knox gelatin
- ⅓ cup cold water
- 3 cups granulated sugar
- 1 ½ cups water
- 1 ½ tsp vanilla extract
- 2 Tbsp cornstarch
- 2 Tbsp powdered sugar
Instructions
- Spray an 8×8 baking dish with nonstick cooking spray (The cooking spray will help parchment stay put). Cut two strips of parchment paper that are 8″ wide. Place one strip in the pan so that it covers the bottom and sides. Next place the other parchment piece in the opposite direction (see photos above). Parchment paper should now cover the baking pan's bottom and sides.
- Now spray the parchment paper in the baking pan with nonstick cooking spray again.
- In a small bowl, mix together 2 Tbsp cornstarch and 2 Tbsp powdered sugar. Sprinkle 1 Tbsp of this mixture into the baking pan. Shake the pan over the sink to help cover the bottom and sides with the powder. This is an important step so that the marshmallows won't stick!
- In a medium bowl, sprinkle 3 Tbsp of gelatin over ⅓ cup cold water. You do not need to mix together! Let the gelatin soak for a full 10 minutes to bloom and expand. It will be floppy like rubber. You can now transfer this to a large mixing bowl.
- In a small saucepan, combine 3 cups granulated sugar with 1 ½ cups water. Heat over medium-high heat, stirring occasionally, until the sugar has completely dissolved. Now turn the heat to low and continue simmering for about 10 minutes, without stirring, or until the mixture reaches 240°F (use a candy thermometer for this step). Remove the saucepan from the heat.
- Slowly and carefully drizzle the hot sugar syrup you just boiled in the pot over the bloomed gelatin. Pour the syrup over the gelatin very slowly, more of a drizzle than pour-this should take about 90 seconds to do!
- Using an electric hand mixer, beat everything together on a high speed for about 5 minutes, or until it turns white and thickens to a marshmallow fluff consistency.
- Now add in 1 ½ tsp vanilla extract. Continue mixing for another full 2 minutes. The marshmallow liquid will have thickened even more (and it will smell incredible at this point!!)
- Use a spatula to transfer the marshmallow mixture into the prepared 8×8 pan. Smooth the top into an even layer. Let the marshmallows sit at room temperature, lightly covered for 12 hours or overnight to fully set.
- Once marshmallow has set, use the parchment paper to gently lift it out of the pan and transfer to a cutting board.
- Just before cutting, sprinkle the remaining cornstarch/powdered sugar mixture over the top of the marshmallow square. Slice it into 6 strips, and then cut the opposite direction to create small squares. If needed, sprinkle more powdered sugar mixture on top of the marshmallows to prevent sticking while cutting. Shake off the excess powder and now the marshmallows are ready to serve!
Notes
Nutrition
Nutrition info is auto-calculated and meant to be an approximation only.



Leave a Reply