

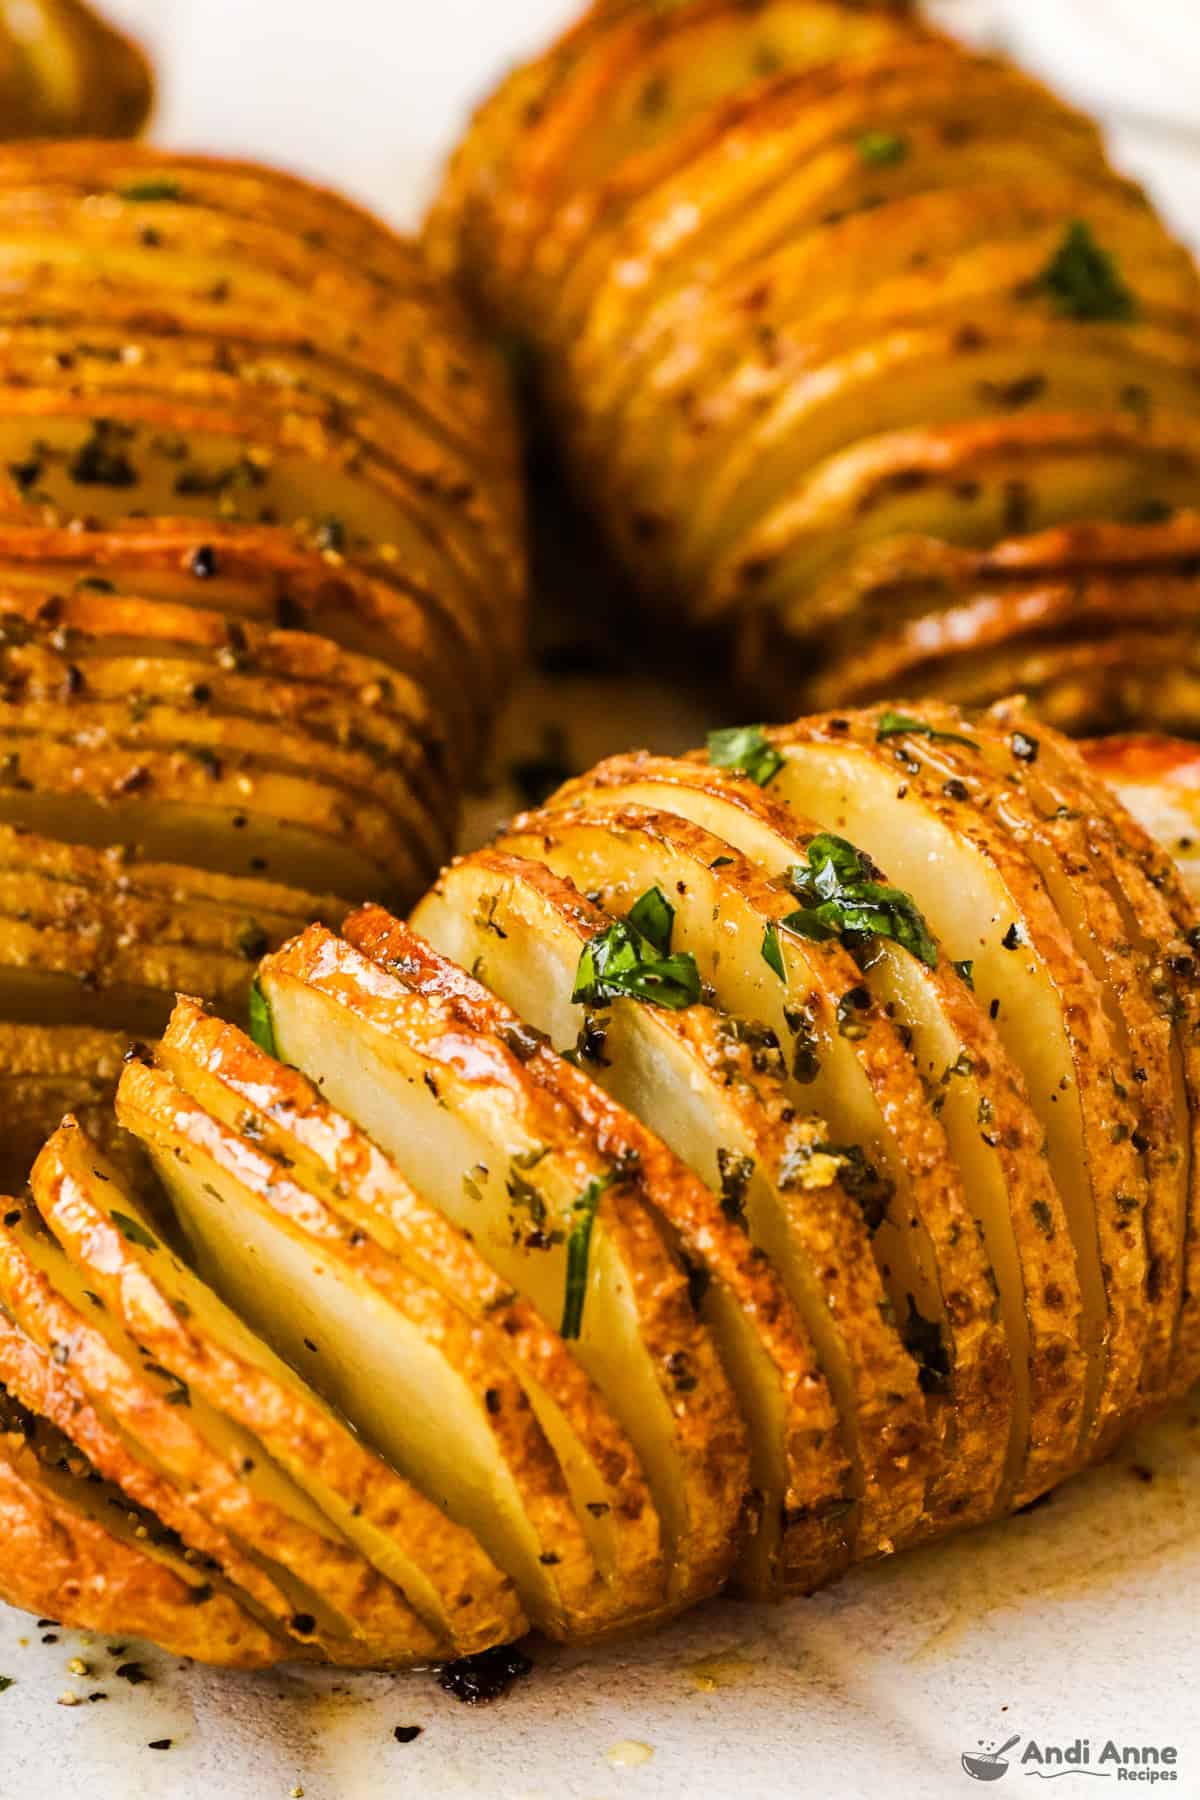
These crispy Hasselback potatoes are an easy oven-baked side dish with golden, buttery edges and soft, tender centers. Each potato is sliced into thin layers, brushed with melted butter, and seasoned with garlic, salt, and pepper before baking until crispy.
Why This Recipe Works
They look a little fancy, but they're surprisingly simple to make! All you need are a few basic ingredients, and a sharp knife to help with the slicing.
- Crispy edges, tender centers - thin slices get golden and crispy while the inside stays soft and fluffy.
- Simple ingredients - made with russet potatoes, butter, garlic powder, and seasonings.
- Extra buttery flavor - brushing with butter twice helps it get between the layers as they open up.
- Great for any dinner - an easy side dish that looks impressive without a lot of extra work.
Recipe Ingredients 👇👇
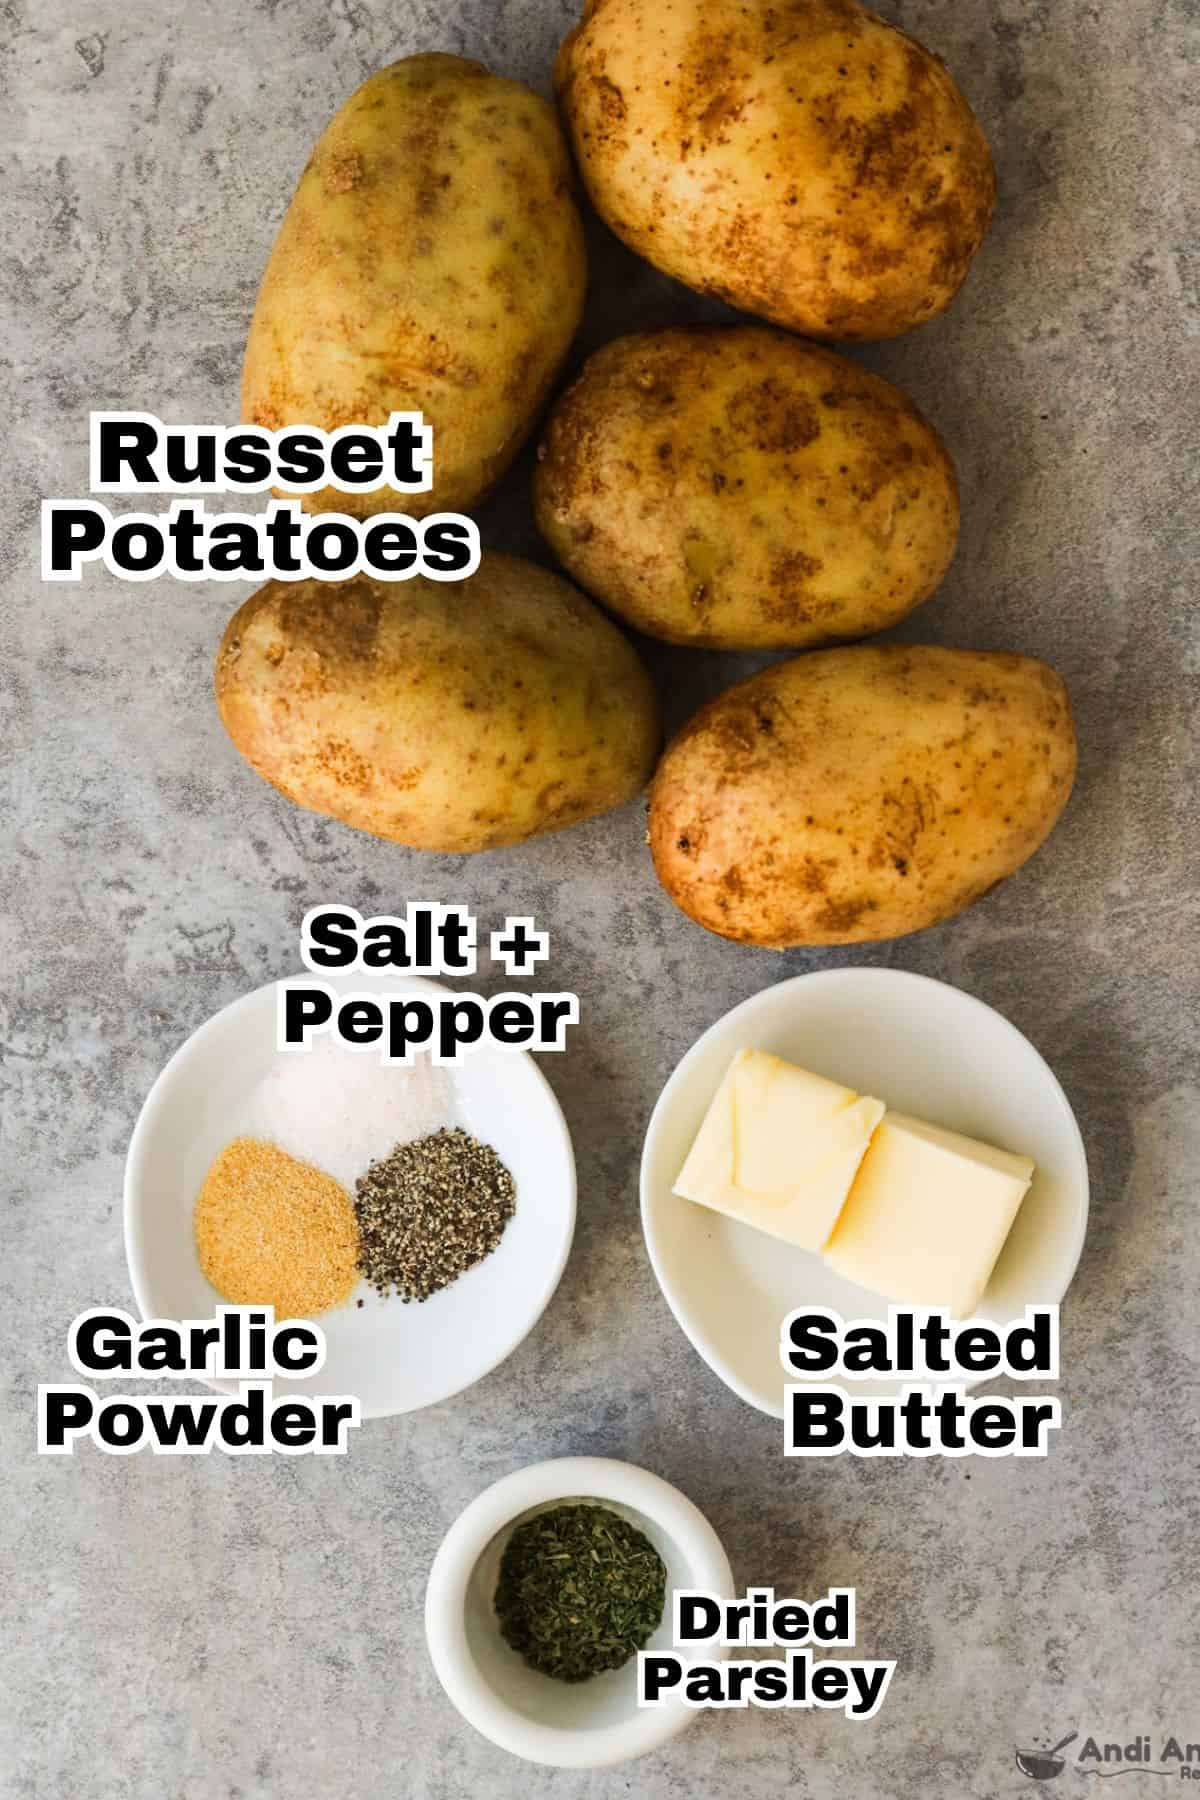
- 4 large russet potatoes - washed and dried. Russets work especially well because they have fluffy centers and crisp up nicely in the oven.
- 4 Tbsp salted butter, melted - divided into two portions. You'll brush the potatoes before baking and again halfway through.
- ½ tsp garlic powder - adds garlic flavor without the risk of fresh garlic burning in the oven.
- ½ tsp kosher salt - seasons the potatoes. Add more to taste after baking.
- ½ tsp black pepper - adds a little extra flavor. Use ¼ tsp before baking and the remaining ¼ tsp to taste when serving.
- 1 tsp dried parsley (optional) - mixed into the melted butter along with the garlic powder, salt, and pepper.
Step-By-Step Instructions 👇👇
STEP 1: Slice The Potatoes
Preheat the oven to 425°F and position the oven rack in the center. Set aside a baking sheet.
Wash and thoroughly dry 4 medium-large russet potatoes.
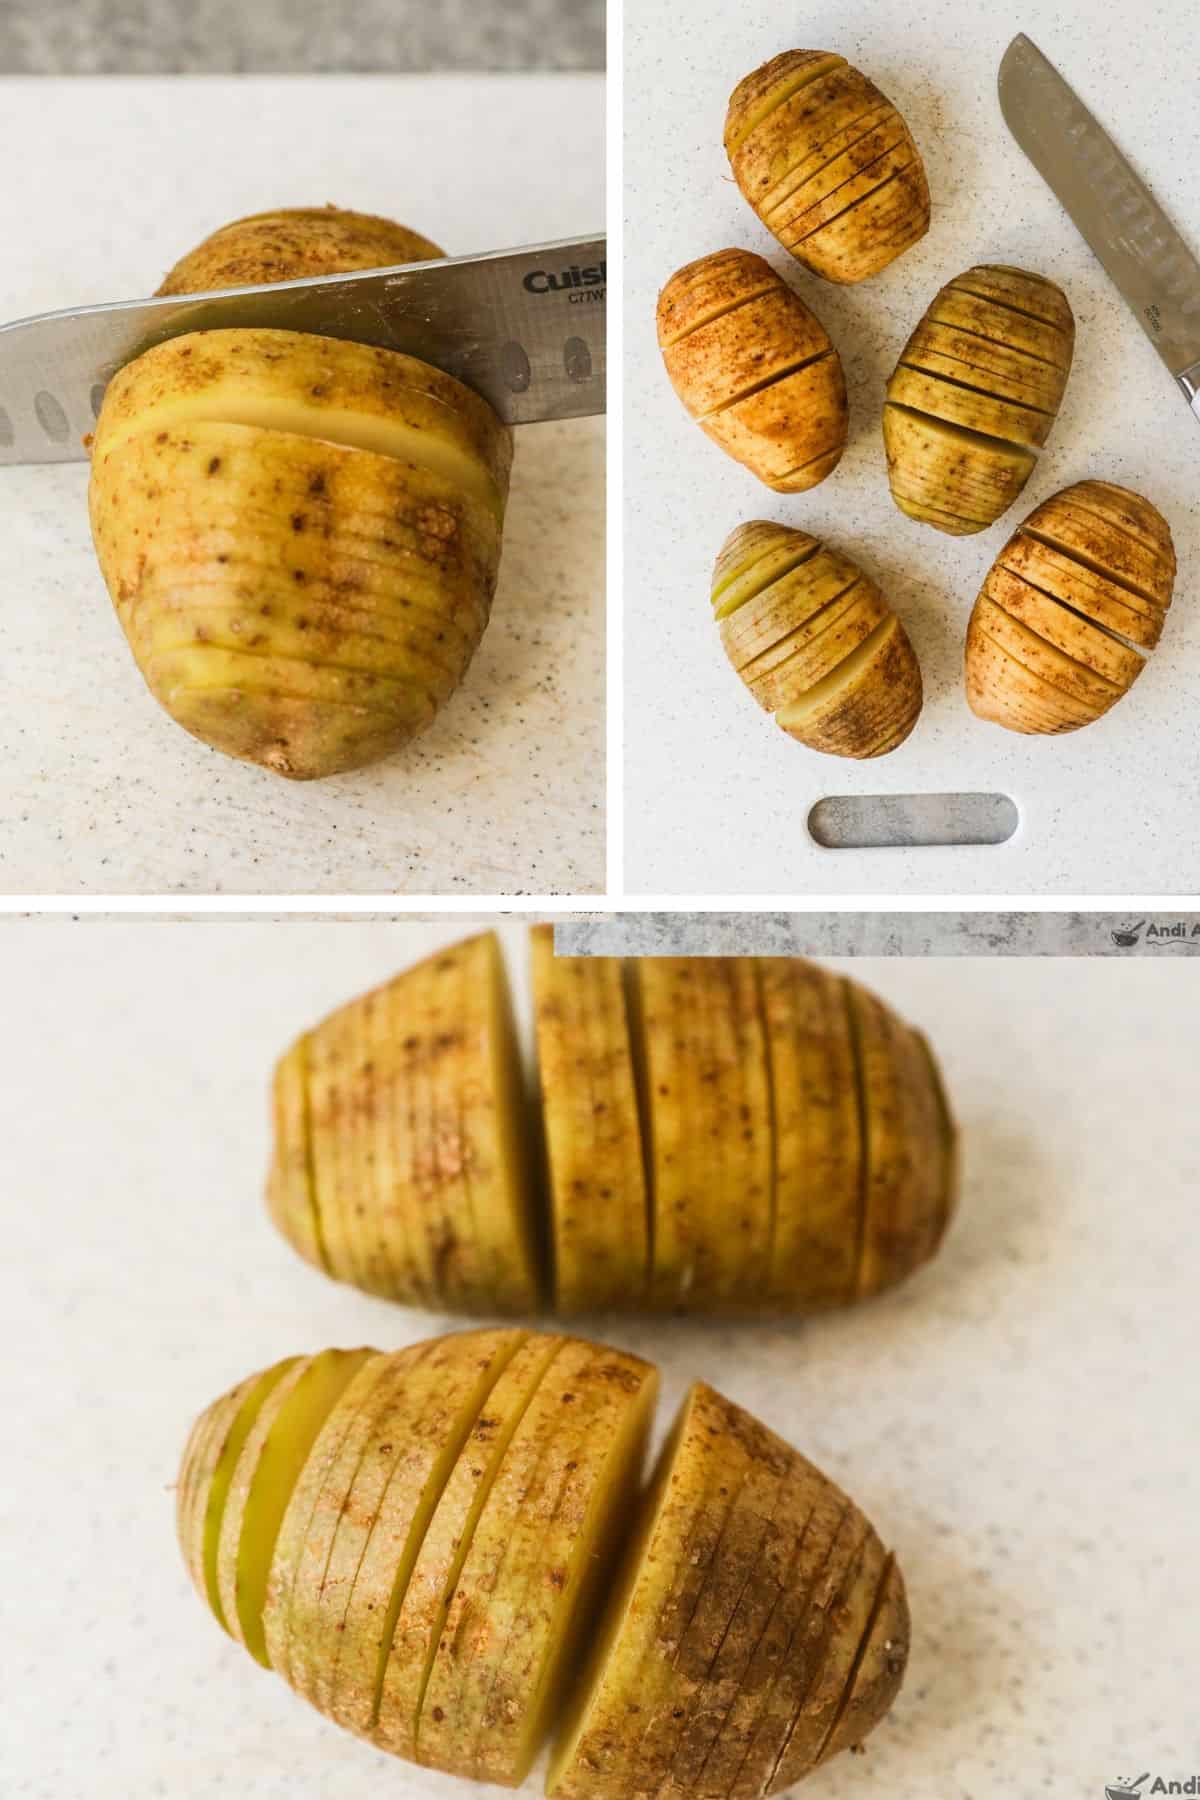
Place one potato on a cutting board. Using a sharp knife, make thin slices about ⅛ inch apart along the length of the potato. Cut most of the way down, stopping just before you reach the bottom so the potato stays connected. Repeat with the remaining potatoes.
TIP: Take your time with the slicing and try to keep the cuts evenly spaced. You want thin slices that will fan open as they bake, but enough potato left at the bottom to hold everything together. Don't worry if a few slices aren't perfect.
What happens if I accidentally slice all the way through the potato?
Nothing! Don't worry if you accidentally cut all the way through a potato. Just place the pieces together on the baking sheet and cook them the same way. They might not hold their shape quite as well, but they'll still turn out buttery, crispy, and delicious!
STEP 2: Mix The Butter And Seasonings
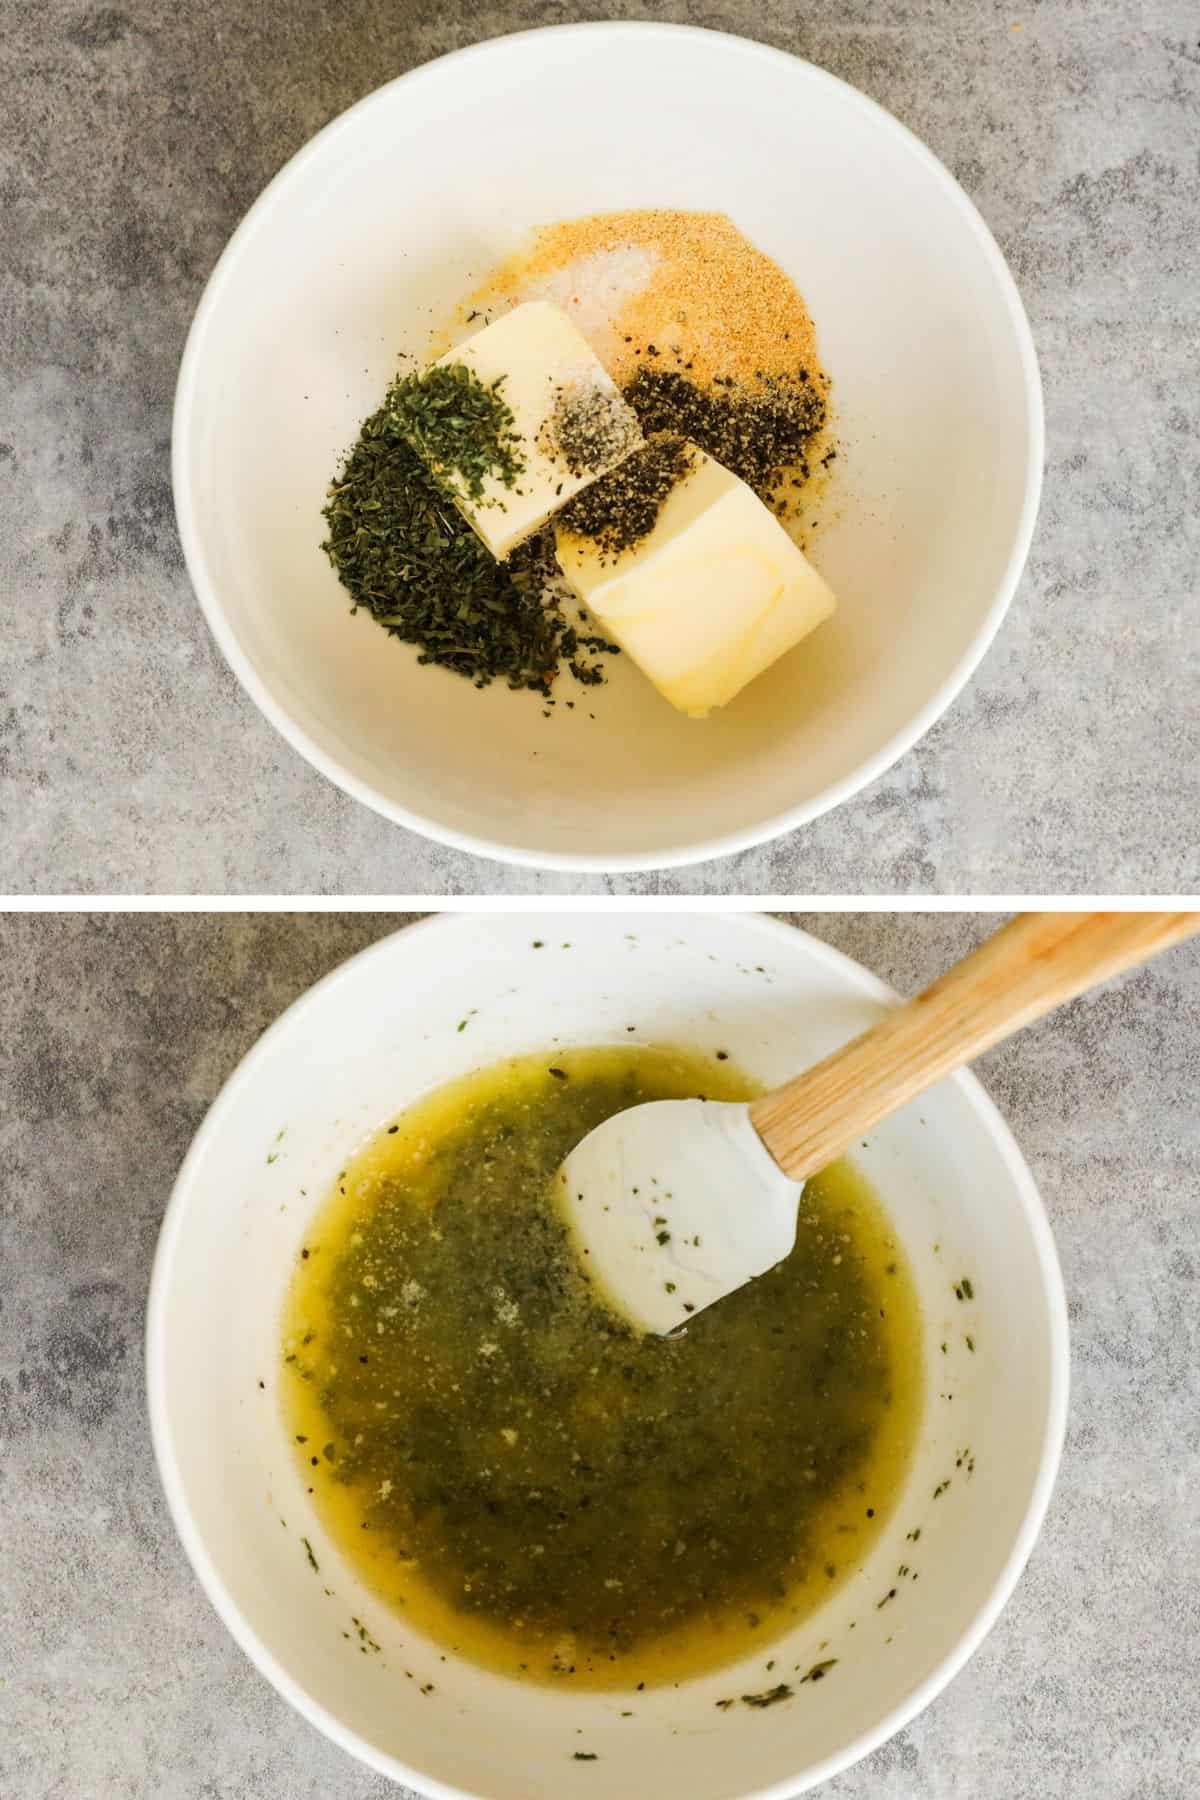
In a small bowl, combine 4 Tbsp melted salted butter, ½ tsp garlic powder, ½ tsp kosher salt, ½ tsp black pepper, and 1 tsp dried parsley. Stir until everything is well mixed.
STEP 3: Brush with Butter
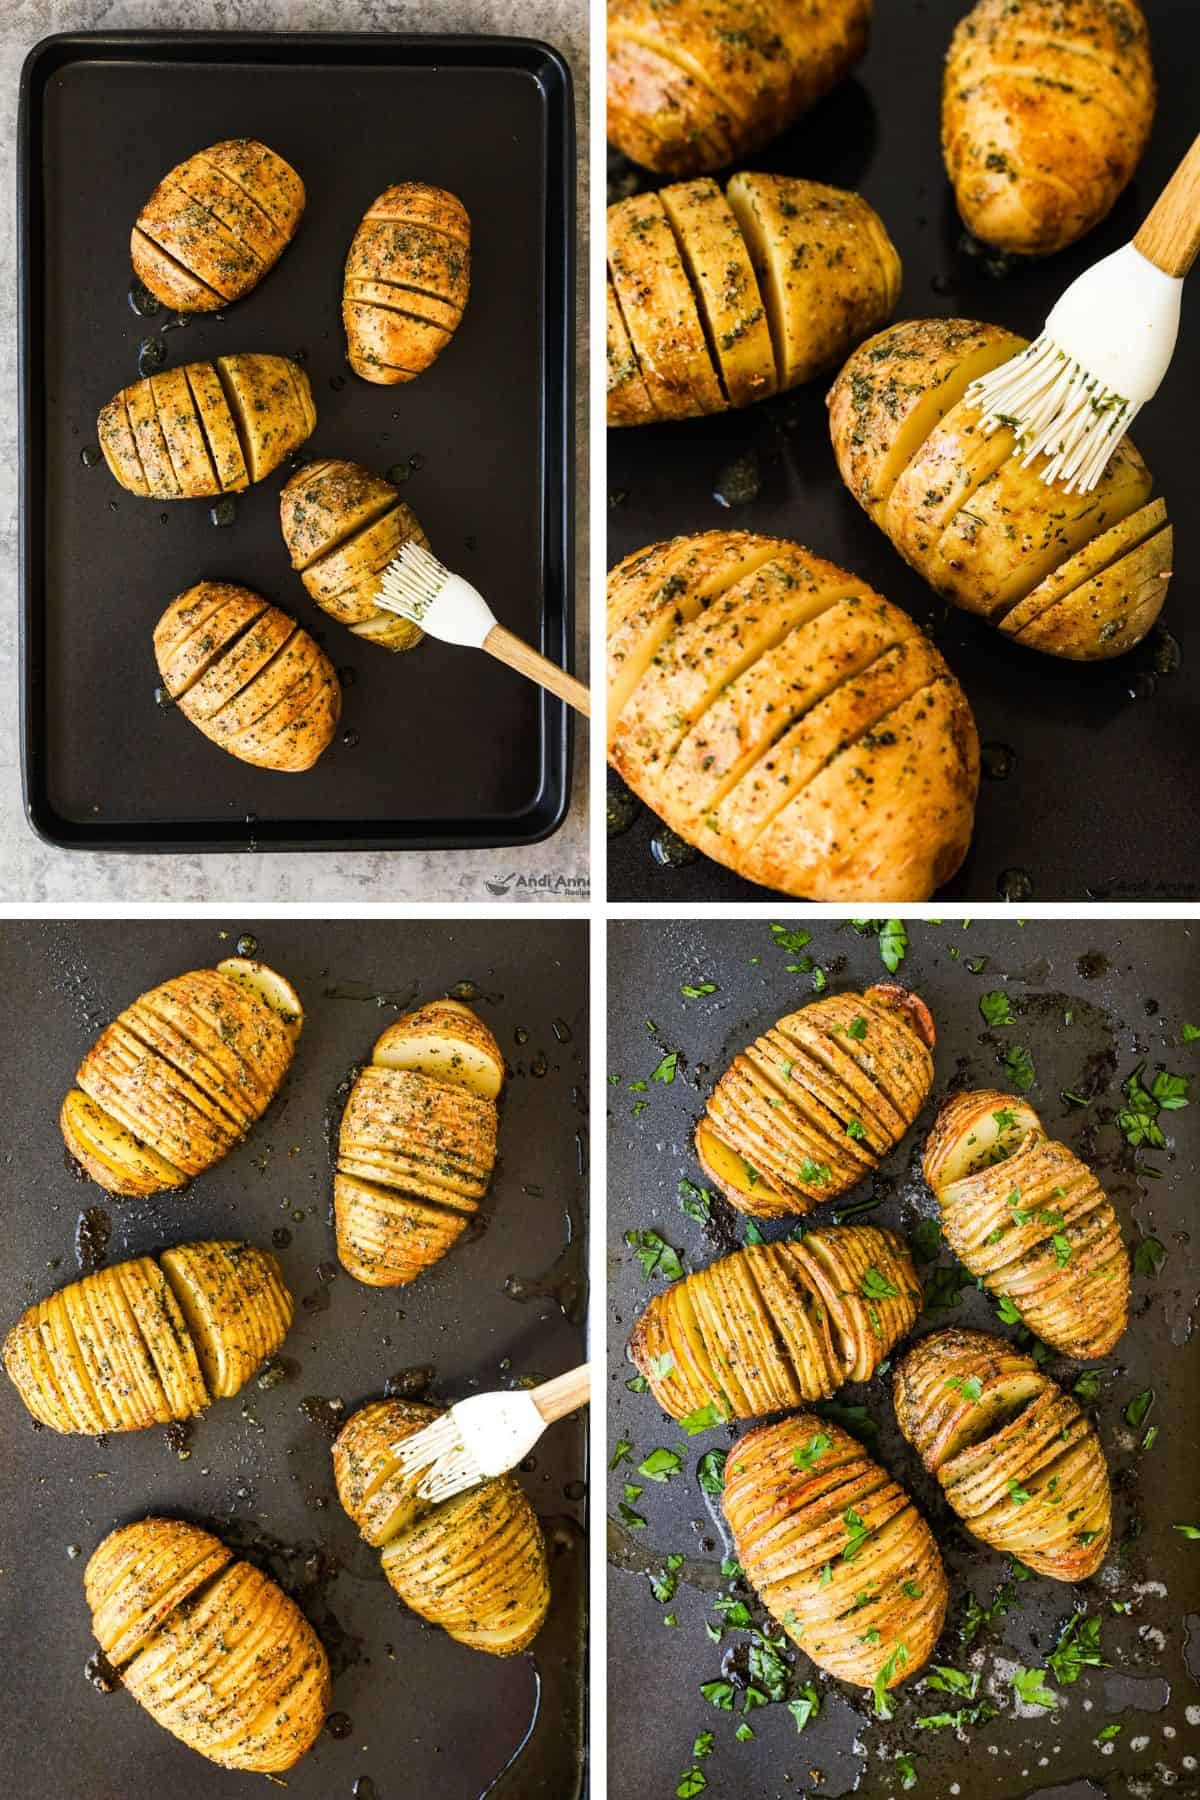
Arrange the 4 sliced potatoes on a baking sheet. Brush with half of the seasoned butter mixture (about 2 Tbsp), coating the tops and sides and working some between the slices wherever possible. Set the remaining butter mixture aside for later.
TIP: Don't worry if the slices are still tightly closed. They'll begin to fan open as the potatoes bake, making it easier to brush more seasoned butter between the layers halfway through cooking.
Place the baking sheet in the oven and bake at 425°F for 30 minutes.
STEP 4: Brush With More Butter
Remove the potatoes from the oven. The slices should be starting to separate and the potatoes will be partially cooked.
- If needed, gently use the tip of a butter knife to separate any slices that are sticking together.
Brush the potatoes with the remaining butter mixture, allowing it to drip between the layers.
TIP: This second brushing makes a big difference! As the potatoes bake, the slices spread apart, allowing the butter to reach areas that were closed during the first brushing. Try to get some butter into the newly opened slices. This helps create those delicious golden, crispy edges.
STEP 5: Finish Baking
Return the potatoes to the oven and bake for another 30-35 minutes, until the edges are golden and crispy and the centers are fork-tender.
The total baking time will be about 60-65 minutes, depending on the size of your potatoes.
Serve warm while the edges are nice and crispy!
Recipe Tips
- Use russet potatoes - their starchy texture creates fluffy centers and crispy edges.
- Dry the potatoes well - removing excess moisture helps the skins crisp up in the oven.
- Use chopsticks as a guide - some people like this trick but I don't do it personally. Place one on either side of the potato to keep your knife from cutting all the way through.
- Keep slices thin - aim for about ⅛ inch between cuts so the edges crisp up nicely.
- Brush with butter twice - the second brushing gets butter between the layers after they start opening up.
- Don't rush the baking - the centers need enough time to become tender while the edges turn golden.
- Serve right away - Hasselback potatoes are crispiest straight from the oven.
How To Get Crispy Hasselback Potatoes
The trick to crispy Hasselback potatoes is making thin, even slices and giving them enough time in the oven.
Here are a few things that make a difference:
Check the centers: A fork or knife should slide easily into the thickest part of the potato when it's finished.
Slice thinly: Aim for ⅛-inch slices. Thicker slices won't fan out or crisp up quite as much.
Use a hot oven: Baking at 425°F helps the exposed edges become golden while the centers cook through.
Add butter halfway through: Once the potato layers start opening, you can brush butter deeper between the slices.
Give them space: Arrange the potatoes with room between each one so hot air can circulate.
If the potatoes are tender but you'd like crispier edges, you can bake them for a few extra minutes, keeping an eye on them so they don't burn.
Andi's Note
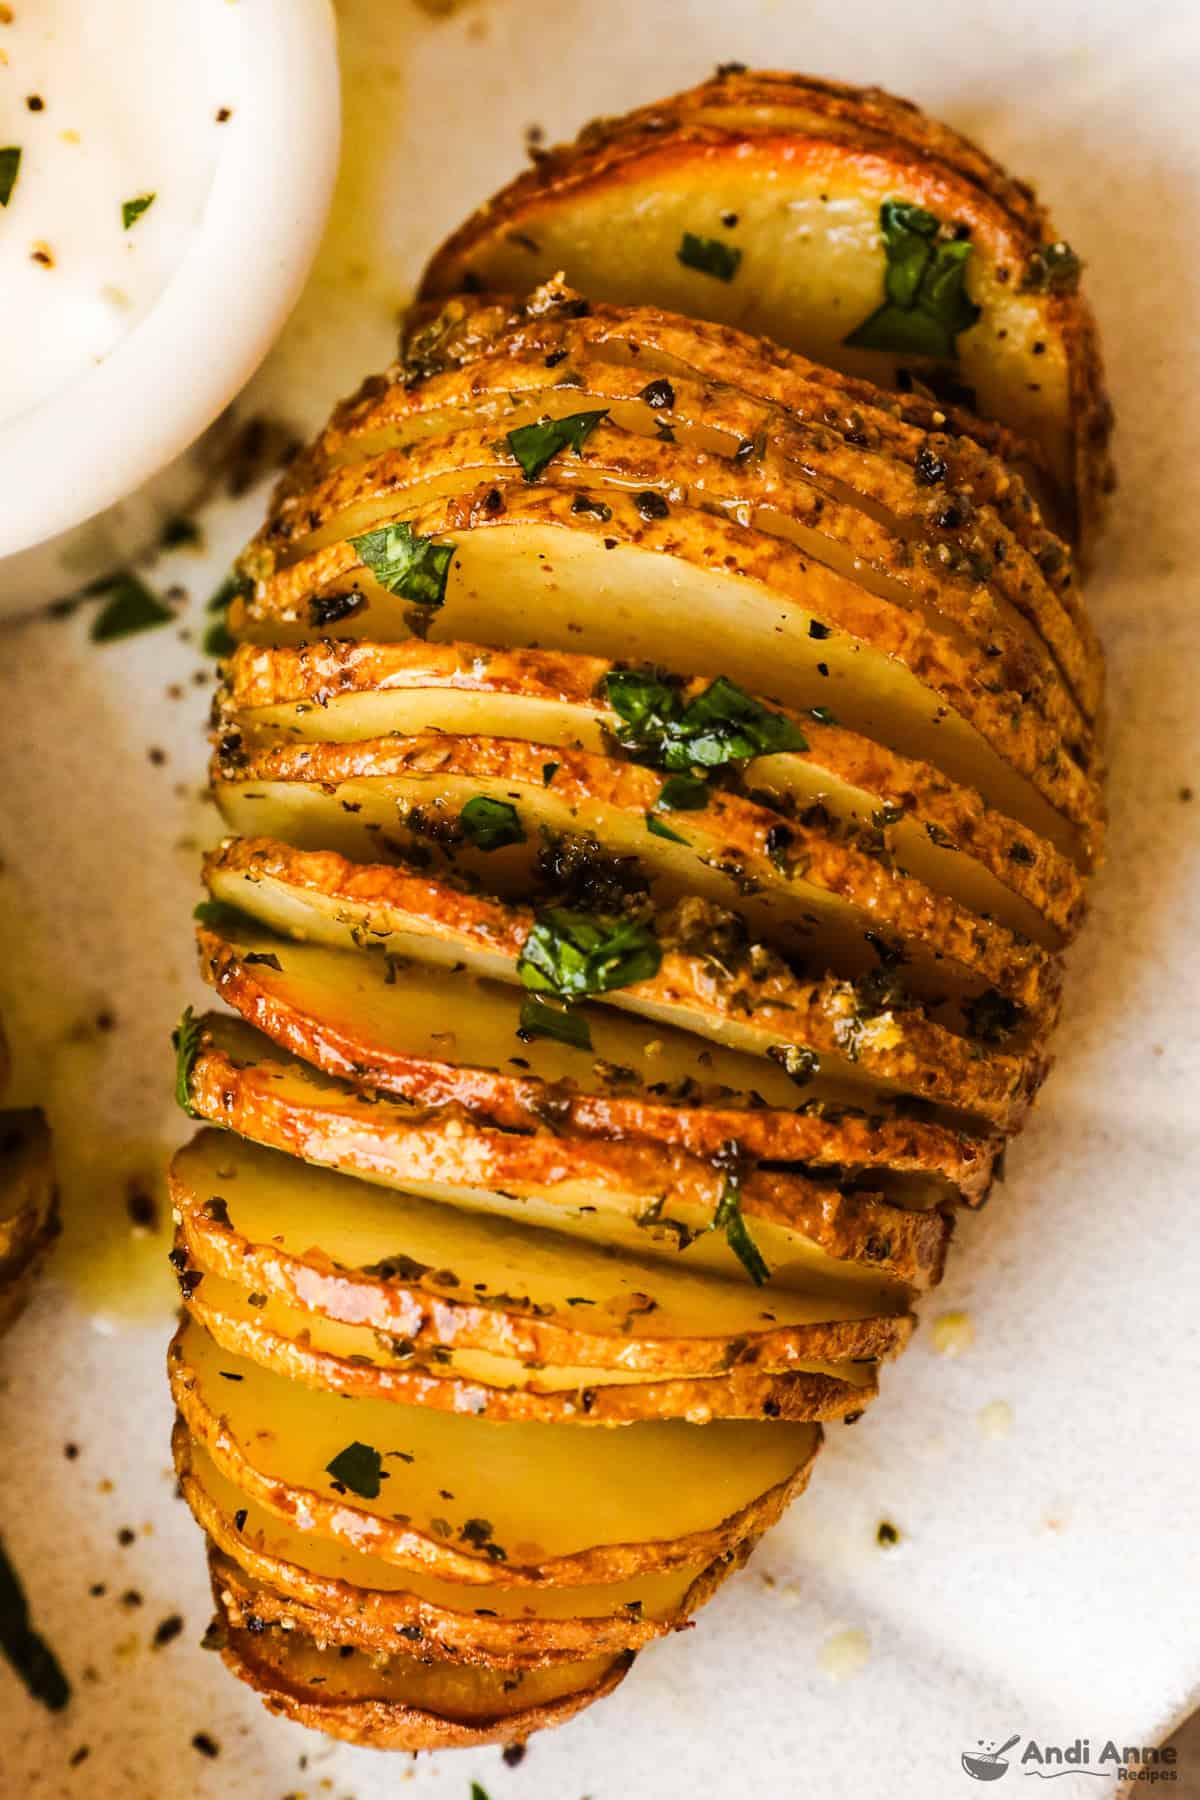
I love Hasselback potatoes because they look like something you'd order at a restaurant, but they're really just baked potatoes with a bunch of thin slices.
I've seen the trick of placing chopsticks on either side of the potato to prevent cutting all the way through, but I actually found that harder! I just used a sharp knife and took my time with each slice. They will open up as you bake them so you can leave about ½" of the bottom stuck together.
The other trick is brushing them with butter halfway through baking. Once the slices start opening up, you can get more butter between the layers, which helps create those golden, crispy edges.
Can You Make Hasselback Potatoes Ahead Of Time?
Yes! You can slice the potatoes a few hours before baking to save some prep time.
Place the sliced potatoes in a bowl of cold water and keep them covered in the fridge until you're ready to cook. This prevents them from turning brown.
Before baking, drain and dry the potatoes really well, including between the slices. Then brush with butter, season, and bake as directed.
For the crispiest results, I recommend baking them fresh rather than cooking them completely ahead of time.
How To Store Leftovers
- Fridge: Store leftover Hasselback potatoes in an airtight container in the refrigerator for up to 3-4 days.
- Freezer: Freezing isn't recommended because the potatoes can become watery and lose their crispy texture after thawing.
- Reheat: Place on a baking sheet and warm in a 400°F oven for about 10-15 minutes, or until heated through and the edges are crispy again. You can also use an air fryer at 375°F for about 5-8 minutes, depending on the size.
FAQs
Russet potatoes are my favorite because they have a fluffy interior and crisp up beautifully in the oven. Yukon Gold potatoes also work well, although they'll have a slightly creamier texture.
No! Leave the skins on. They help hold the potatoes together and become deliciously crispy as they bake. Just make sure to wash and dry the potatoes thoroughly.
The slices might be too thick, the potatoes may have had too much moisture, or they might need a little longer in the oven. Thin slices, a hot oven, and brushing with butter halfway through all help create crispy edges.
You can place a wooden chopstick on either side of the potato before slicing. The chopsticks act as a barrier that stops the knife before it cuts all the way through the bottom.
Yes! You can substitute the melted butter with olive oil. It will give the potatoes a slightly different flavor, but the edges will still crisp up nicely.
The edges should be golden brown and crispy, and a fork or knife should slide easily into the thickest part of the potato. For medium-large russet potatoes, this usually takes about 60-65 minutes at 425°F.
Hasselback Potatoes

Tap Stars To Rate!
Ingredients
- 4 large russet potatoes - washed and dried
- 4 Tbsp salted butter - melted and divided
- ½ tsp garlic powder
- ½ tsp kosher salt
- ½ tsp black pepper - divided
- 1 tsp dried parsley - optional
Instructions
- Preheat the oven to 425°F. Position the oven rack in the center and set aside a baking sheet.
- Place one potato on a cutting board. Using a sharp knife, make thin slices about ⅛ inch apart along the length of the potato, cutting most of the way down but leaving about ½ inch at the bottom connected. Repeat with the remaining potatoes.
- In a small bowl, mix together 4 Tbsp melted salted butter, ½ tsp garlic powder, ½ tsp kosher salt, ½ tsp black pepper, and 1 tsp dried parsley (if using).
- Arrange the potatoes on the baking sheet. Brush with half of the seasoned butter mixture, coating the tops and sides and working some between the slices. Set the remaining butter mixture aside.
- Bake for 30 minutes. Remove from the oven and gently separate the slices with a butter knife if needed. Brush with the remaining seasoned butter mixture, allowing it to drip between the layers.
- Return to the oven and bake for another 30-35 minutes, until the edges are golden and crispy and the centers are fork-tender. Serve warm.
Notes
- Slicing: Aim for thin, ⅛-inch slices, leaving about ½ inch at the bottom to hold the potato together.
- Accidentally cut through? No problem! Place the pieces together on the baking sheet and bake as usual. They'll still taste delicious.
- Butter: Brush with the seasoned butter twice. The second brushing helps the butter reach between the layers as they open up.
- Baking time: Larger potatoes may need a few extra minutes. The centers should be fork-tender and the edges golden and crispy.
- Storage: Refrigerate leftovers in an airtight container for 3-4 days. Reheat in the oven or air fryer to crisp up the edges.
Nutrition
Nutrition info is auto-calculated and meant to be an approximation only.





Leave a Reply