

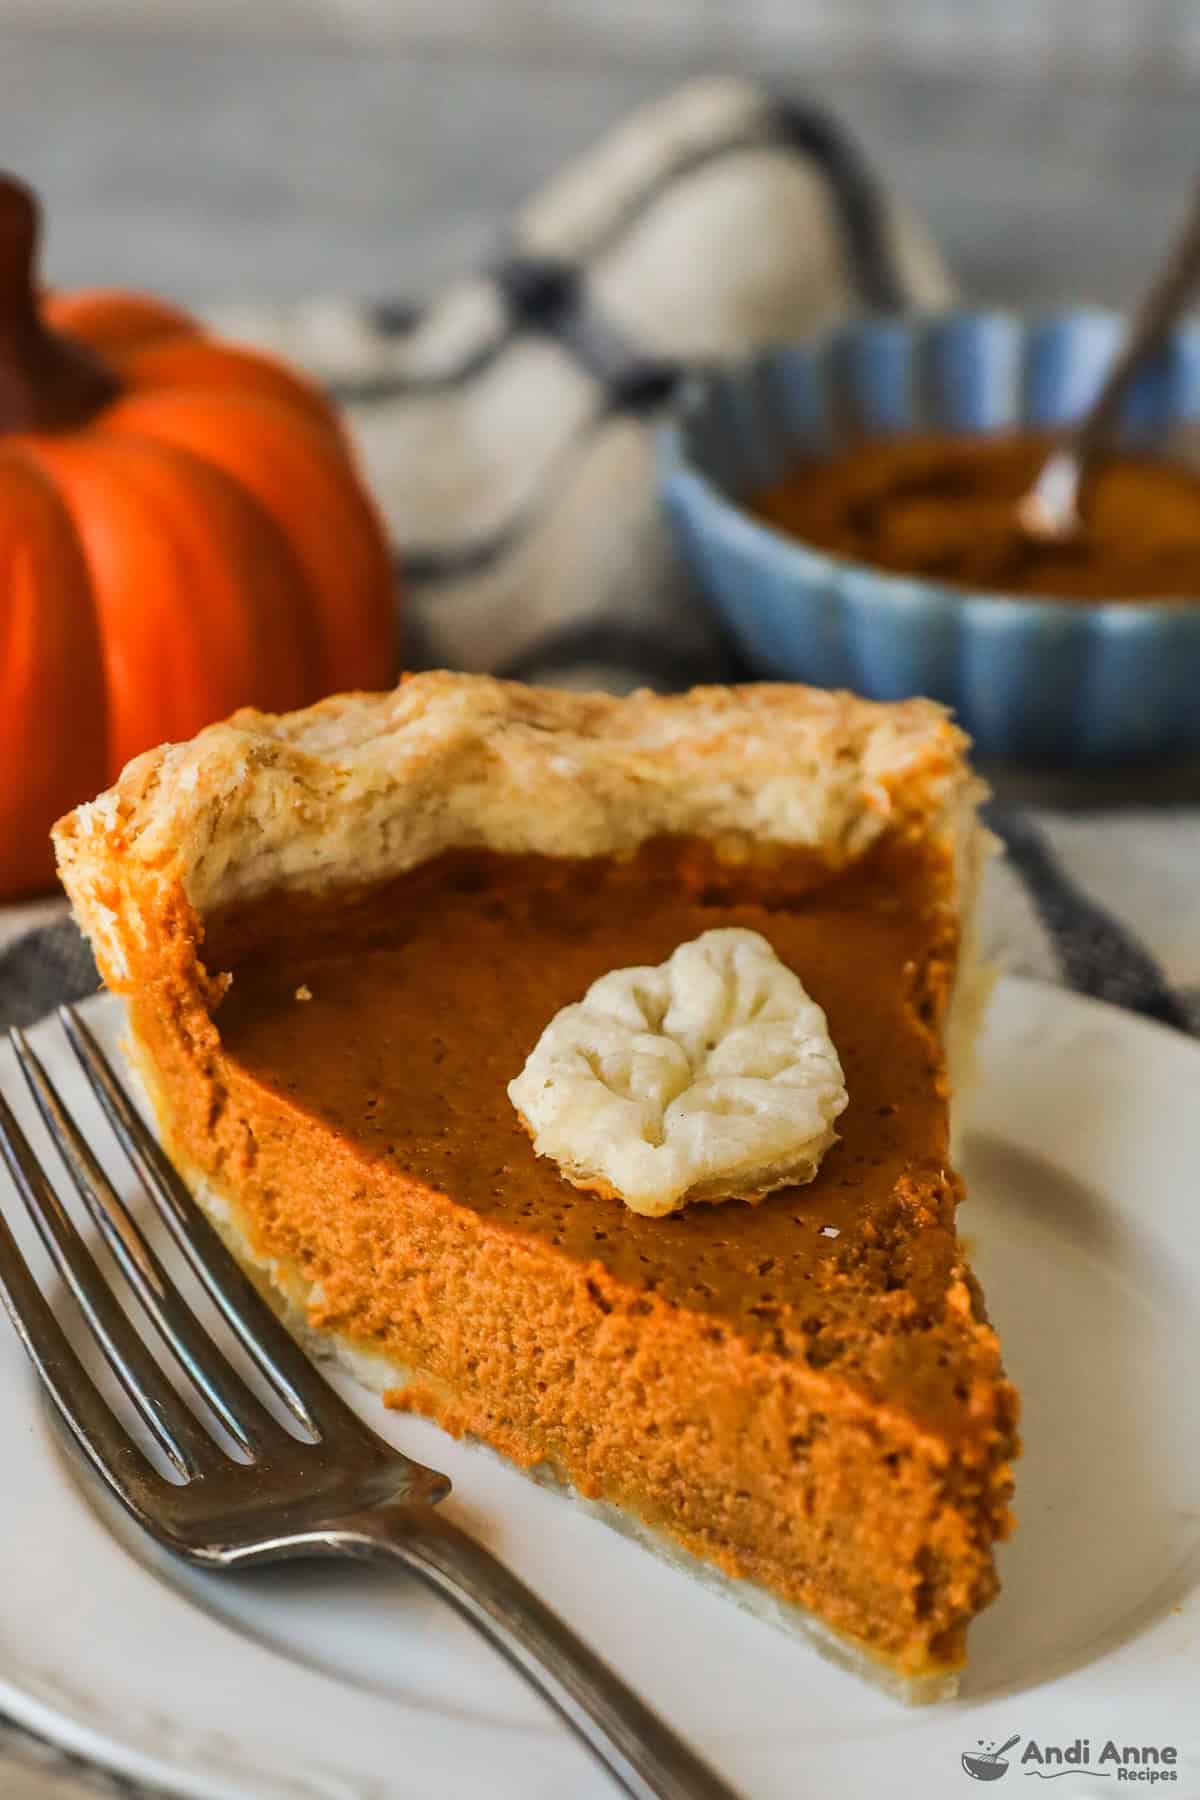
This classic pumpkin pie recipe is creamy, rich, and perfectly spiced - just like Grandma used to make. The all-butter crust bakes up golden and flaky, while the filling is silky-smooth and full of warm cinnamon flavor. It's cozy, simple, and totally doable, even if you've never made a pie before. 👇👇
Why I Love This Recipe
- Classic and cozy: Old-fashioned pumpkin pie, just like Grandma made.
- All-butter crust: No shortening, just butter for rich flavor and a flaky texture.
- Creamy filling: Brown sugar and warm spices make the pumpkin shine.
- Beginner-friendly: No blind baking required - the crust bakes beautifully as-is.
- Perfect for holidays: Makes two 9-inch pies, so you can share one (or keep both).
Note from Andi
I used to be intimidated by making pies, but once I tried Grandma's version, everything changed. She never pre-baked her crust, and I don't either - and honestly, it always turns out beautifully.
If this is your first time, don't worry about perfection. A rustic-looking pie still tastes incredible. You can use canned pumpkin puree (an easy go-to) or roast your own sugar pumpkin for homemade puree. I've done both - roasted pumpkin gives a lighter texture but with deeper flavor, but canned tastes great too and has a thicker texture.
If you want to get a feel for homemade crust before you start, take a peek at my Flaky Homemade Pie Crust tutorial - it's the same one I use here and perfect for beginners.
Beginner Baking Tips (Read Before You Start!)
If you've never made a pie before, these tips will make it so much easier:
- Cold ingredients are key: Keep butter and water cold for a flaky crust.
- Don't panic about cracks: A little cracking on top is normal (whipped cream hides everything).
- No peeking: Opening the oven door drops the temp and can make the filling fall.
- Watch for the jiggle: The pie should jiggle slightly in the center when done, not slosh. It sets as it cools.
- Test early: Ovens vary, so start checking at 45 minutes.
- Cool completely: Cutting while warm will make it runny - patience pays off.
- Bake on a sheet pan: It catches drips and keeps your crust from burning.
- Chill overnight: The flavor deepens by day two, making it even better for holidays.
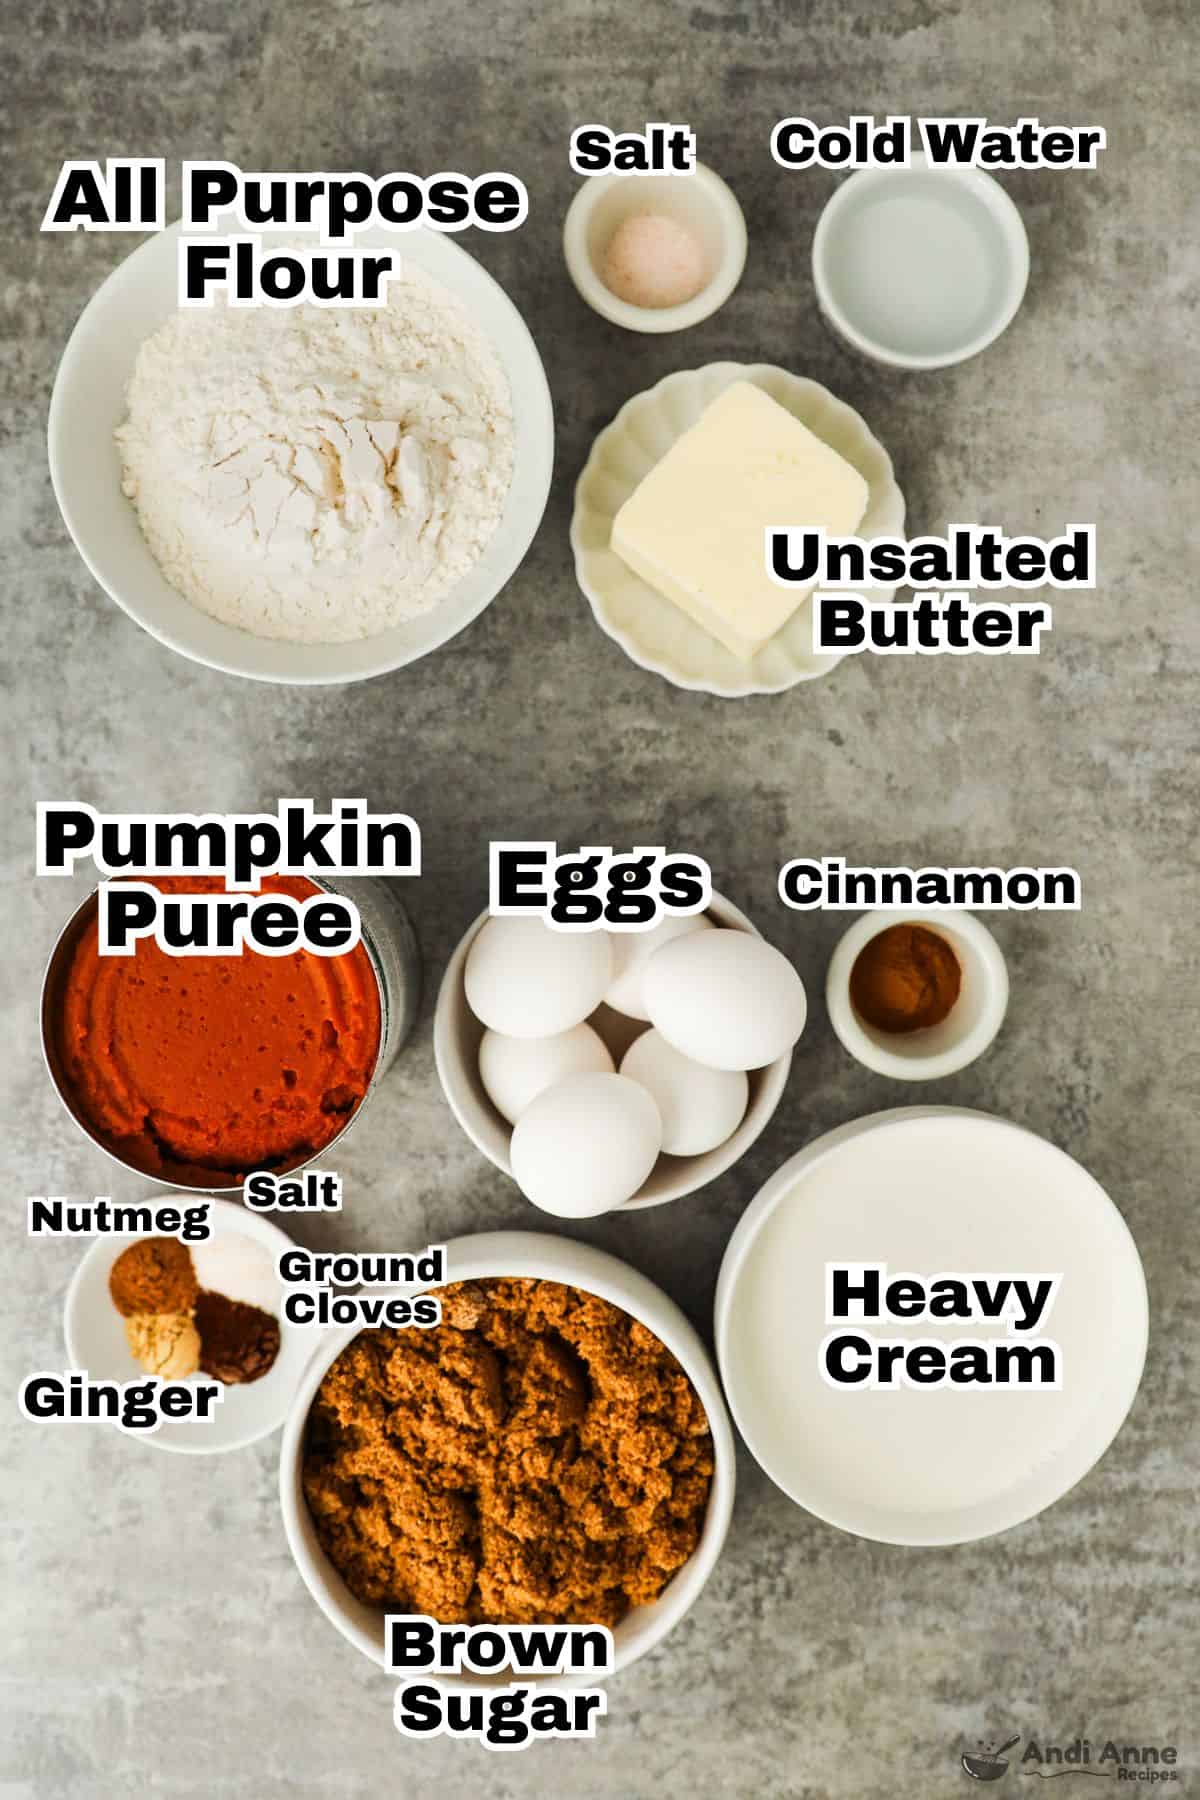
Recipe Ingredients
Note: This recipe makes two 9-inch pies. If you only want one, divide everything in half.
For the Crust:
- 3 cups all-purpose flour
- 1 Tbsp granulated sugar
- ½ tsp salt
- 1 cup cold unsalted butter, cubed
- ⅔ cup ice-cold water
For the Filling:
- 6 large eggs
- 26 oz pumpkin puree - must be pumpkin puree and not canned pumpkin pie filling.
- 2 cups packed brown sugar
- 2 tsp ground cinnamon
- ½ tsp salt
- ½ tsp ground nutmeg
- ½ tsp ground ginger
- ½ tsp ground cloves
- 2 cups heavy cream - or you can use evaporated milk
- To Serve (Optional): Whipped cream or vanilla ice cream.
Try my Homemade Whipped Cream or Whipped Coconut Cream (dairy free) - the perfect pie toppers!
Can You Use Store-Bought Crust?
Absolutely. The filling is the star of the show, and a store-bought crust makes this even more beginner-friendly. I use it all the time during the holidays when I'm short on prep time - it still tastes amazing.
Do You Need to Blind Bake the Crust?
Not for this recipe. Some bakers like to blind bake (pre-bake) their crust before adding the filling to help prevent a soggy bottom. But many old-fashioned recipes never blind baked.
Personally, I skip it. I've tried both - pre-baked and unbaked - and honestly, I don't notice a big difference (and my family doesn't either). I'll leave the blind baking to the professional pastry chefs for this one. I'm a home baker who loves making pie for my family at Thanksgiving, and I'll happily take any shortcut that still tastes amazing. Skipping it saves time and still turns out just as good, in my opinion.
Step-By-Step Instructions 👇👇
Step 1 : [Pie Crust] Combine Pie Crust Dry Ingredients
In a large bowl, whisk together 3 cups flour, 1 Tbsp granulated sugar, and ½ tsp salt until combined.
Note: If you want even more details on how to create a crust, see my Flaky Homemade Pie Crust for a full tutorial before you start.
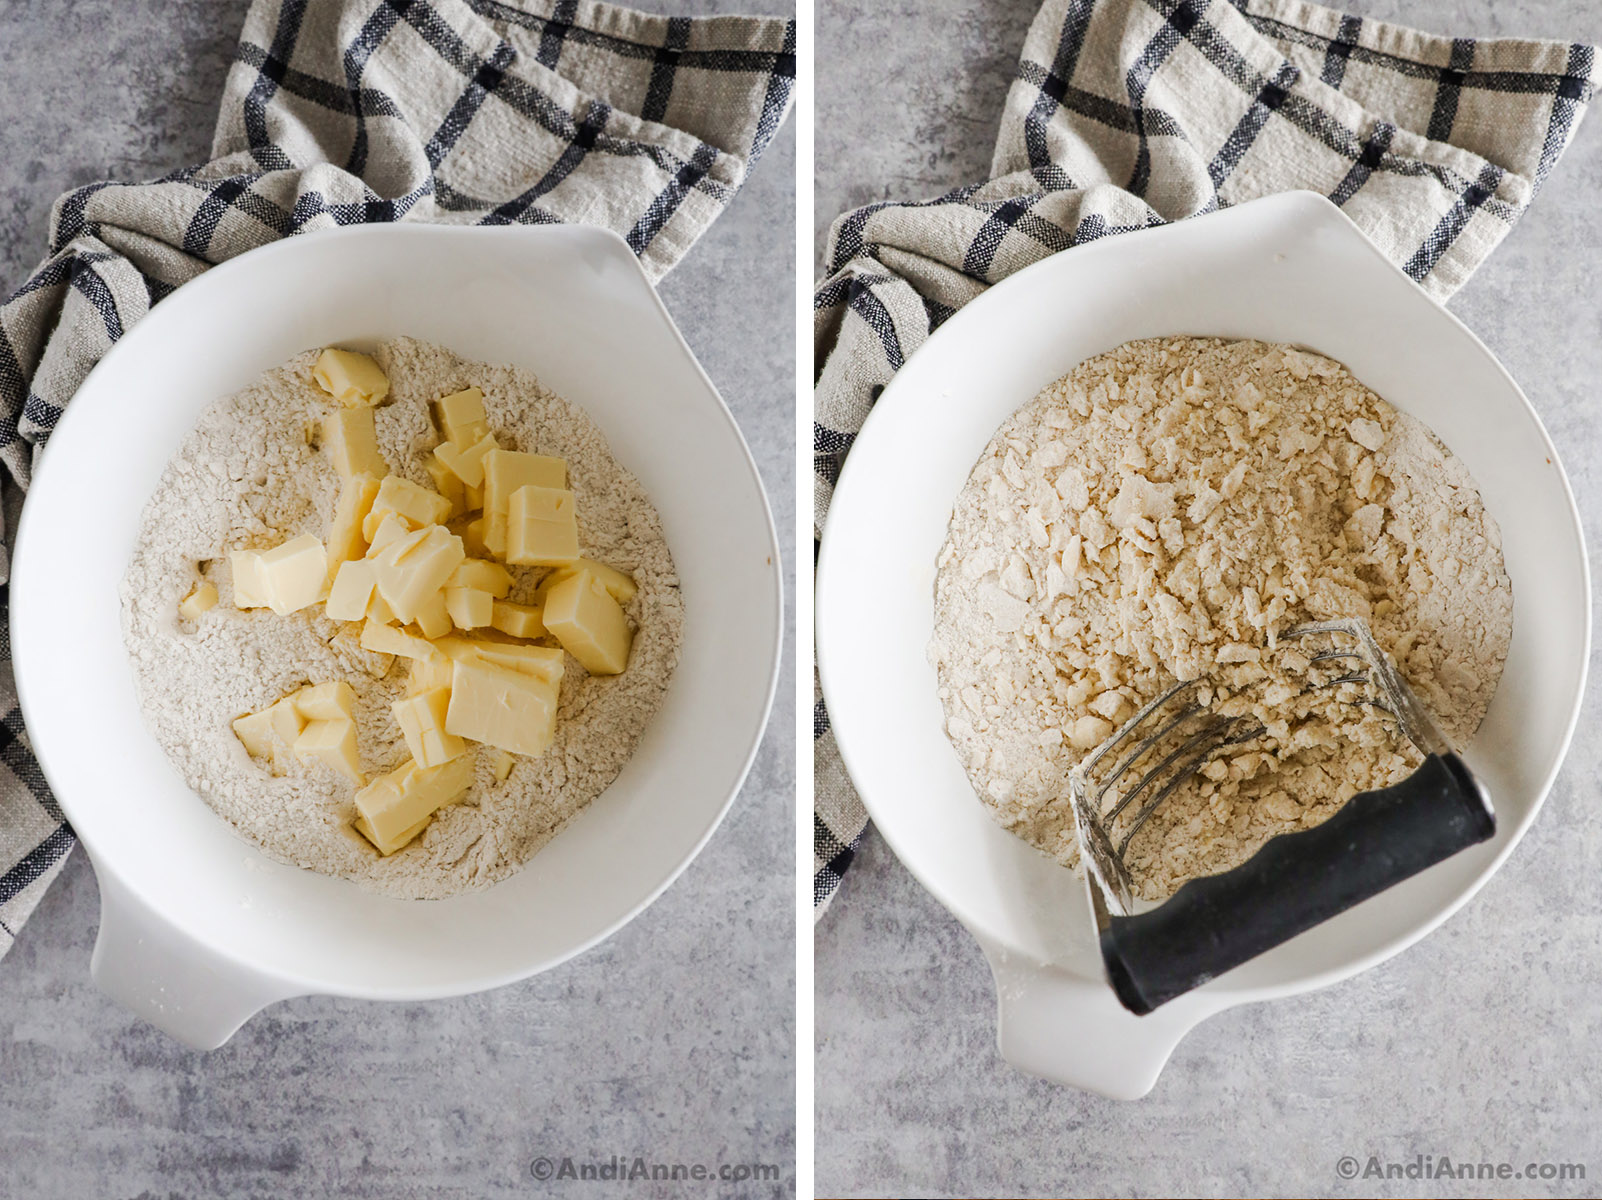
Step 2: [Pie Crust] Cut in Butter
Chop 1 cup cold butter into small cubes using a knife. Add those butter pieces to the dry flour mixture. Use a pastry cutter or two knives to "cut" the butter into the flour until you have pea-sized crumbled pieces.
This step helps create those flaky layers everyone loves in a homemade pie crust.
Step 3: [Pie Crust] Add Water and Form Dough
Slowly drizzle in ⅔ cup ice-cold water, about 1 Tbsp at a time, stirring gently with a fork after each addition.
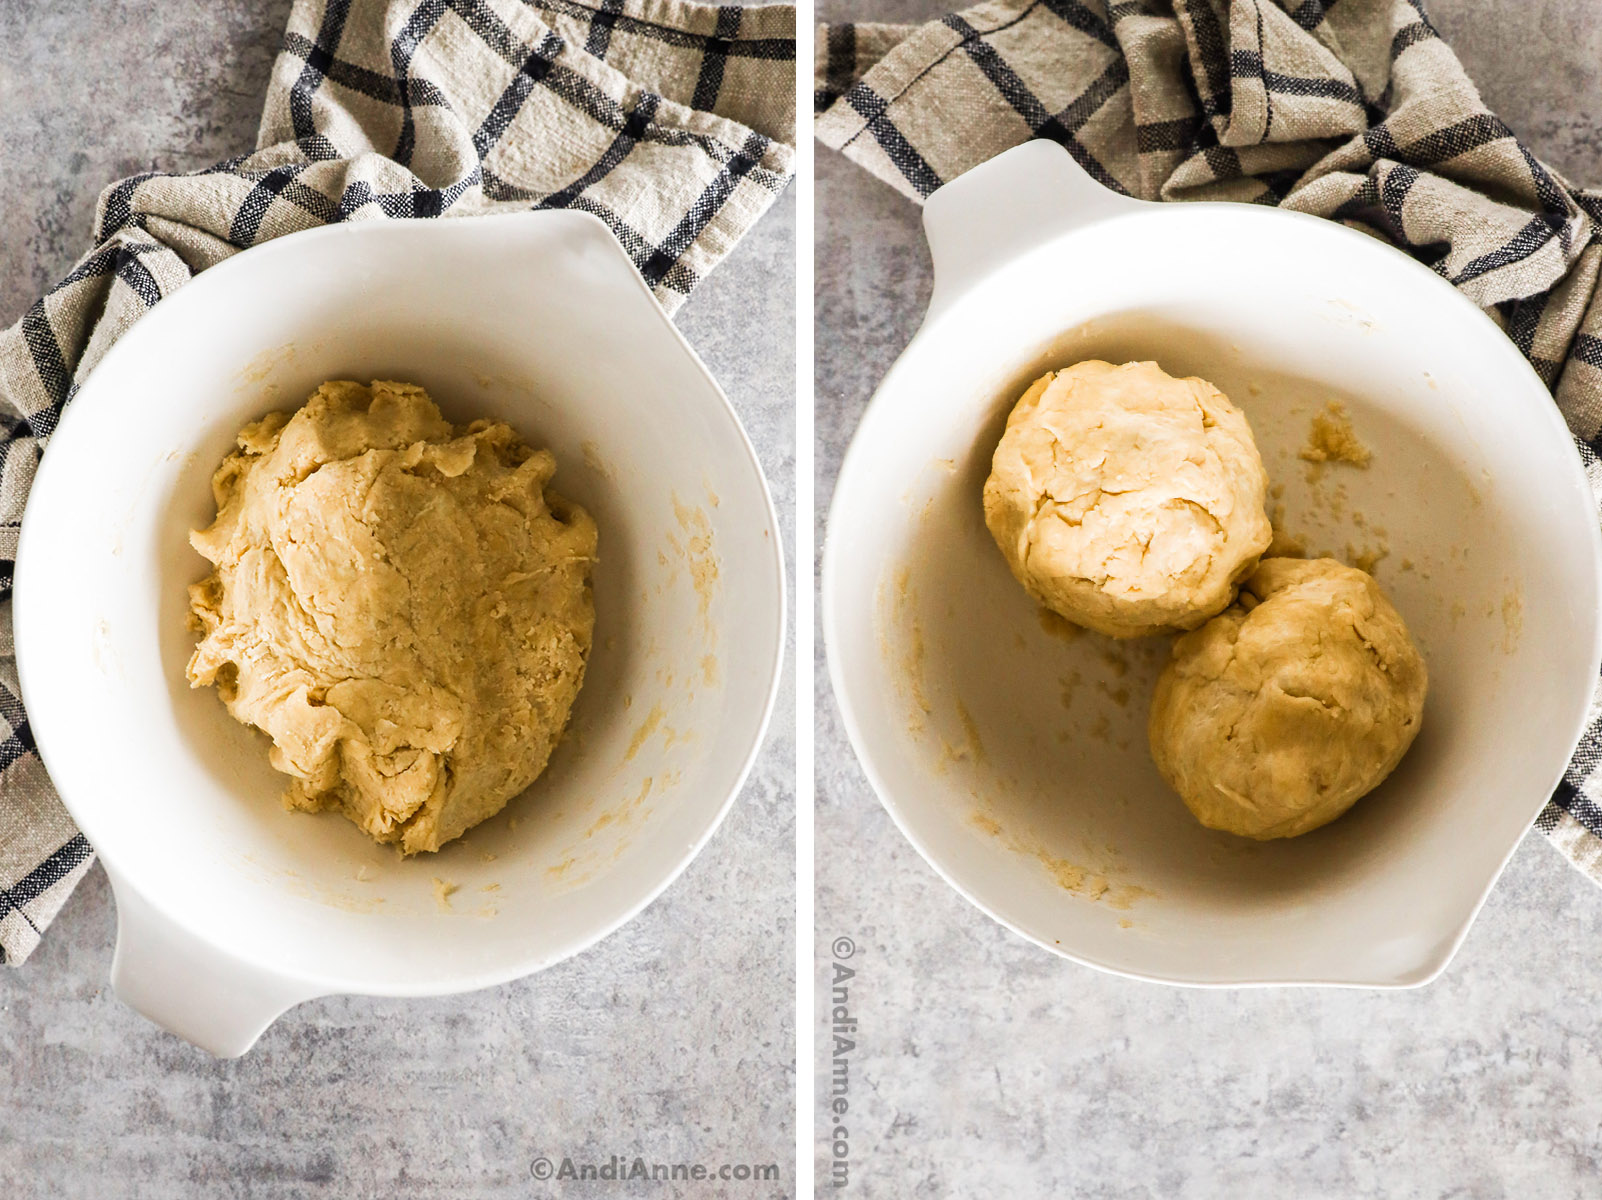
You'll know it's ready when the dough starts clumping together - not wet or sticky, but just holding shape.
Once it comes together, divide into two equal dough balls, wrap in plastic, and chill for 30-60 minutes.
💡 Pro tip: Go slow with the water. Too much will make your crust heavy instead of flaky.
Step 4: [Pie Crust] Divide and Chill
Once you have a dough ball formed, use a knife to cut it into two equal balls - these will each be a pie crust.
Wrap each ball in plastic and chill for at least 30-60 minutes.
Step 5: [Pie Crust] Roll and Fit the Crust
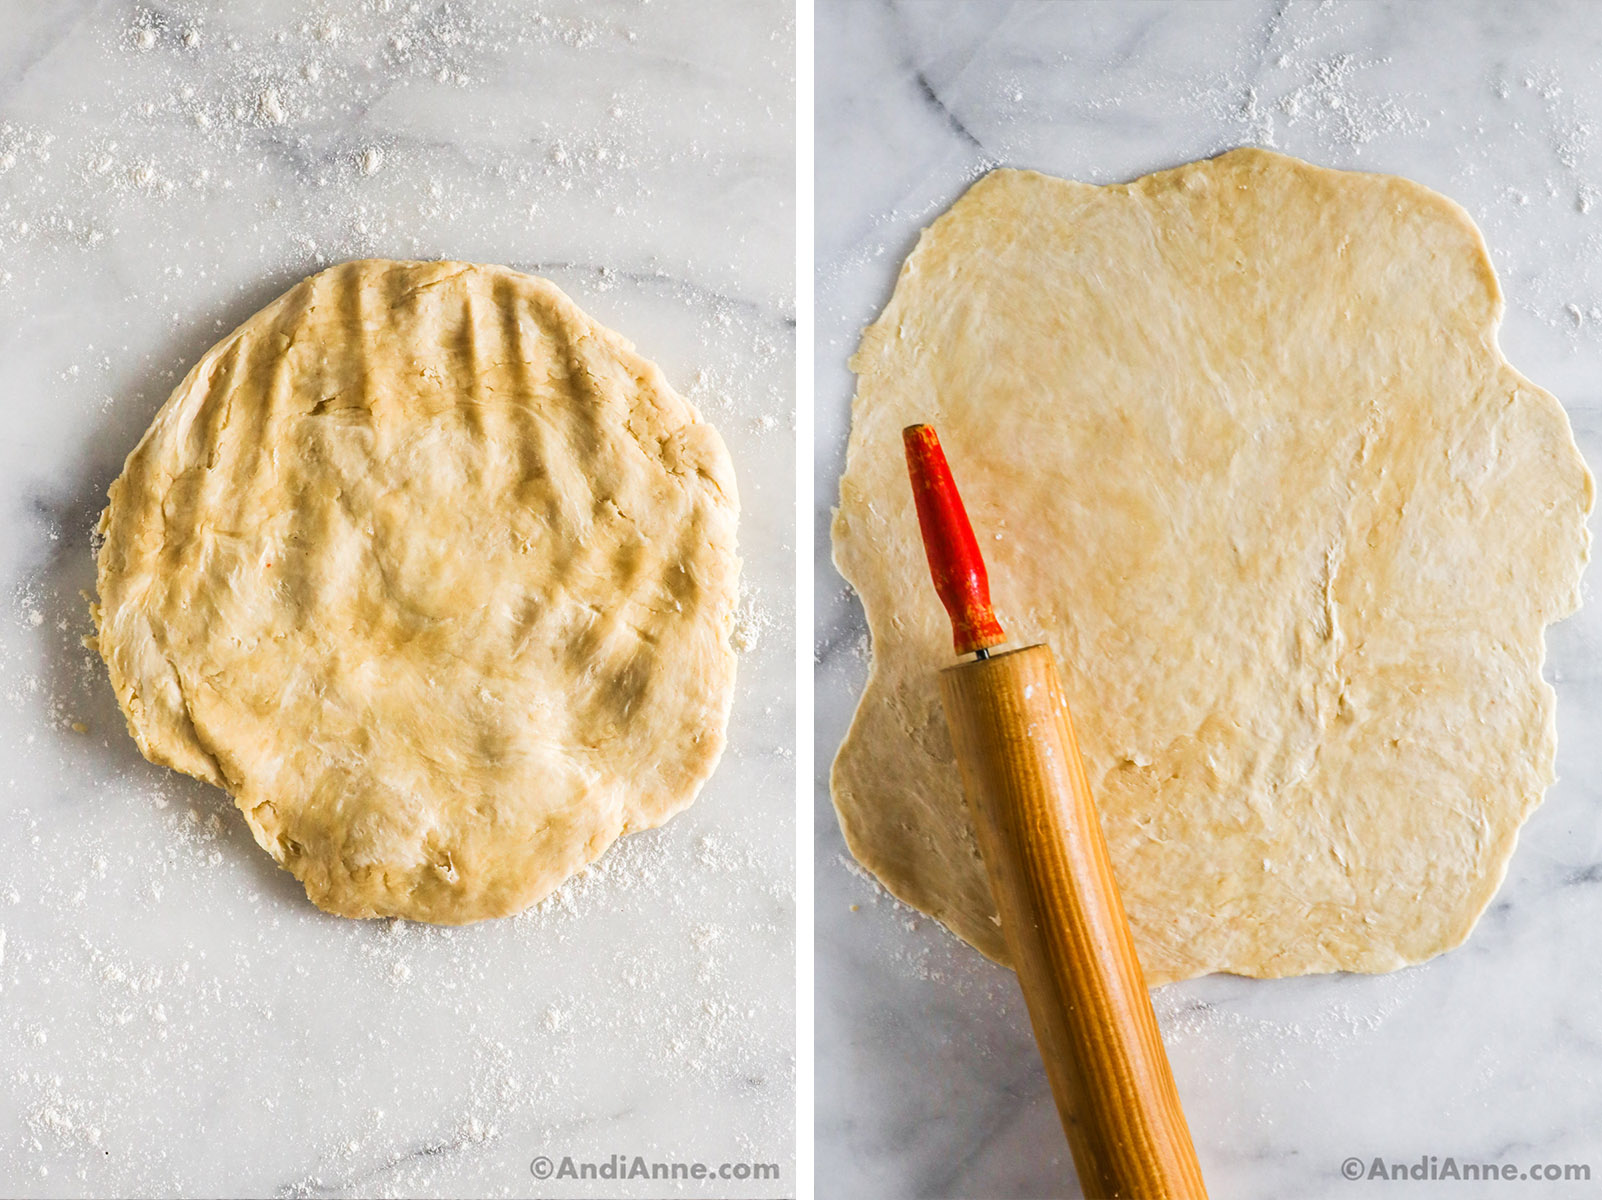
Lightly flour your countertop and rolling pin to prevent sticking.
Place one chilled dough disc on the counter and gently roll it into a 12-inch circle.
Roll up and down, then side to side, turning the dough slightly as you go - this helps it stay circular.
If you notice any rips or cracks, don't worry - just press them back together with your fingers (like playdough). It will bake up beautifully.
Try to keep the dough about ⅛ inch thick - thin enough to be flexible, but not so thin it tears easily. I always found this part tricky when I first started making crust, so if yours is a bit thicker, that's ok too.
If it's your first time making pie, this might take a bit of practice. Just keep rolling slowly and you'll get there - it's okay if it isn't perfect.
Step 6: [Pie Crust] Make the Filling
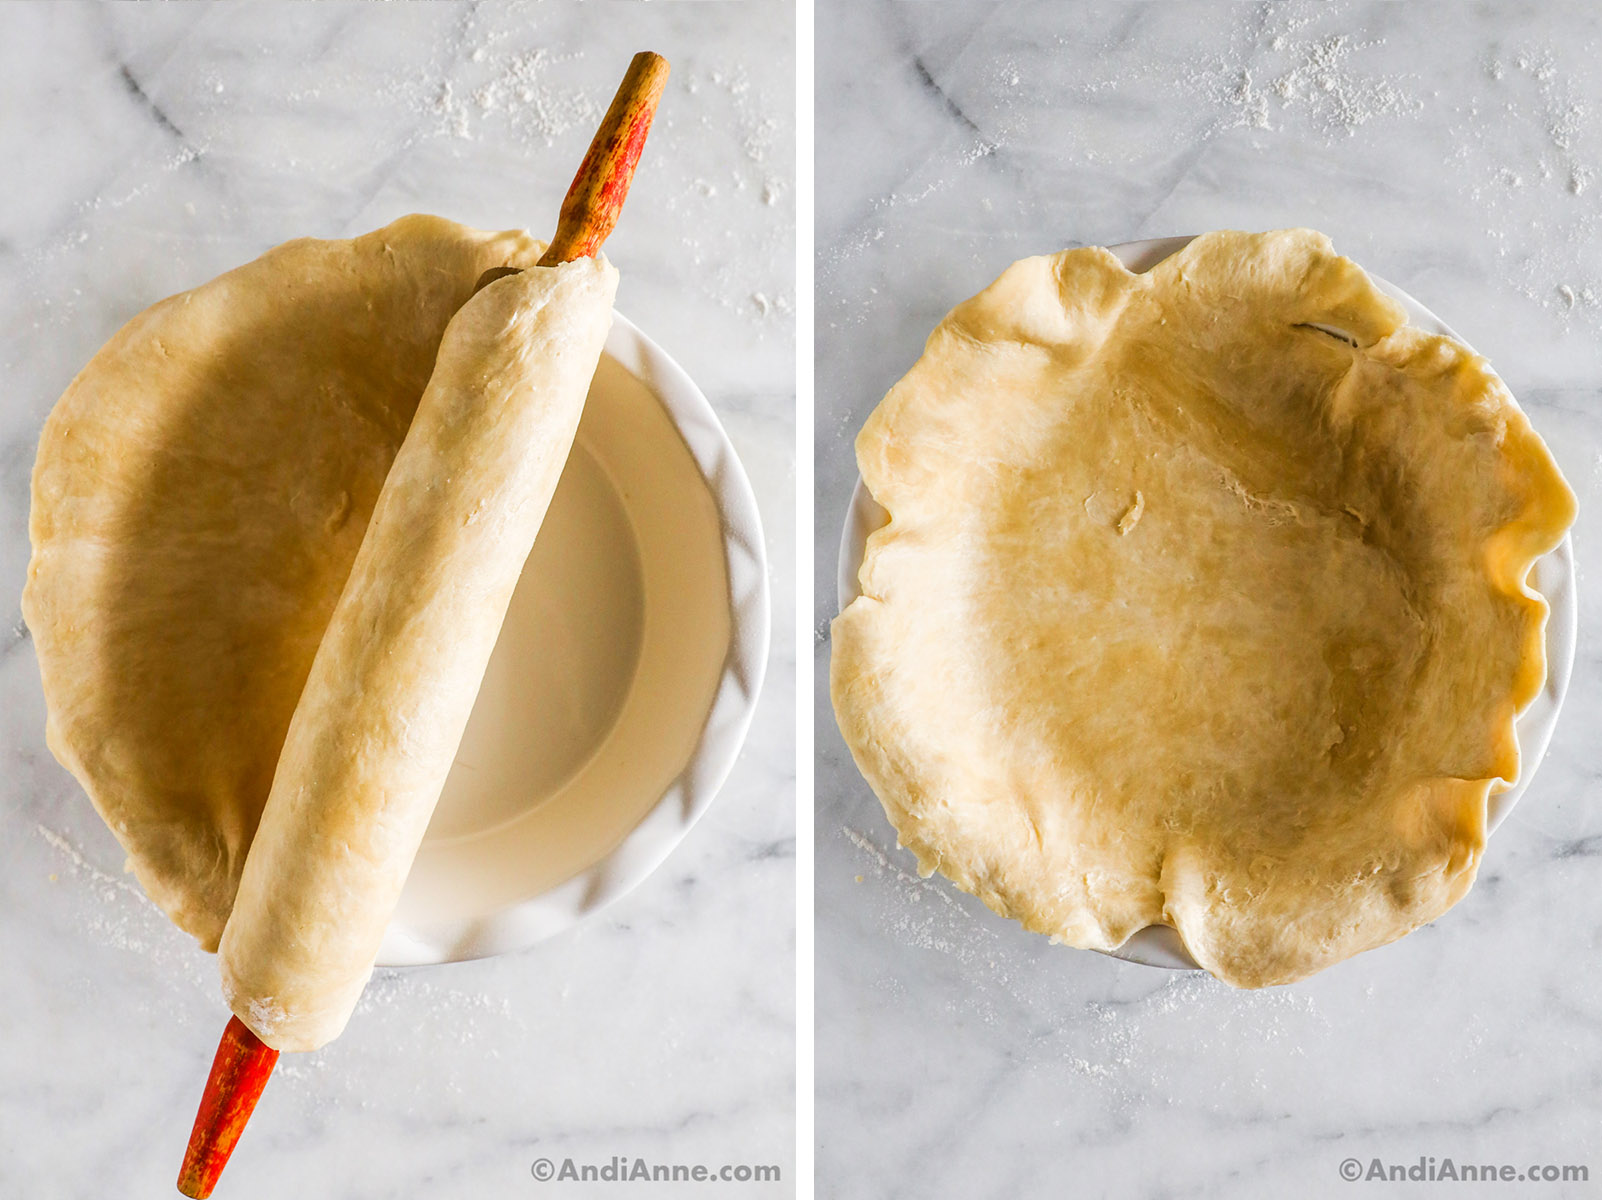
Once your dough is rolled out, gently roll it around your rolling pin, then unroll it over a greased 9-inch pie plate.
Lift the edges of the dough slightly to help it settle into the bottom edges of the pan.
When it's nice and snug, use kitchen scissors or a small knife to trim the extra dough around the edges.
Don't toss those scraps - use them to patch any thin spots or tears by pressing them gently into place (just like playdough).
💡 Note: Pie dough is very forgiving - a few cracks or uneven edges won't change how delicious it tastes.
The more you do this, the better you'll get. You're doing great!
Repeat these steps with the second pie dough, then chill both crusts while you make the filling.
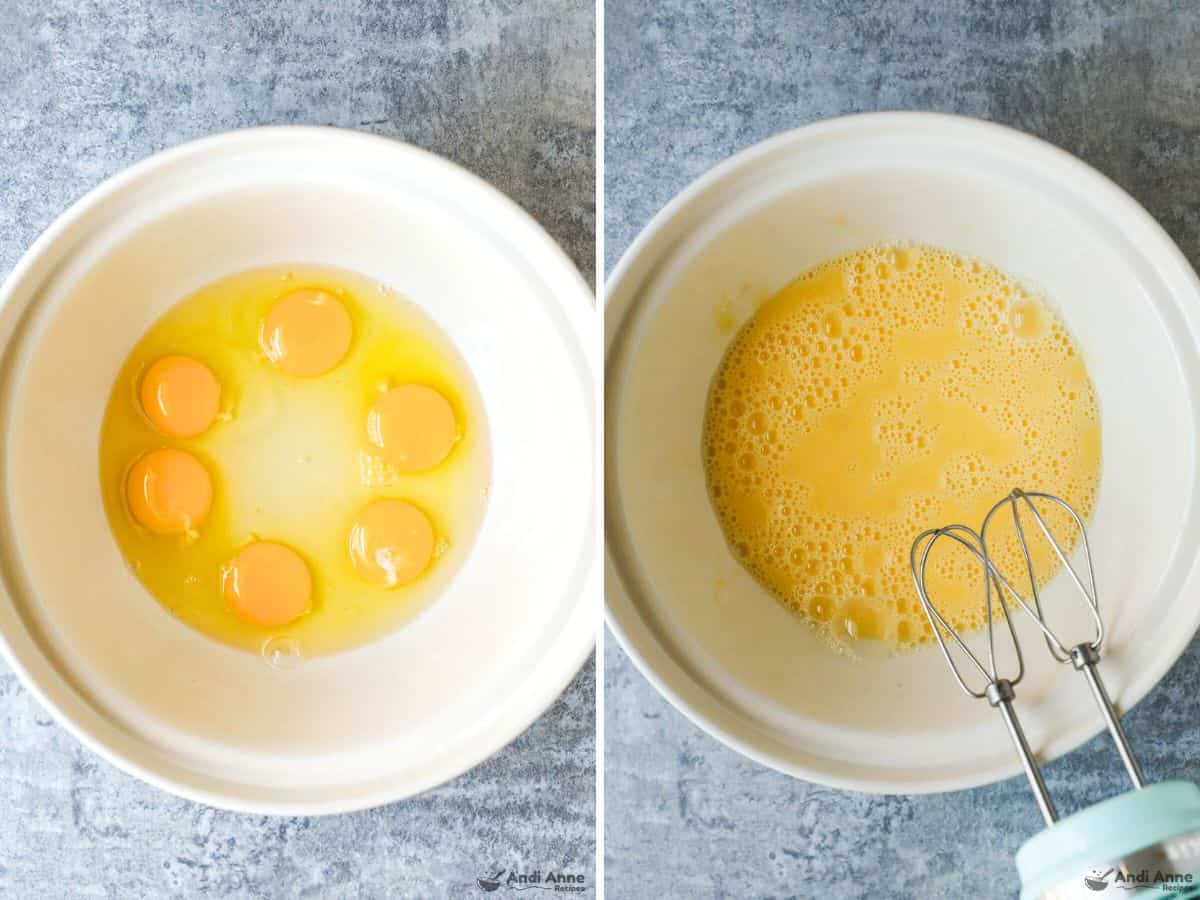
Step 7: [Pie Filling] Beat the Eggs
In a large bowl, beat 6 eggs until smooth with an electric hand mixer.
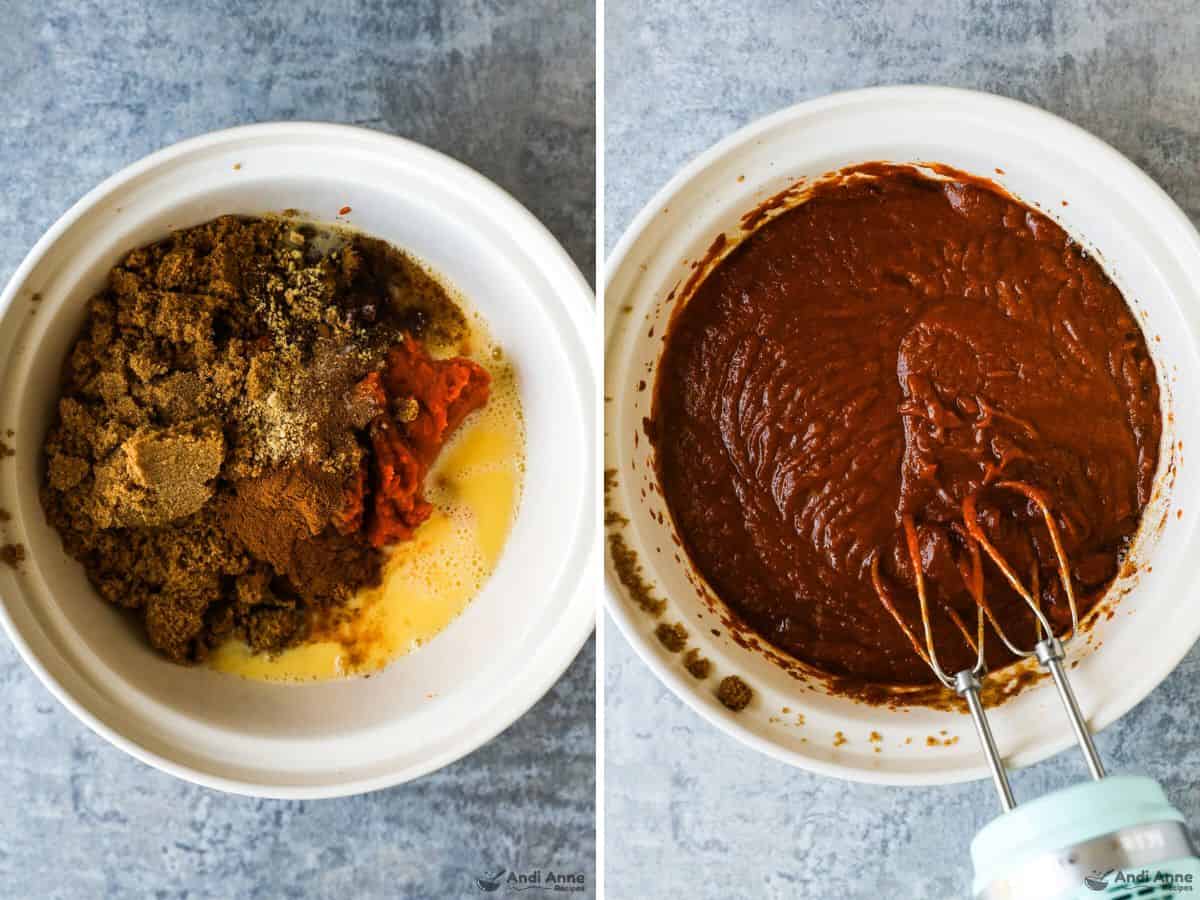
Step 8: [Pie Filling] Make the Pumpkin Filling
Now let's make the pumpkin pie filling...
Add in 26 oz pumpkin puree, 2 cups brown sugar, 2 tsp cinnamon, ½ tsp salt, ½ tsp nutmeg, ½ tsp ginger, and ½ tsp cloves.
Mix until fully combined.
Slowly mix in 2 cups heavy cream until smooth.
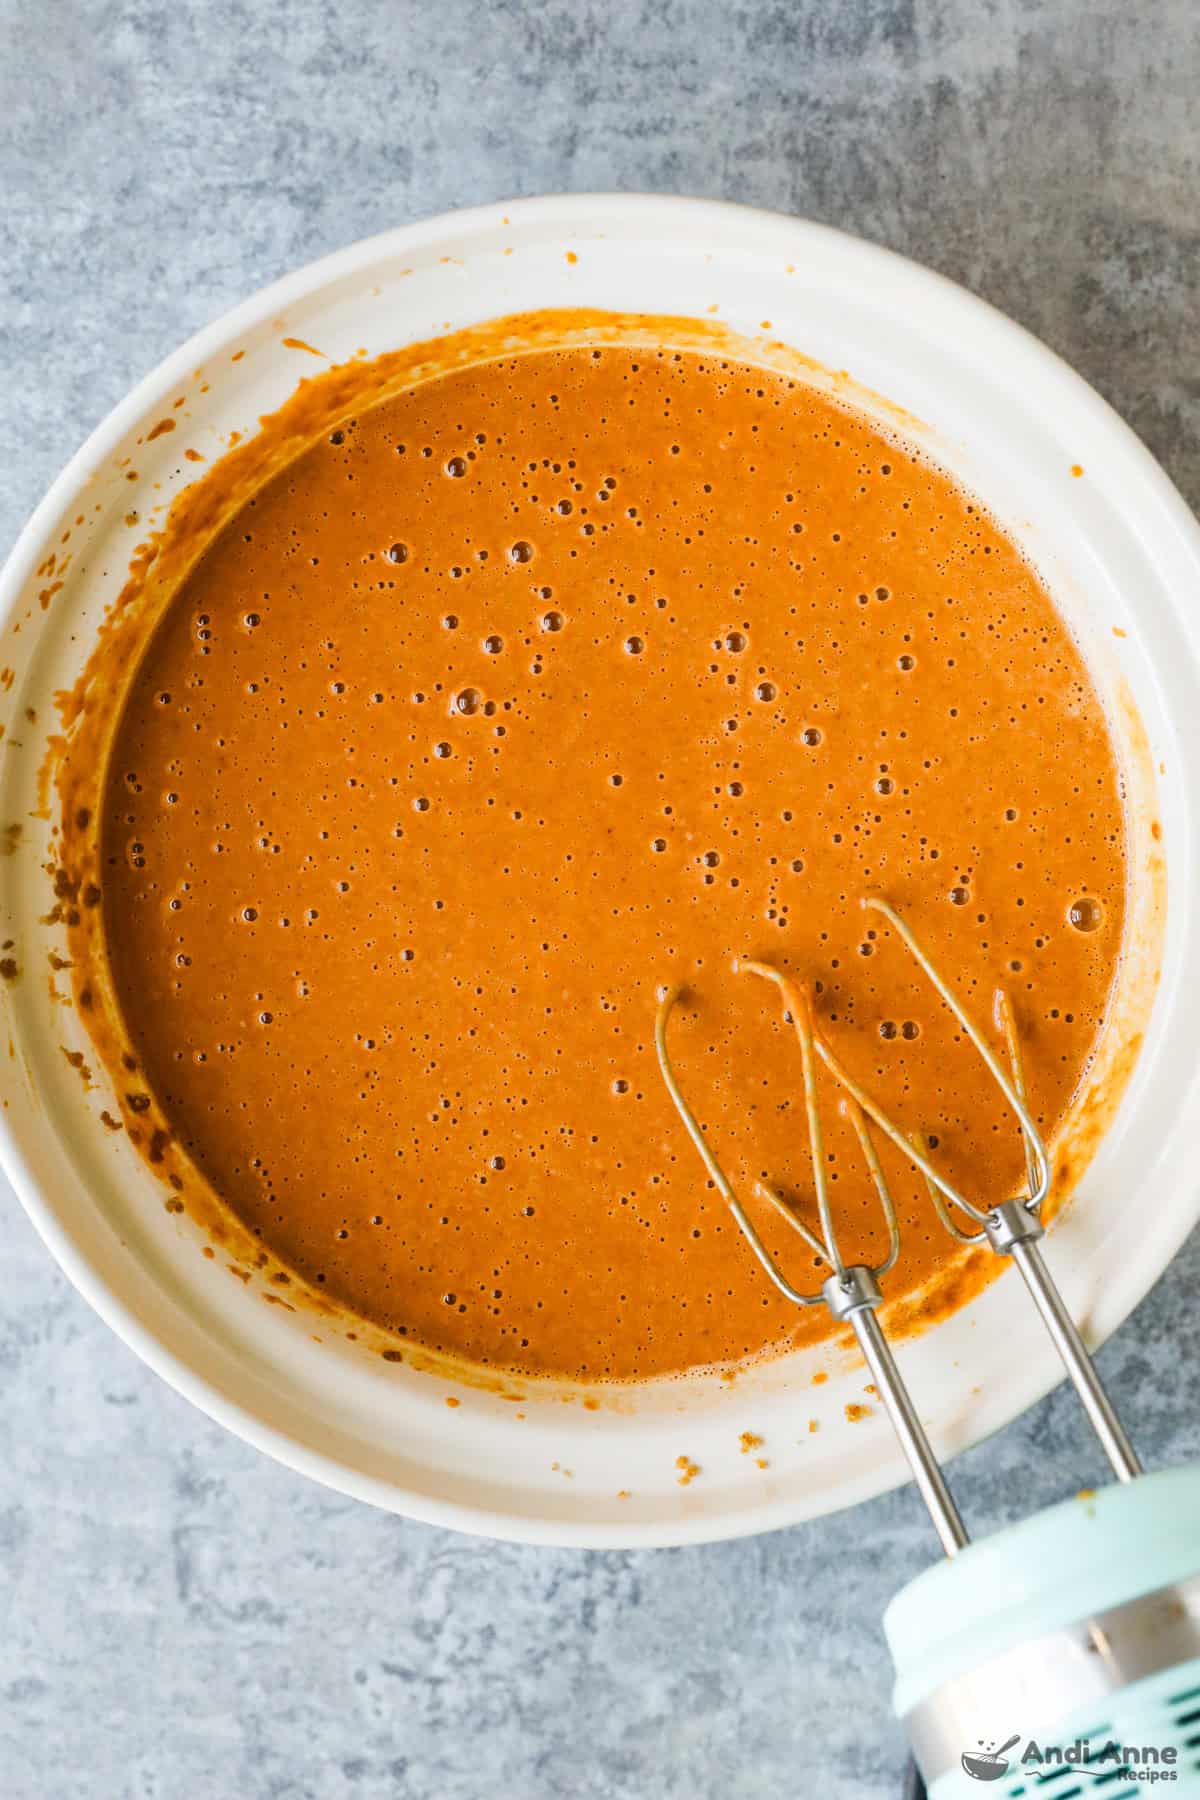
Step 9: [Pie Filling] Mix in the Cream (Final Step)
Slowly mix in 2 cups heavy cream until smooth.
Step 10: Assemble the Pies
Pour half of the pumpkin filling evenly into one pie shell, about ¾ full.
Do not fill any higher because it will expand as it bakes (and I don't want it to overflow on you!).
Pour the last half of the pumpkin filling into the second pie crust.
💡 Handy Tip: Place both pies on a large baking sheet to make them easier to move in and out of the oven.
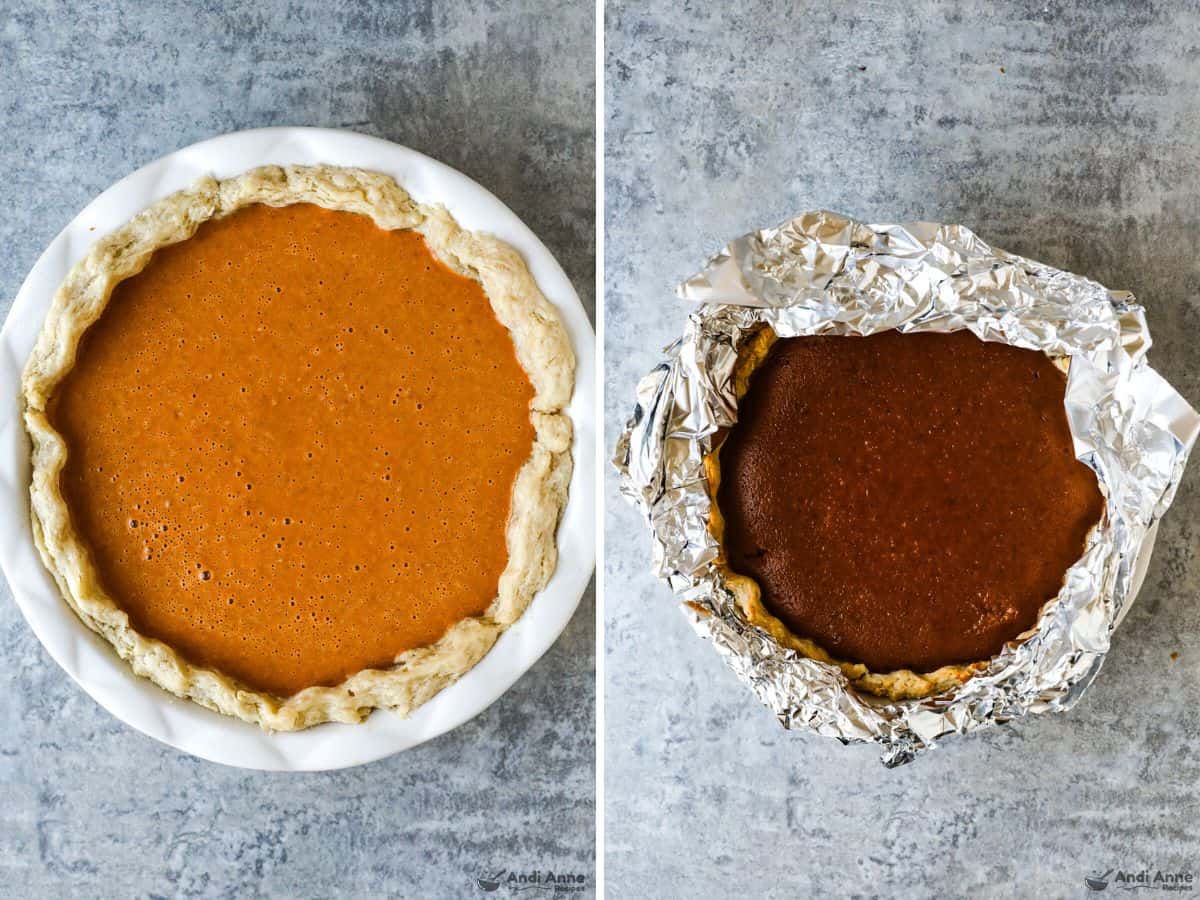
Step 11: Bake the Pies
Preheat oven to 400°F (200°C).
Bake the pies for 50-60 minutes, or until the pie is no longer jiggly on the edges but just a tiny bit jiggly in the center.
(You can bake one pie or both pies for about the same time.)
After 25 minutes, cover crust edges with foil or a crust shield (you can buy these on Amazon) to prevent over-browning.
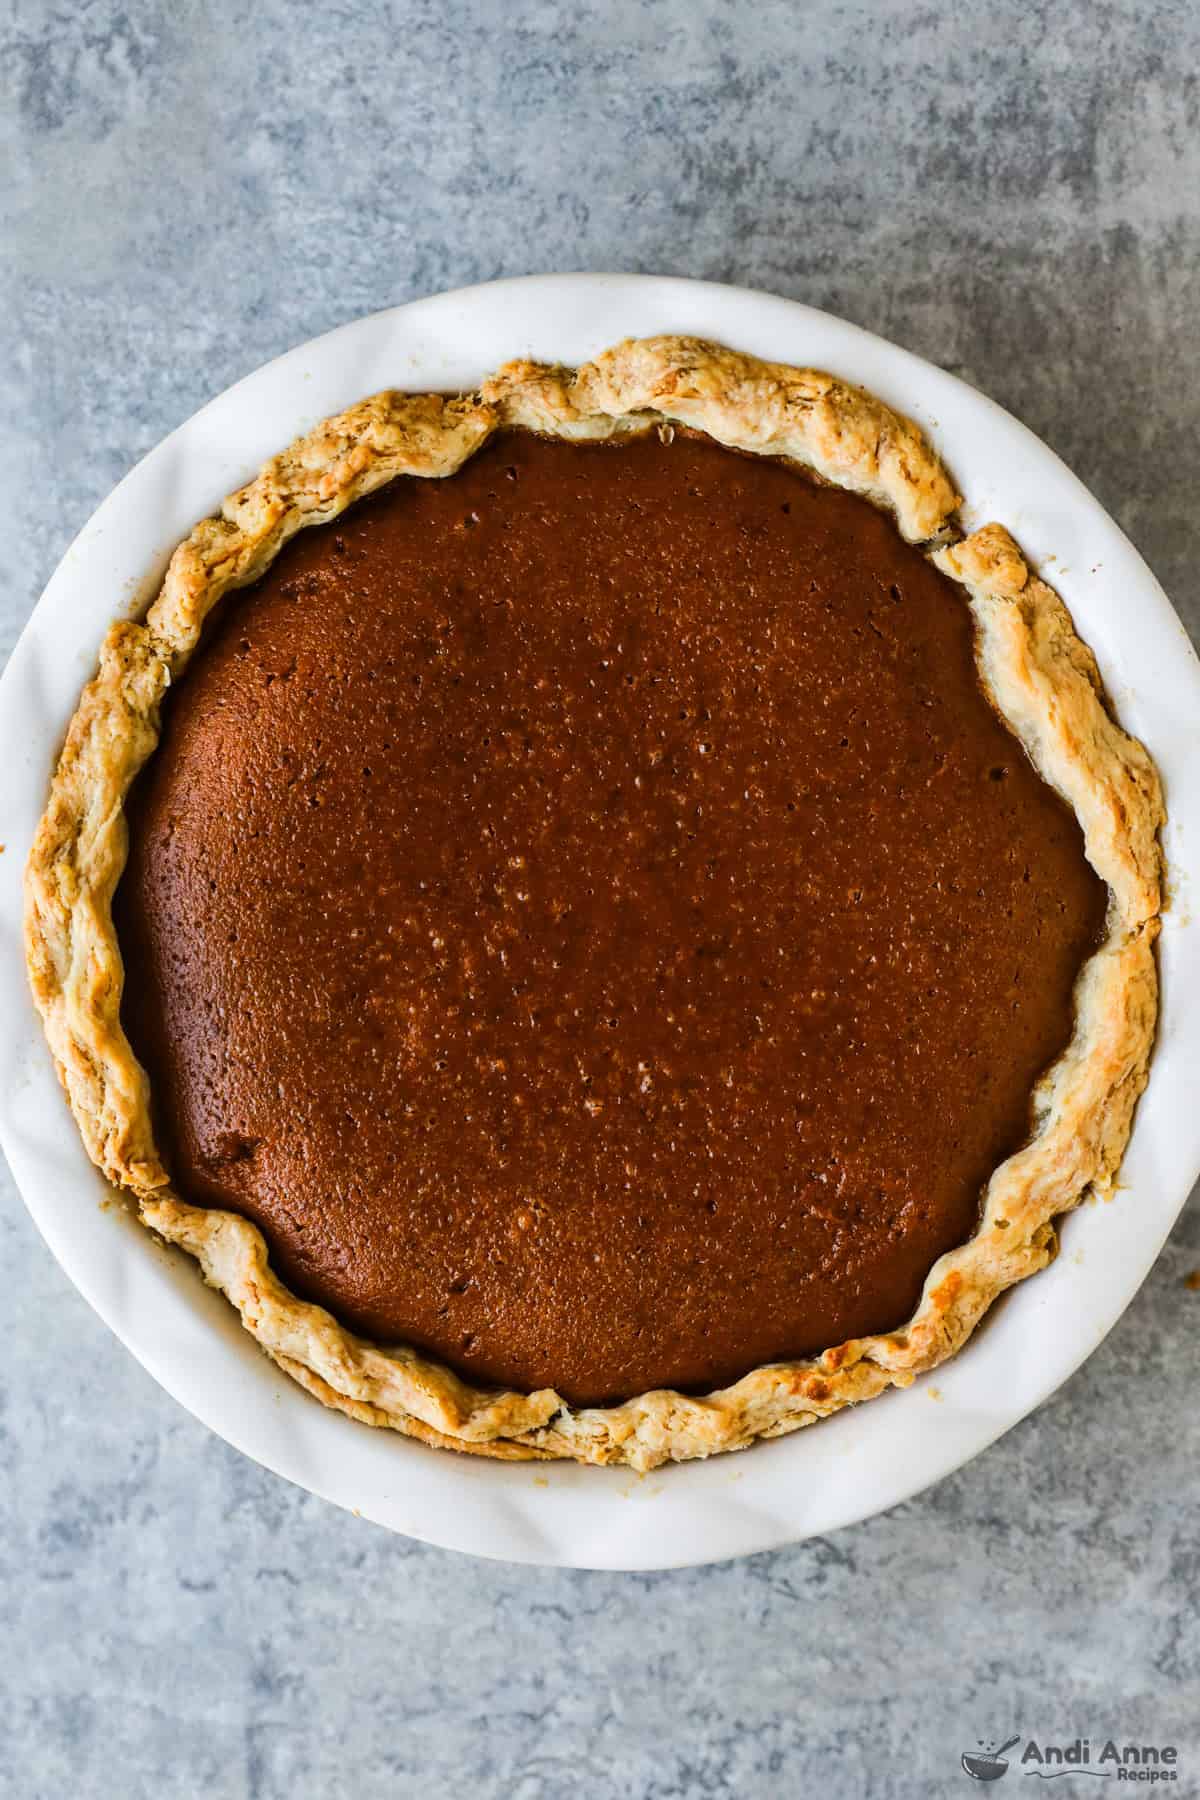
Step 12: Cool and Chill
Cool pies on a wire rack for at least 2 hours, then gently cover with plastic wrap and refrigerate until completely set.
I recommend chilling at least overnight.
The flavor deepens as it chills - which is why I love to make mine 2 days before.
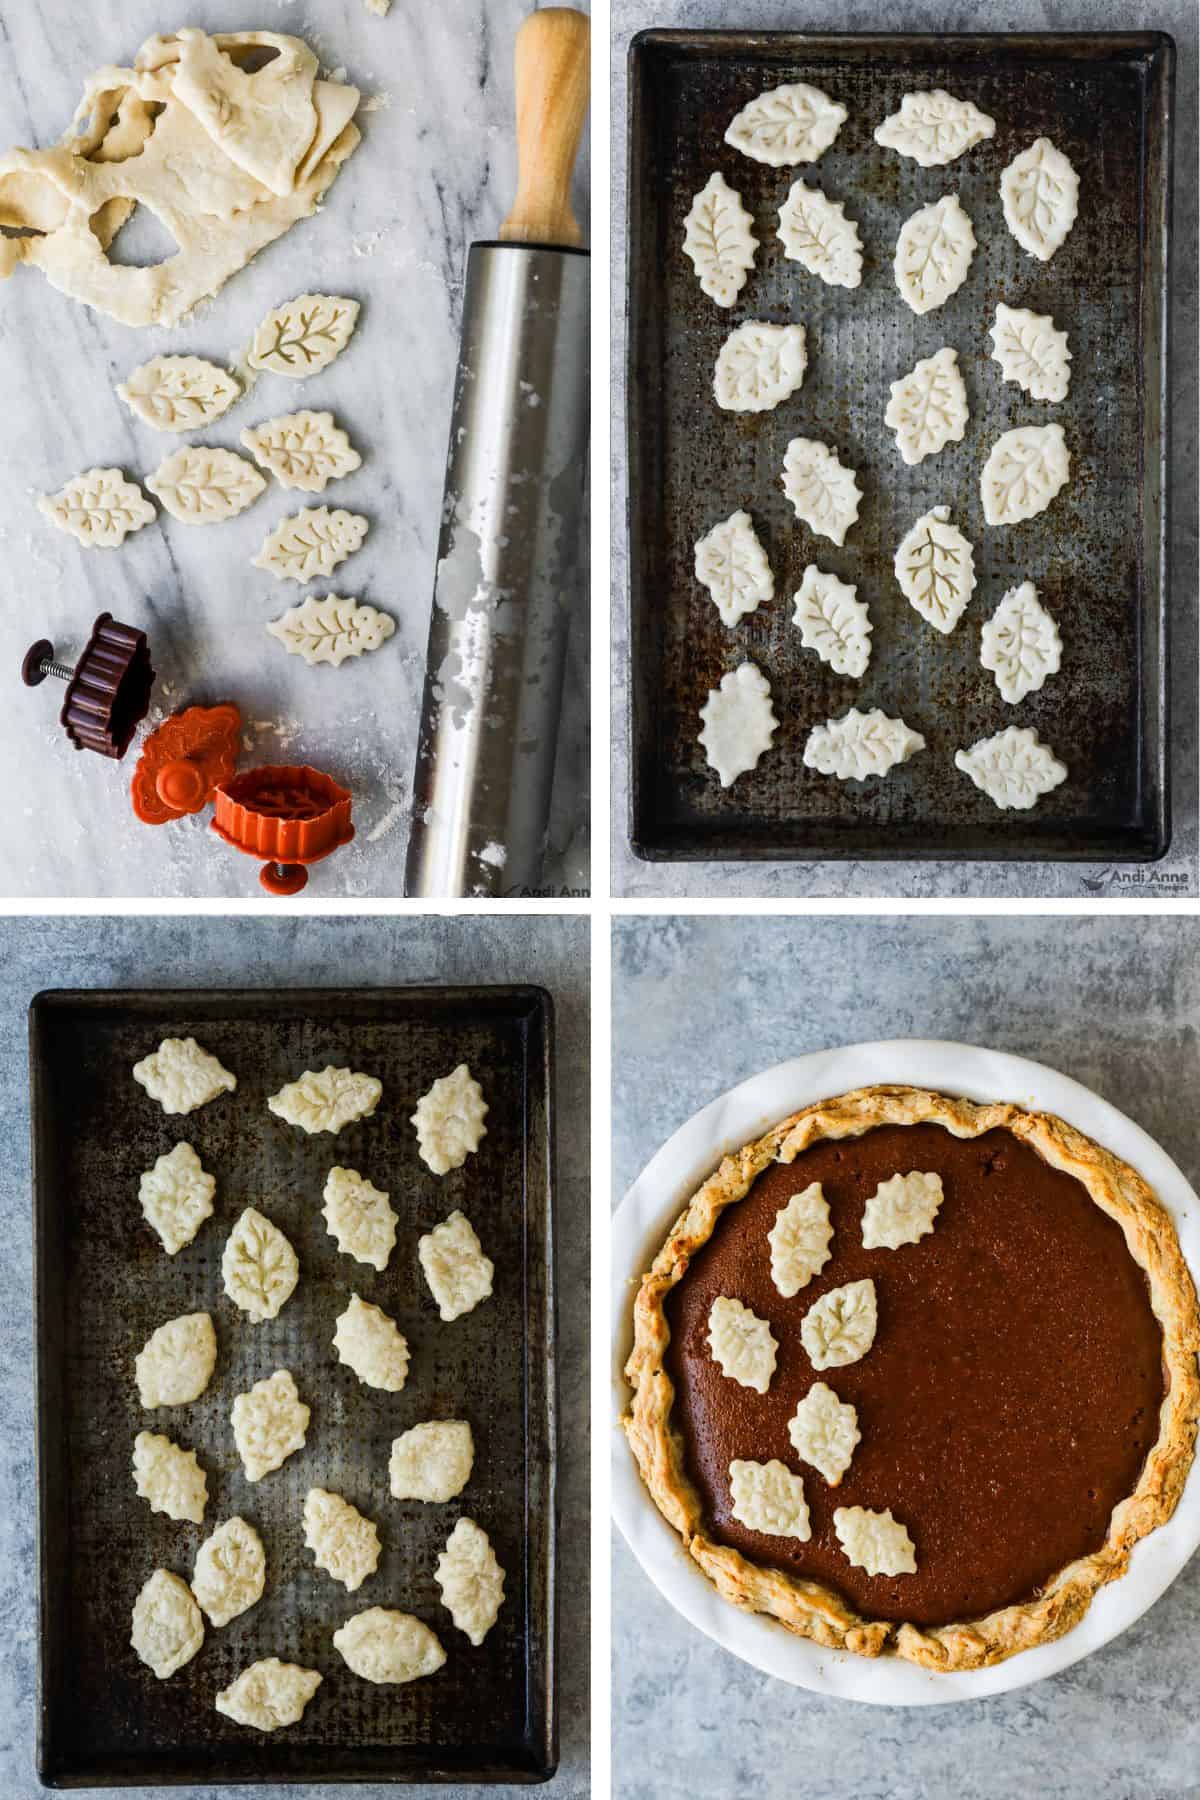
Step 13: How to Make Pie Leaves (Optional)
Use your leftover dough scraps to make pretty pie leaves for decoration.
First, make sure the dough is chilled. Roll out the scrap dough on a lightly floured surface and cut small leaf shapes using a paring knife or cookie cutter.
Place the leaves on a parchment-lined or greased baking sheet and bake at 350°F for 10-15 minutes, or until golden and crisp.
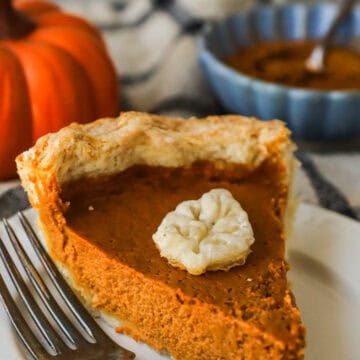
Let them cool, then arrange on top of your baked pumpkin pies while still warm.
Recipe Tips
- Cover the crust halfway through baking: Keeps the edges golden, not burnt.
- Whisk gently: Overbeating adds air bubbles that can cause cracks.
- Keep everything cold: Cold butter and water make a flakier crust.
- Watch for the jiggle: The center should jiggle slightly when done - it will firm up as it cools.
- Use a glass pie plate: It helps you see when the bottom crust is golden and cooked through.
- Let it rest, then chill: Cutting too soon makes the filling runny. Cool completely, then refrigerate overnight for the best texture.
- Don't stress the cracks: If your pie cracks slightly, it's still perfect. A little whipped cream will hide everything.
- Make ahead for better flavor: The taste deepens by day two, so it's ideal for prepping before holidays.
Variations and Substitutions
- Pumpkin Puree: Use canned for convenience or roast your own pumpkin for a deeper flavor.
- Cream Options: Heavy cream gives the richest texture, while evaporated milk makes it lighter.
- Spices: Swap the cinnamon, nutmeg, ginger, and cloves for 2½ tsp pumpkin pie spice if that's what you have.
- Crust Shortcut: Store-bought crusts work great when you're short on time.
- Make It Gluten-Free: Use a gluten free pre-made pie crust.
Make-Ahead, Storage & Freezing
Personally, I think pumpkin pie tastes best cold. I like to make mine two days before serving and keep it covered in the fridge - it chills fully, the texture sets, and the flavors deepen beautifully.
- Make Ahead: Bake up to 2 days early, then chill until serving.
- Refrigerate: Store covered in the fridge for 4-5 days.
- Freeze: Wrap tightly in plastic and foil and freeze for up to 1 month. Thaw overnight in the fridge.
Serving Ideas
- Serve with Homemade Whipped Cream or Whipped Coconut Cream.
- Add a sprinkle: Dust with cinnamon or nutmeg right before serving.
- Pair with Homemade Apple Pie for the ultimate holiday dessert table.
For a lighter dessert, check out my Pumpkin Marshmallow Pie or Sugar-Free Pumpkin Cheesecake.
FAQs
Nope! Grandma never did, and I don't either. The all-butter crust cooks up beautifully without pre-baking.
It's usually from overbaking. Start checking at 45 minutes and remove once the center just barely jiggles. But honestly, it will still taste amazing!
Yes, just roast a sugar pumpkin until soft, scoop, and puree. It adds deeper flavor but canned is still delicious. Use my roasted sugar pumpkin tutorial for baking instructions.
You will not get a perfectly crisp pie crust from this recipe because we're not blind baking it first. But here's some tips: a soggy crust could mean the dough wasn't cold enough, the crust was too thick, or the filling didn't have enough time to cook. Chill the crust well before adding the filling.
Classic Pumpkin Pie
Tap Stars To Rate!
Ingredients
For the Crust:
- 3 cups all-purpose flour
- 1 Tbsp granulated sugar
- ½ tsp salt
- 1 cup cold unsalted butter - cubed
- ⅔ cup ice-cold water
For the Filling:
- 6 large eggs
- 26 oz canned pumpkin puree - or make your own
- 2 cups packed brown sugar
- 2 tsp ground cinnamon
- ½ tsp salt
- ½ tsp ground nutmeg
- ½ tsp ground ginger
- ½ tsp ground cloves
- 2 cups heavy cream - or evaporated milk
- To Serve With: - Whipped cream or vanilla ice cream.
Instructions
- Preheat oven to 400°F.
- Mix flour, sugar, and salt. Cut in butter until crumbly. Add cold water until dough forms. Divide in half.
- Roll dough to fit two 9-inch pie plates. Trim and crimp edges.
- Beat eggs, then mix in pumpkin puree, brown sugar, cinnamon, salt, nutmeg, ginger, and cloves.
- Gradually whisk in heavy cream.
- Pour filling into crusts, about ¾ full.
- Bake 50-60 minutes until knife inserted in center comes out clean.
- Cover crust edges halfway through baking.
- Cool completely and refrigerate before serving.
Notes
- Cover crust after 25 minutes to prevent over-browning.
- Center should jiggle slightly when done.
- Cool fully for clean slices.
- Chill at least 2 hours before serving.
Nutrition
Nutrition info is auto-calculated and meant to be an approximation only.


Alyssa says
Thanks for the rec! It was amazing